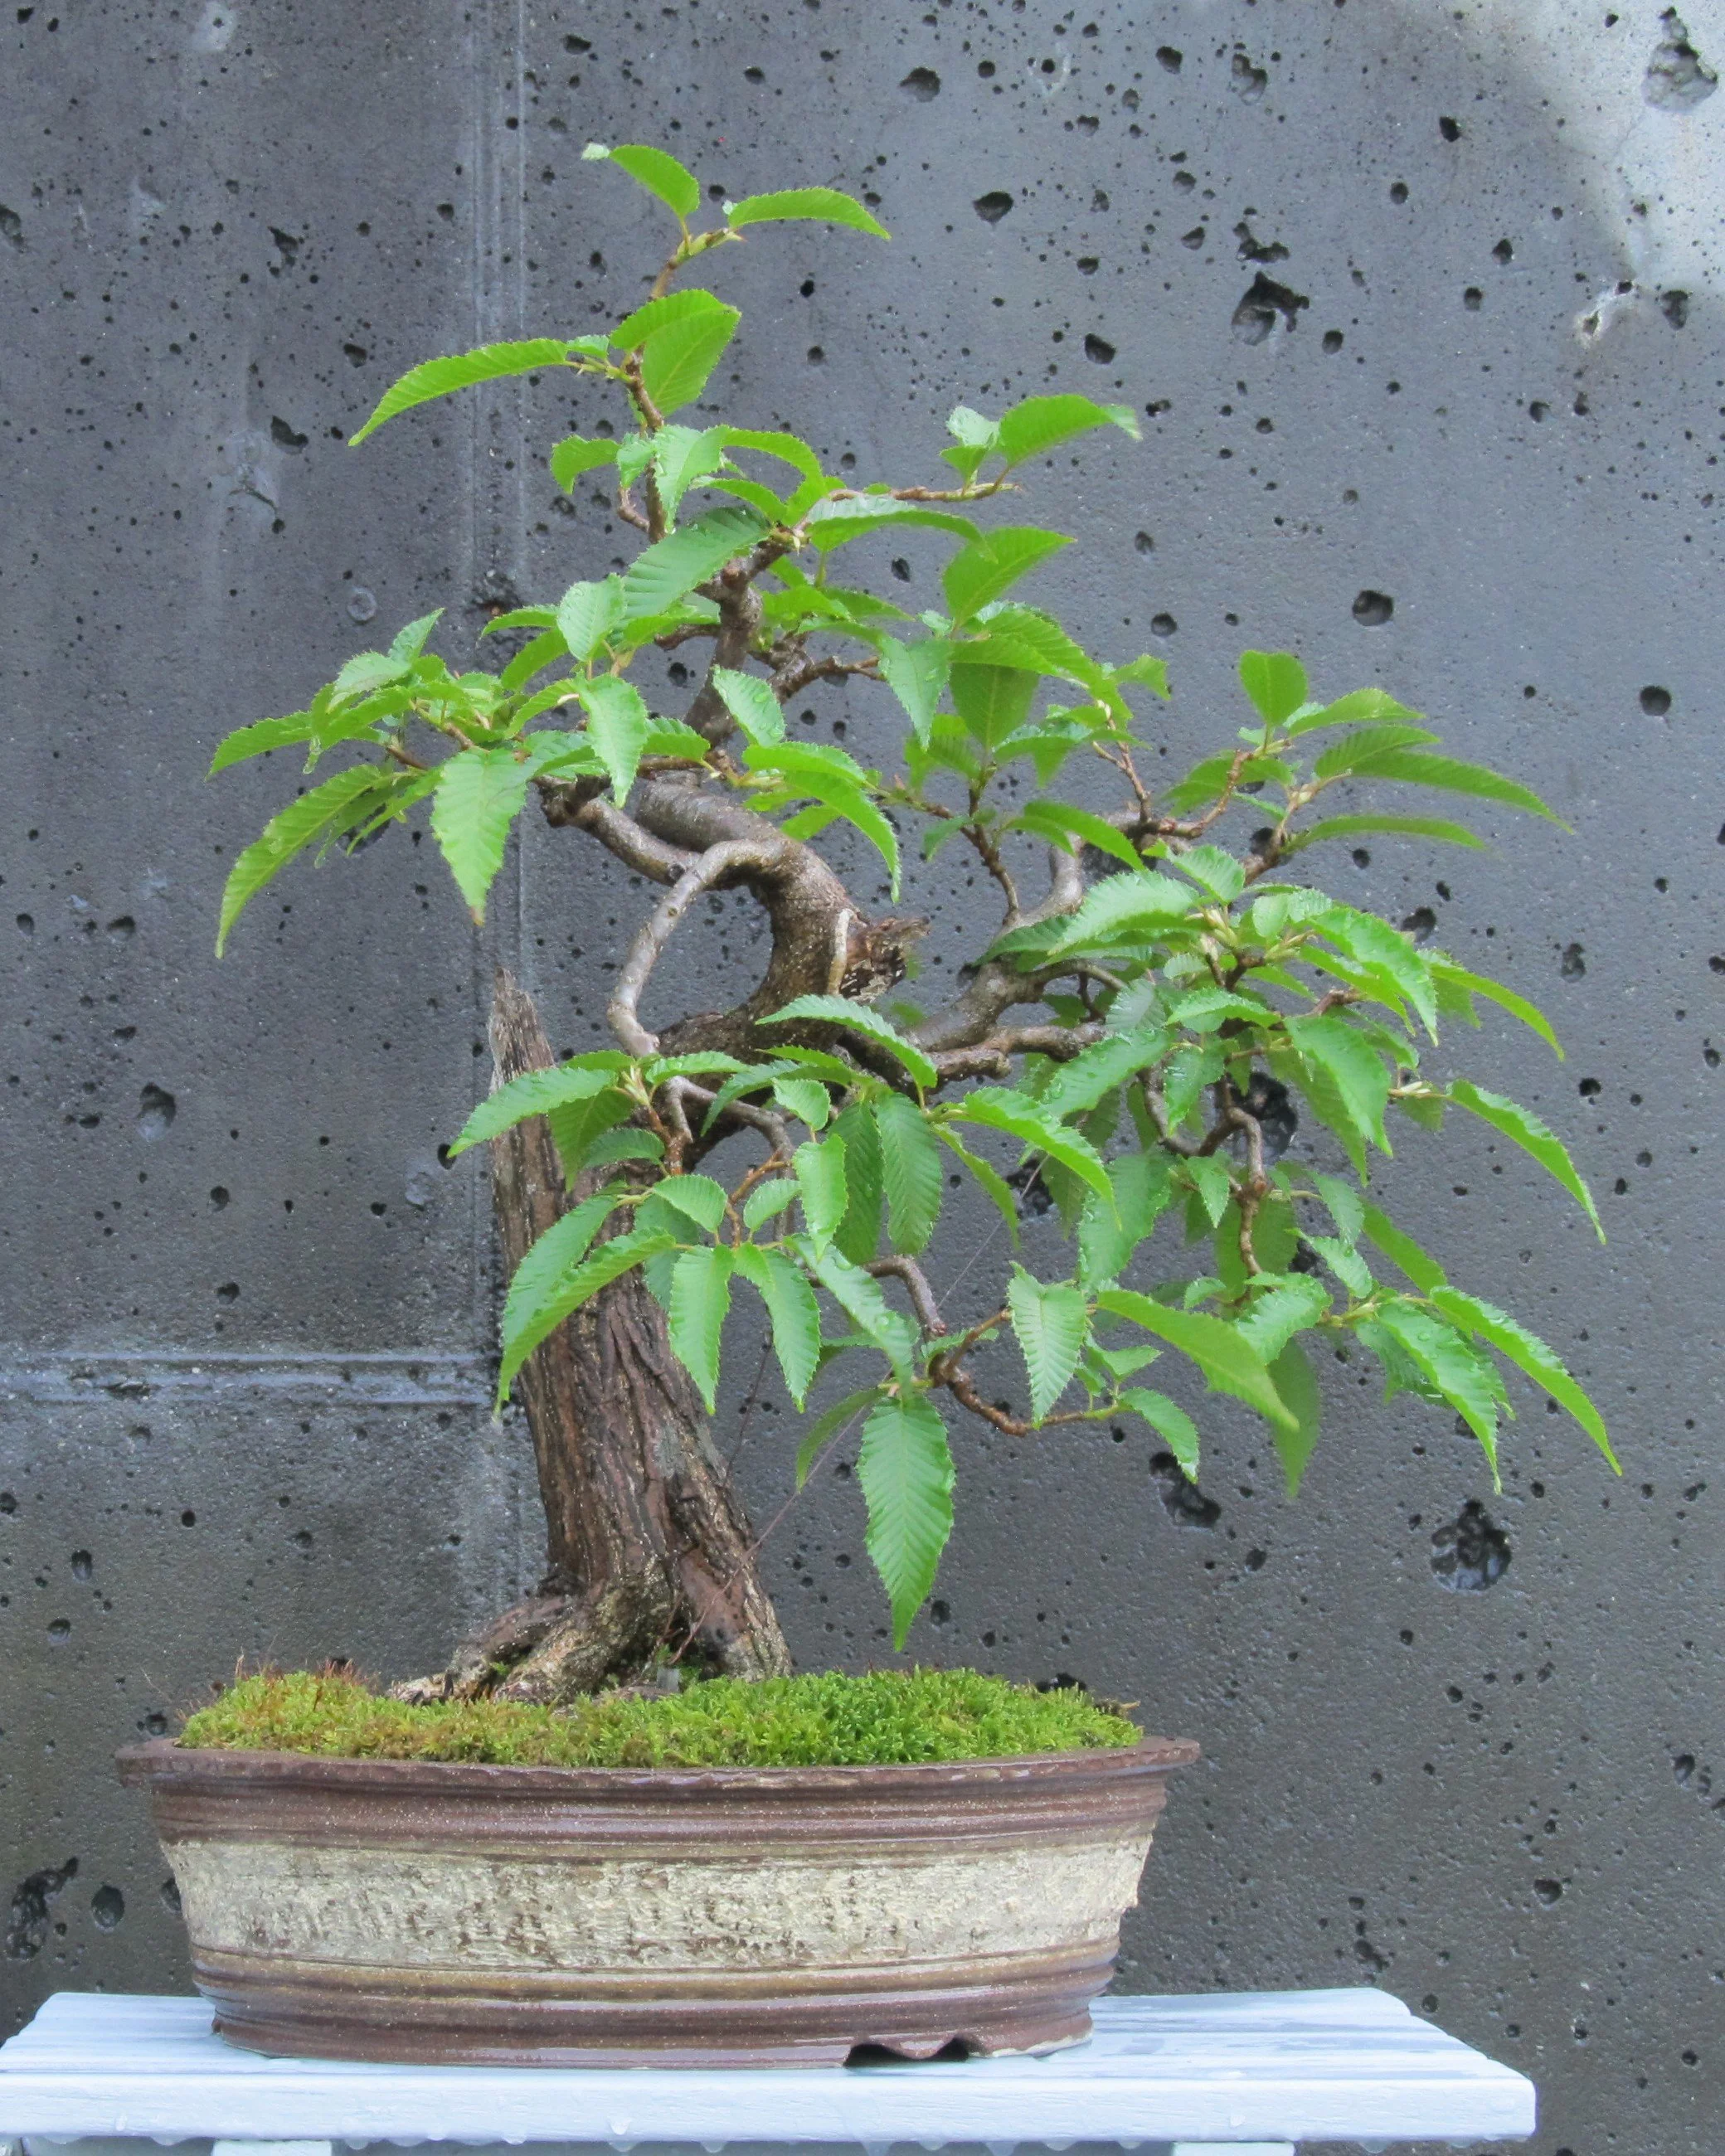
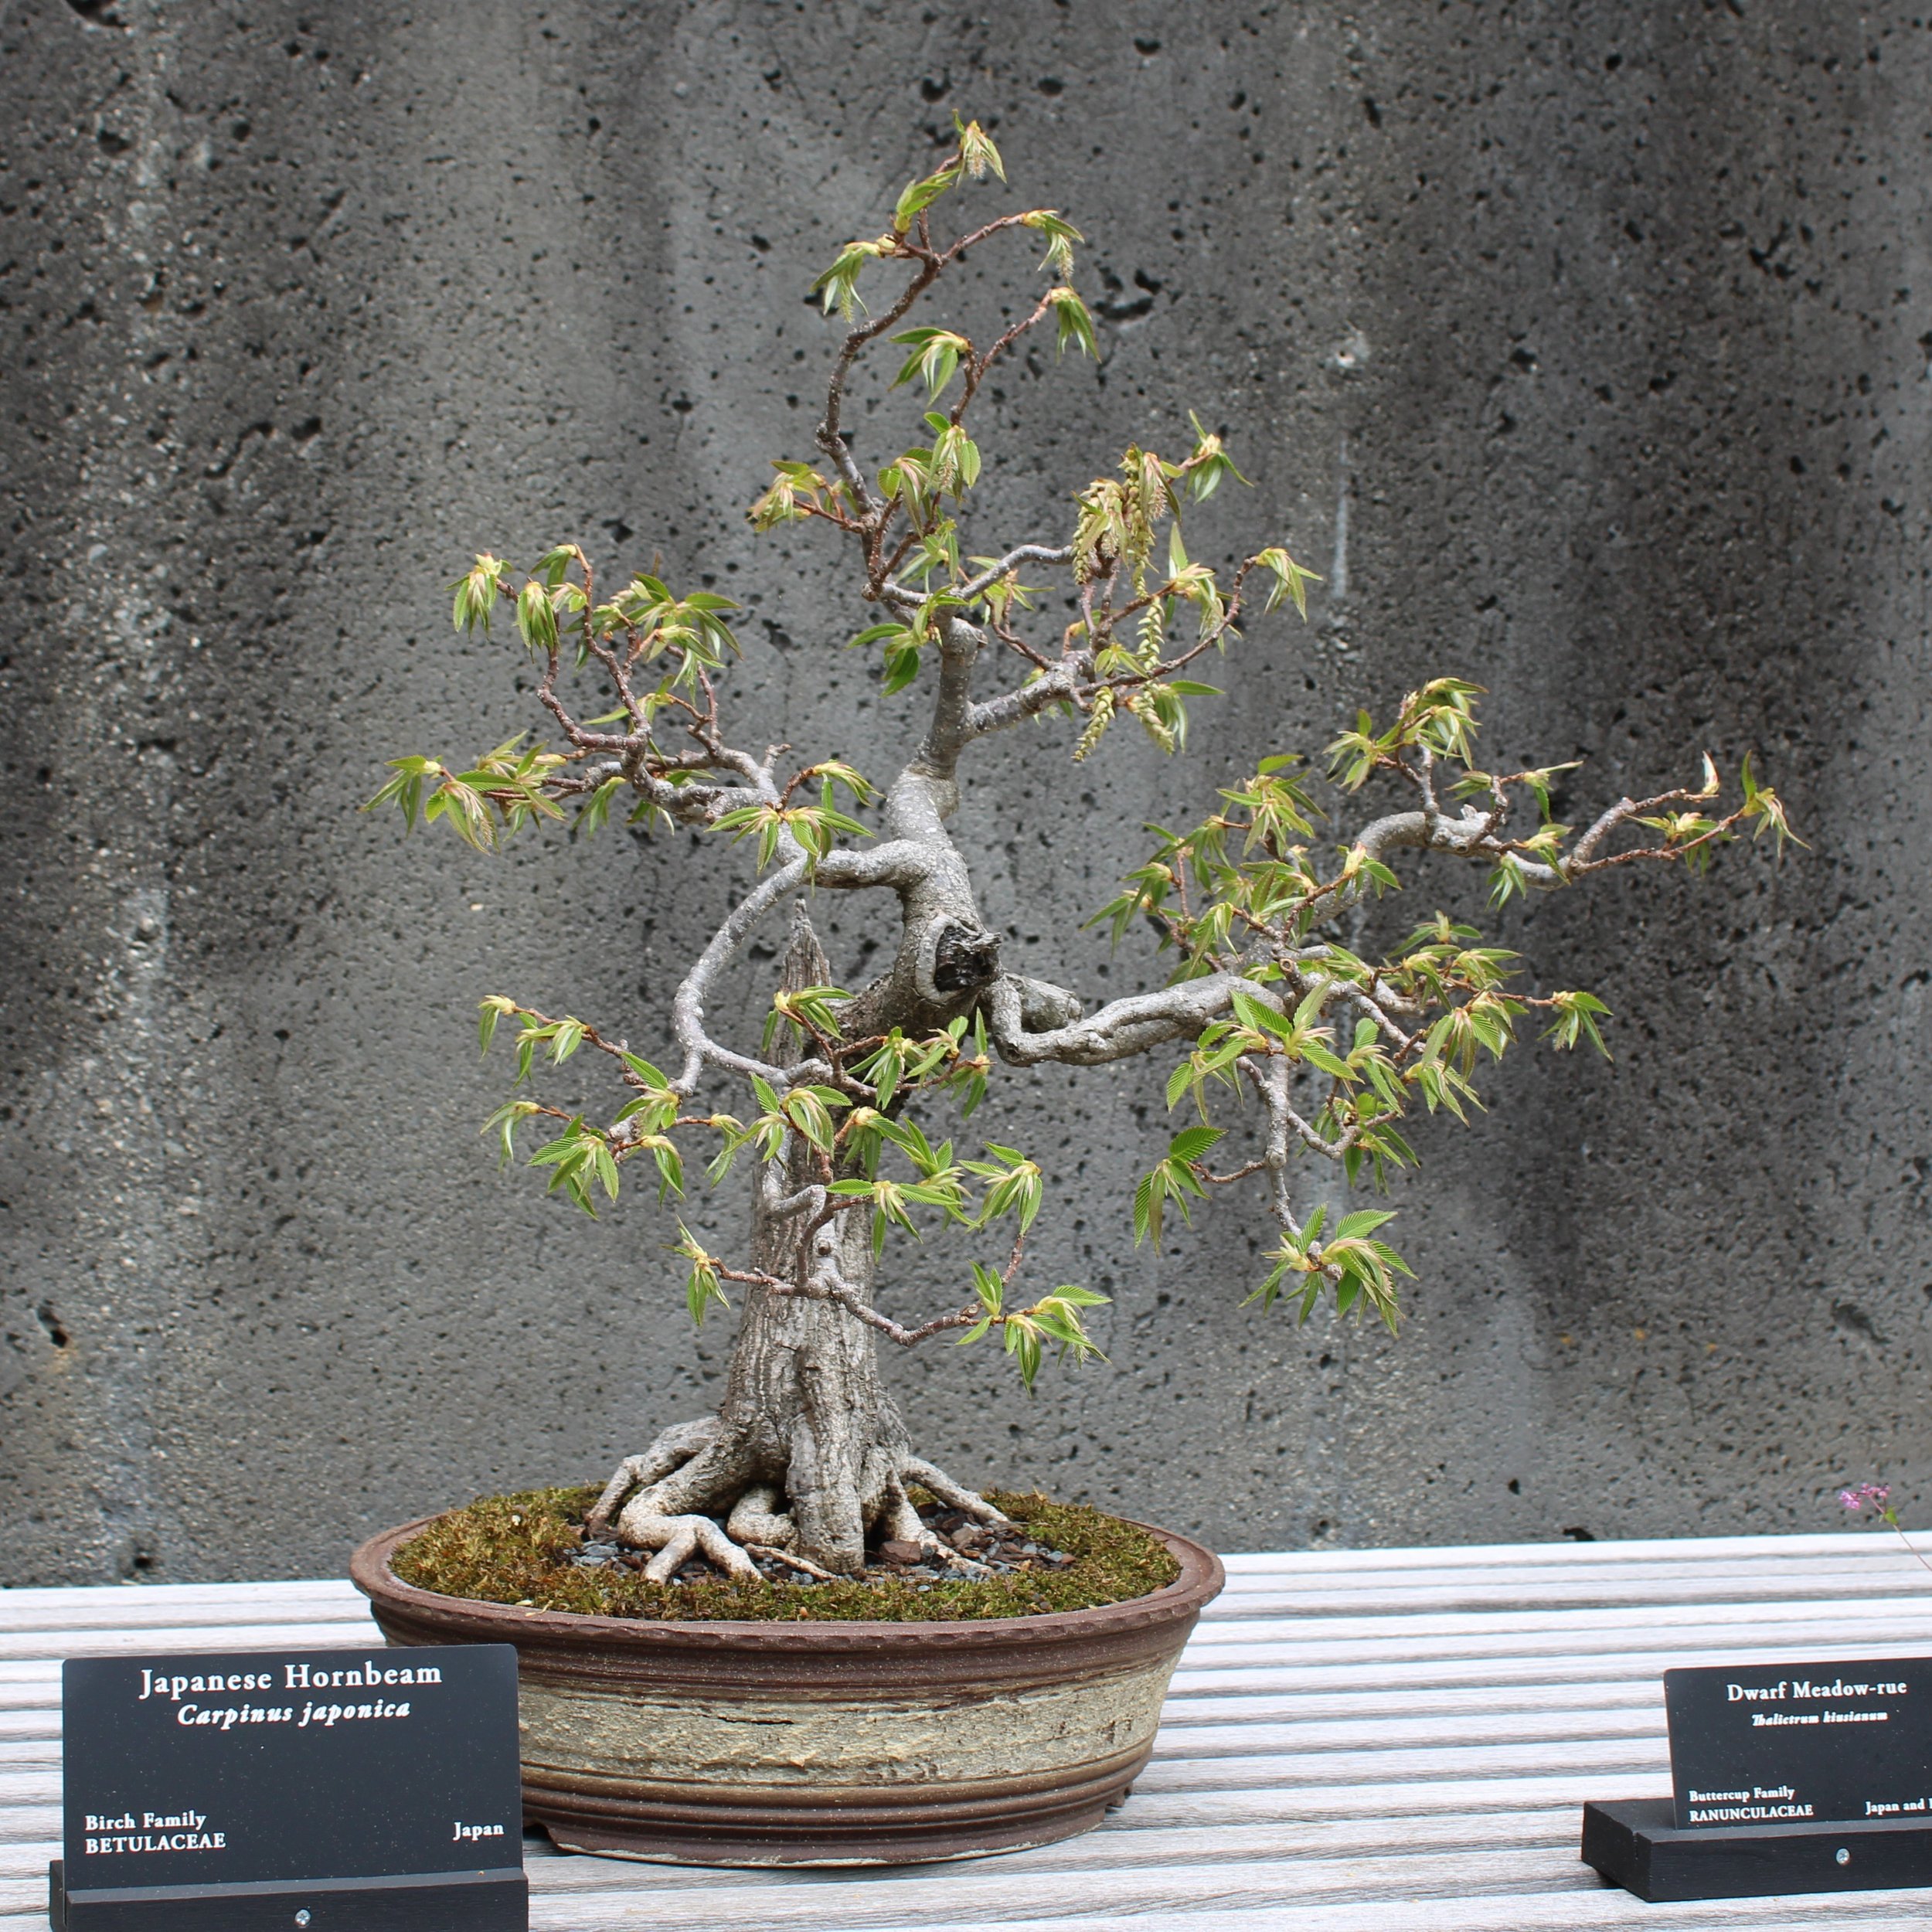
Japanese Hornbeam
The subject of this entry is a Japanese hornbeam (Carpinus japonica), donated to the Arboretum in the early 2000s by Dana and Bunky Markham. This image shows the tree a few years after donation, although its appearance in this photograph is a good representation of how it looked when we received it:
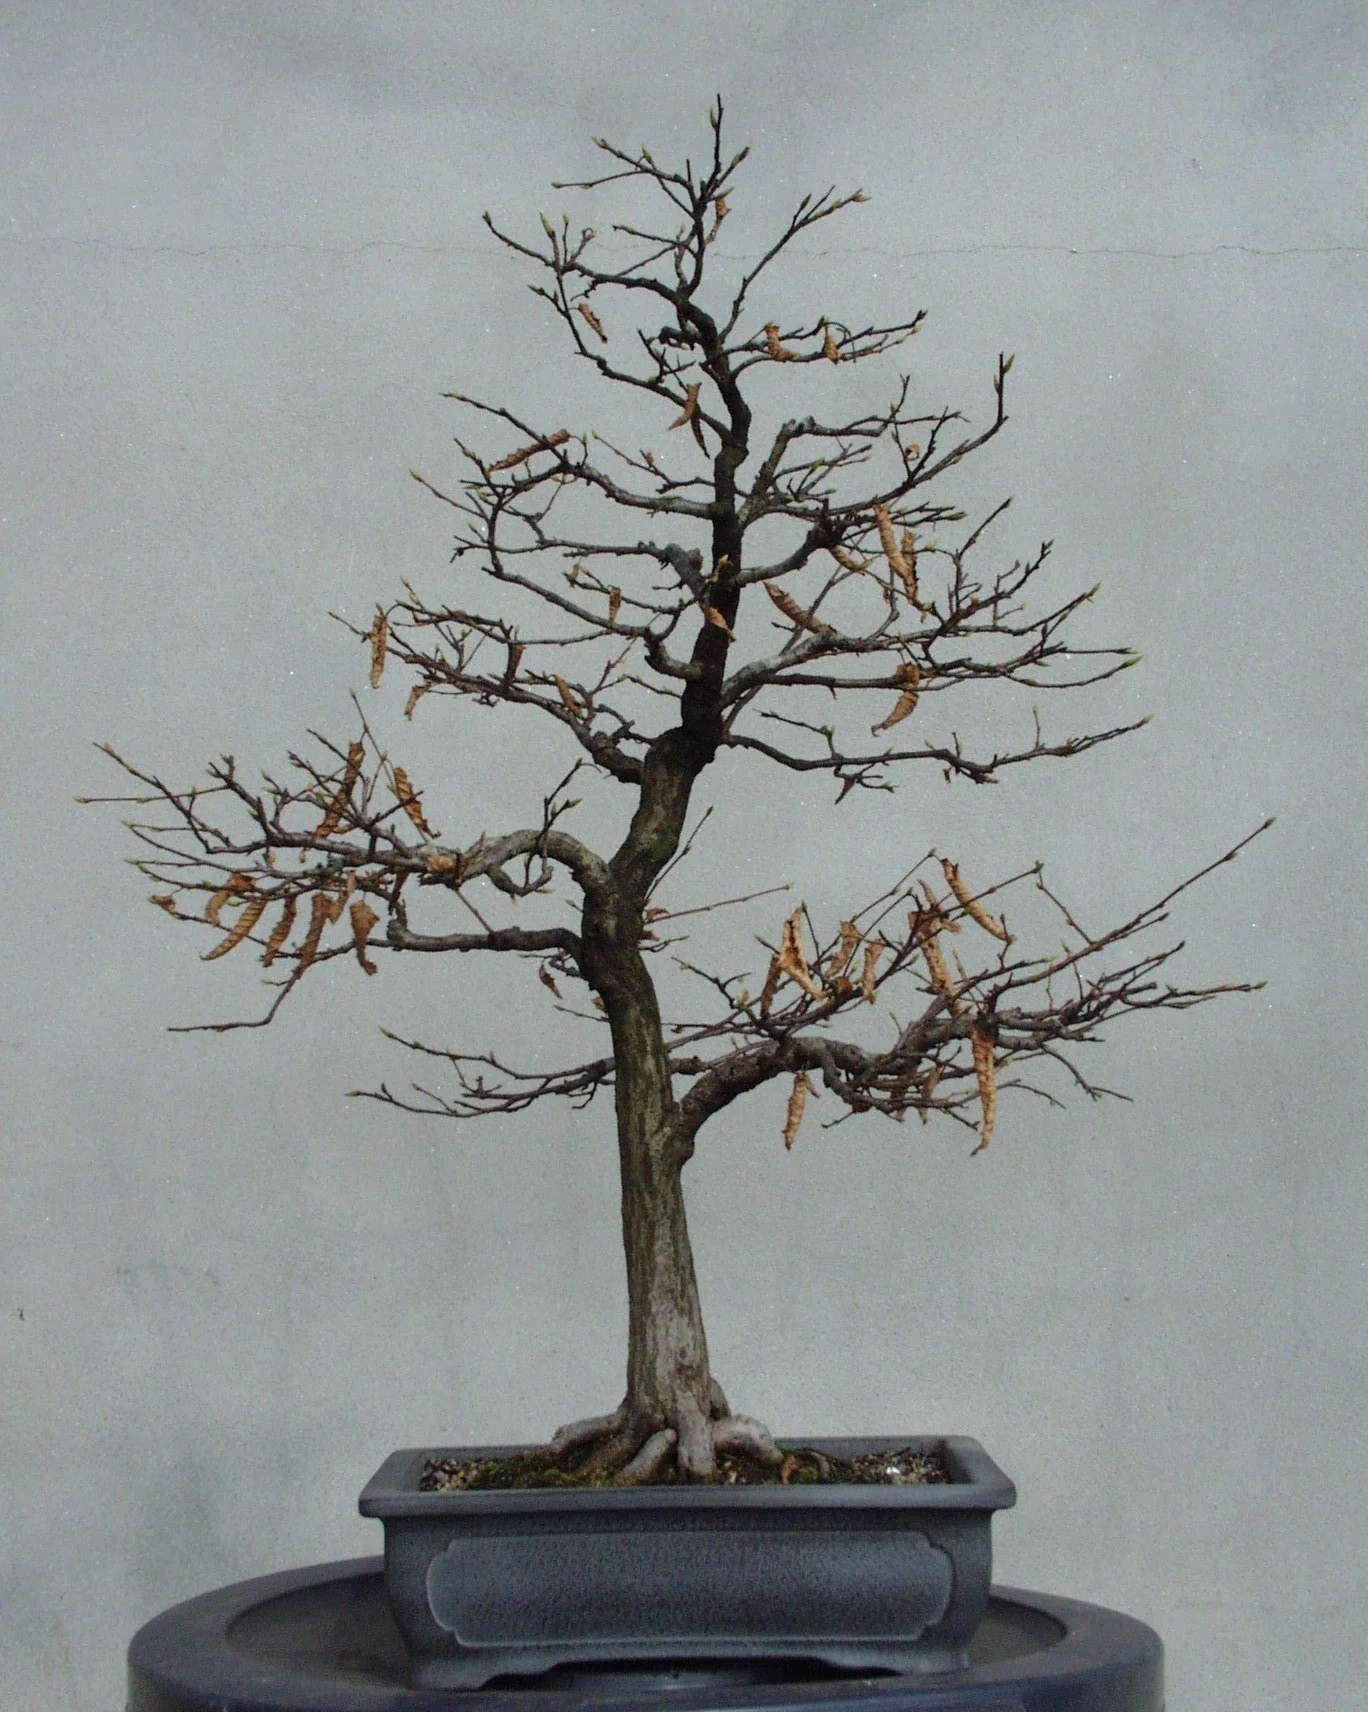
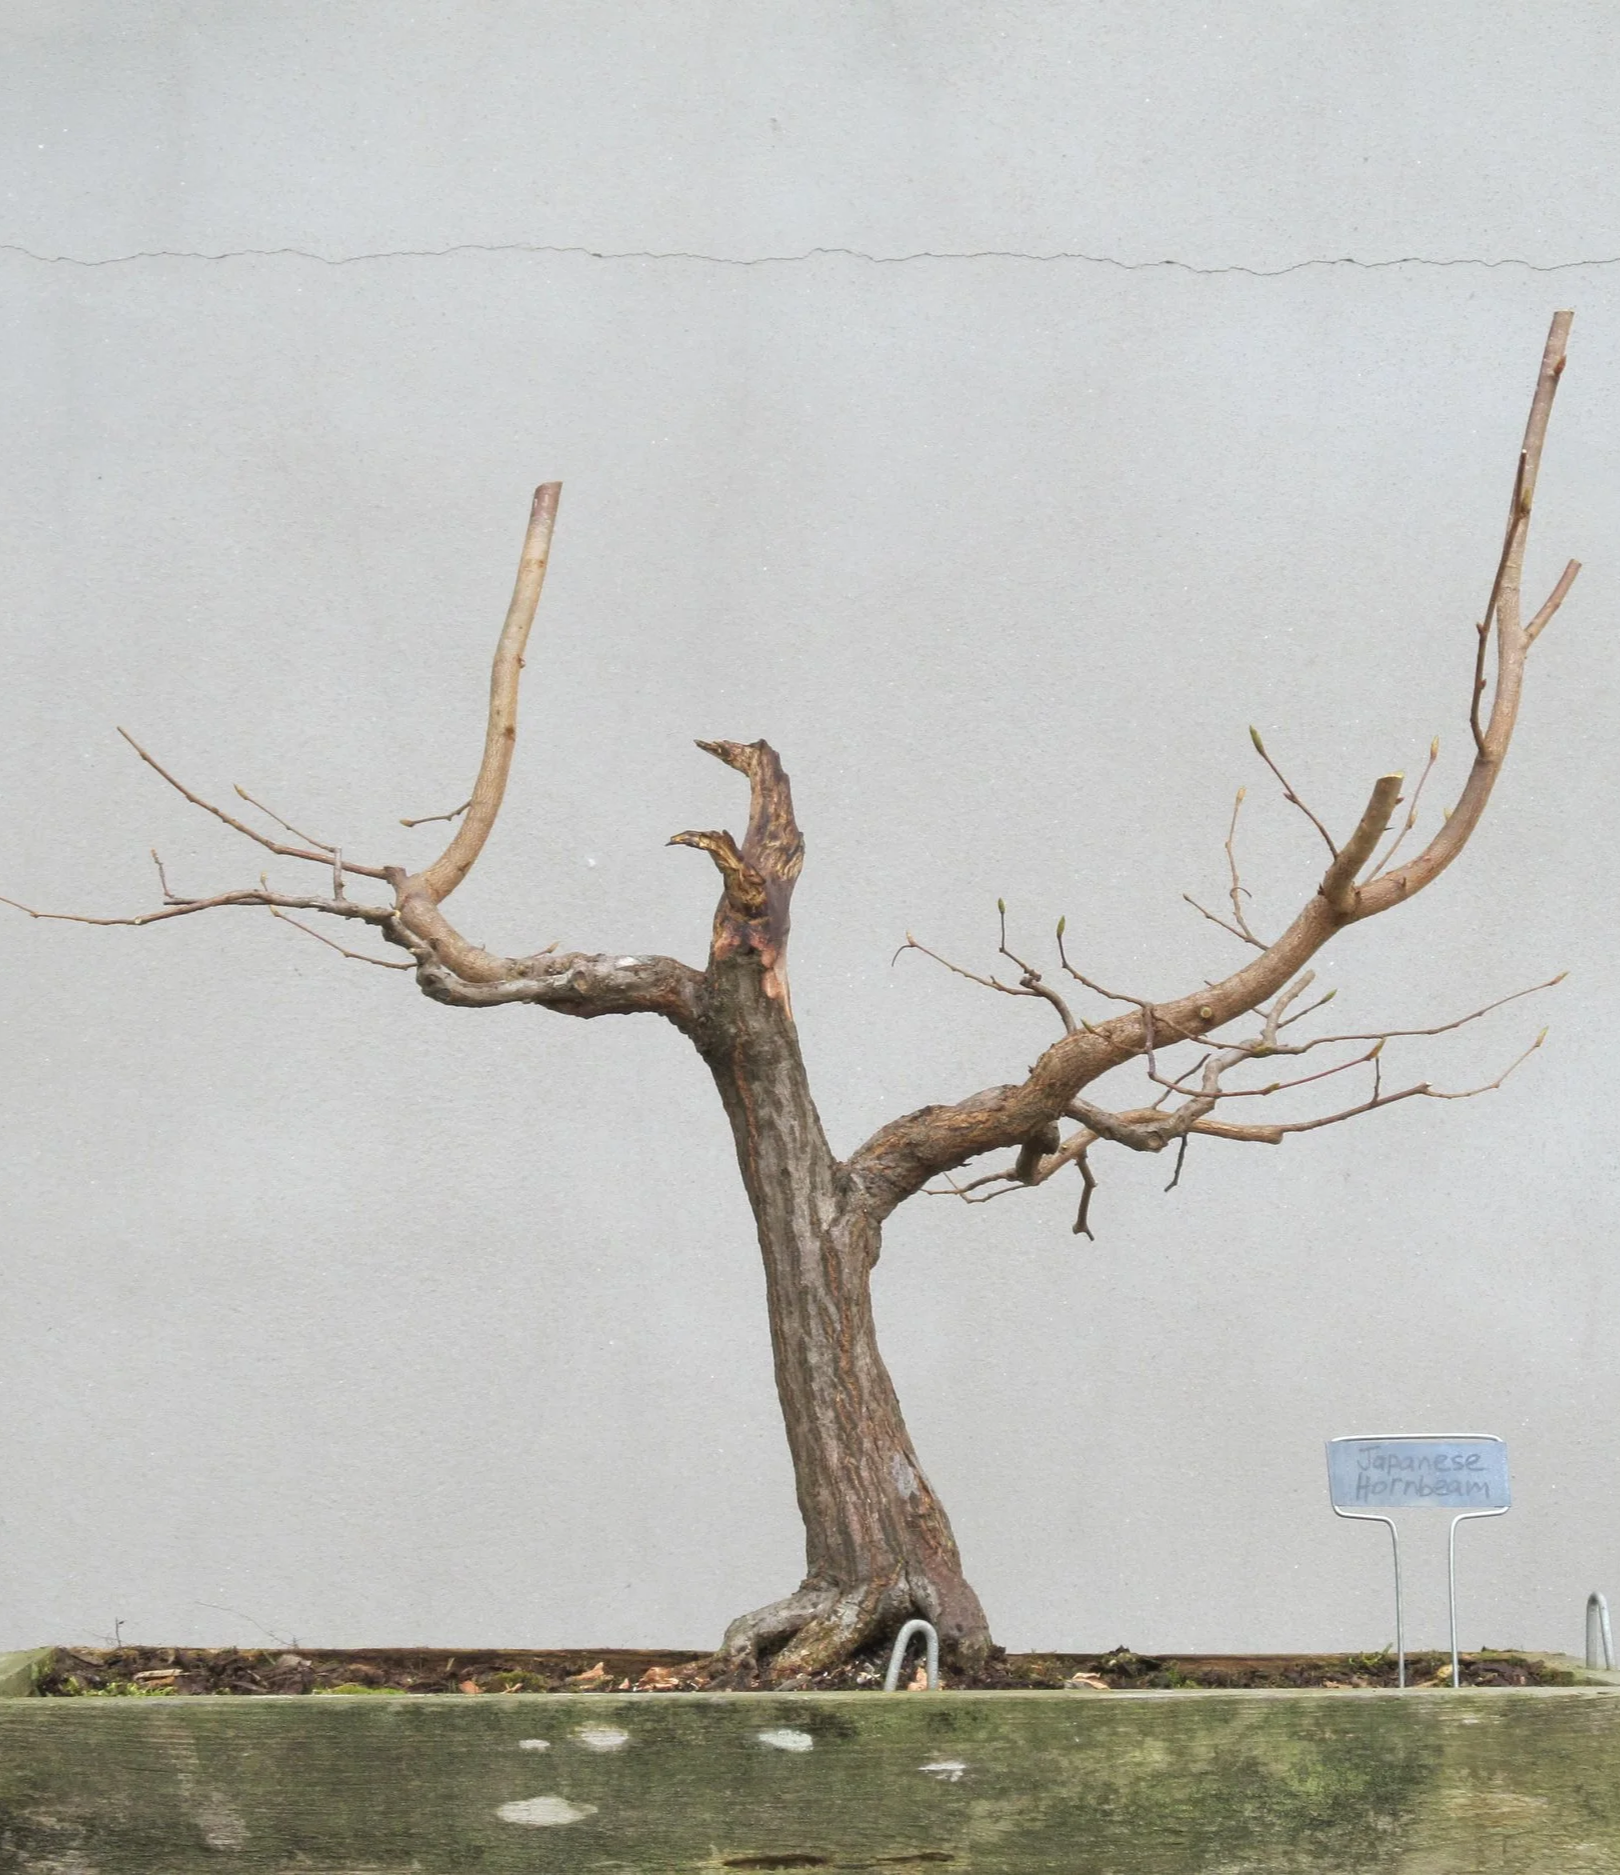
February 2006
Many bonsai donated to the Arboretum over the years ended up as auction material at the annual Carolina Bonsai Expo. The various donors always knew that some or all of what they gave us would be handled that way, just as the Markham’s understood that many of their donations would. The donors gave consent because they knew the funds generated would support the bonsai program, and that was considered a worthy purpose.
When we accepted donations, I always had an eye out for specimens that might be useful additions to the Arboretum collection. Donations, after all, were the primary means by which we initially built the collection. My interest in this Japanese hornbeam, the real reason we held on to it and did not auction it, was its species — the tree was attractive because it was a Japanese hornbeam. We had one other, but that Japanese hornbeam was a component in a tray landscape and not a stand-alone specimen. We already had American hornbeam and Korean hornbeam specimens in our collection, and I was thinking in terms of building out that part of our portfolio.
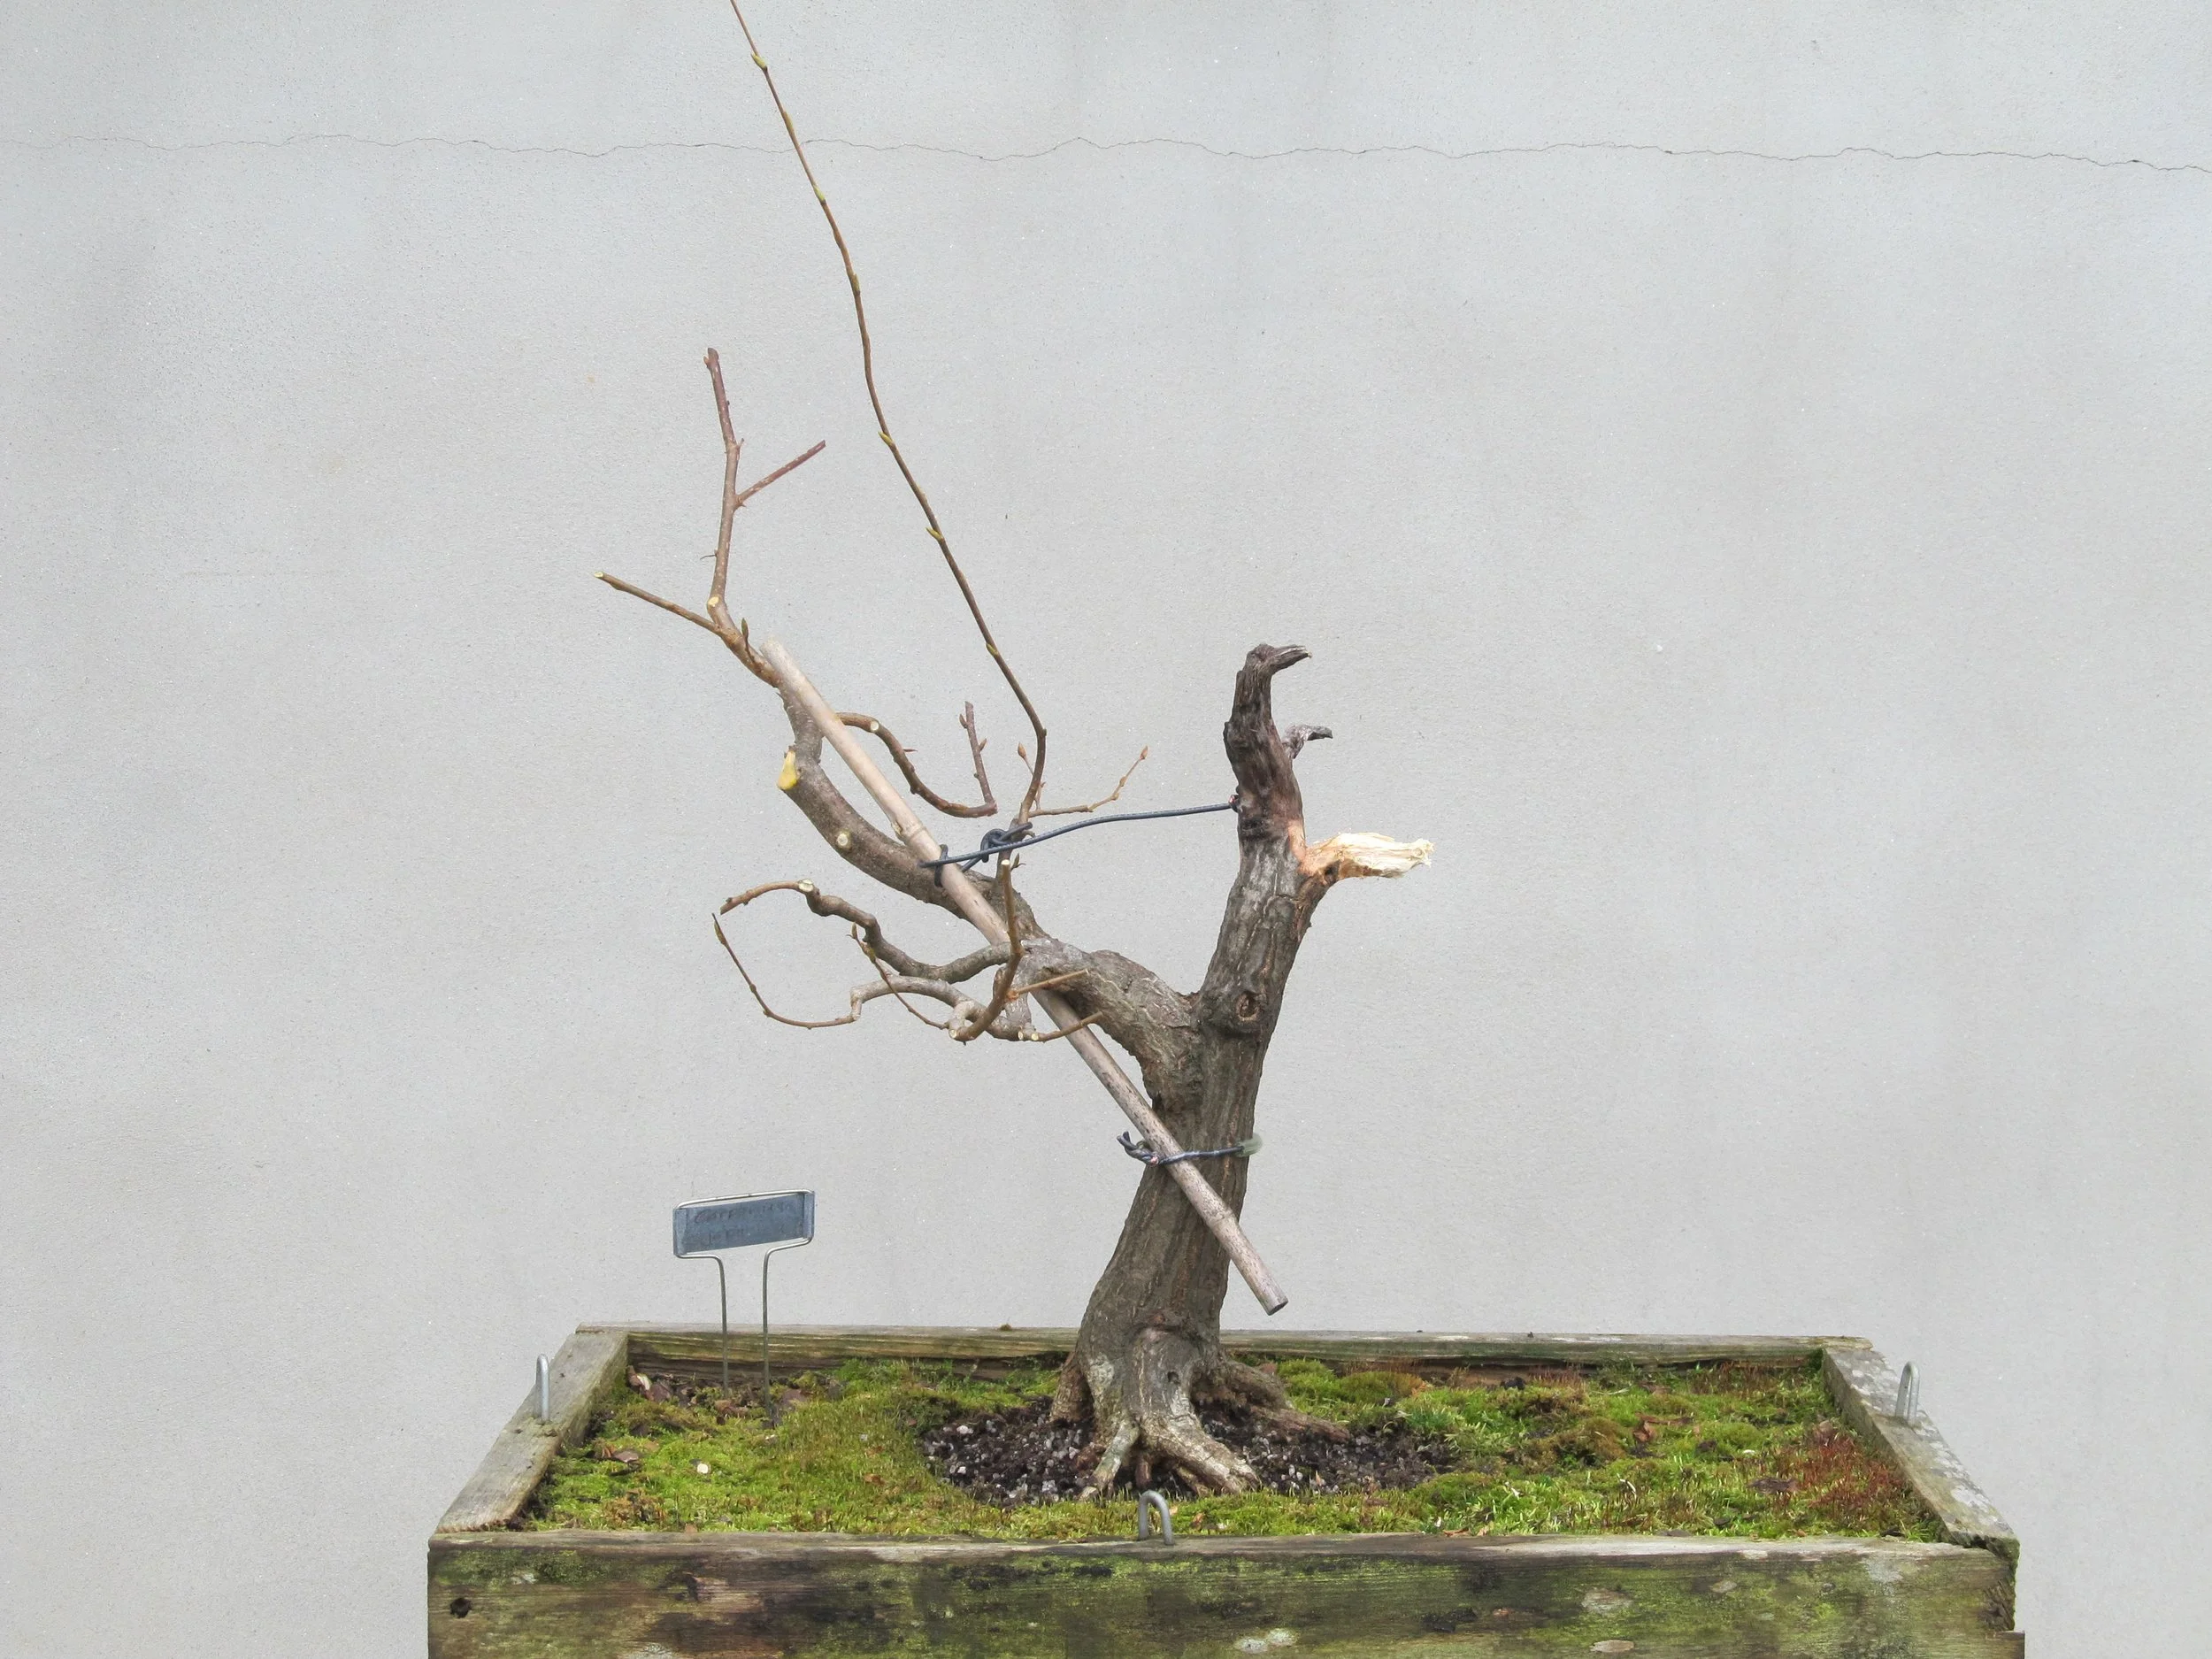
I did not think much of the tree in terms of its styling. Not that there was anything wrong with it, but it was completely conventional and did not have much personality. The single-line leader was unappealing and the trunk appeared long and spindly. Also, I didn’t like the base of the tree because it had a rogue root running perpendicular to the other surface roots, even crossing under one of them:
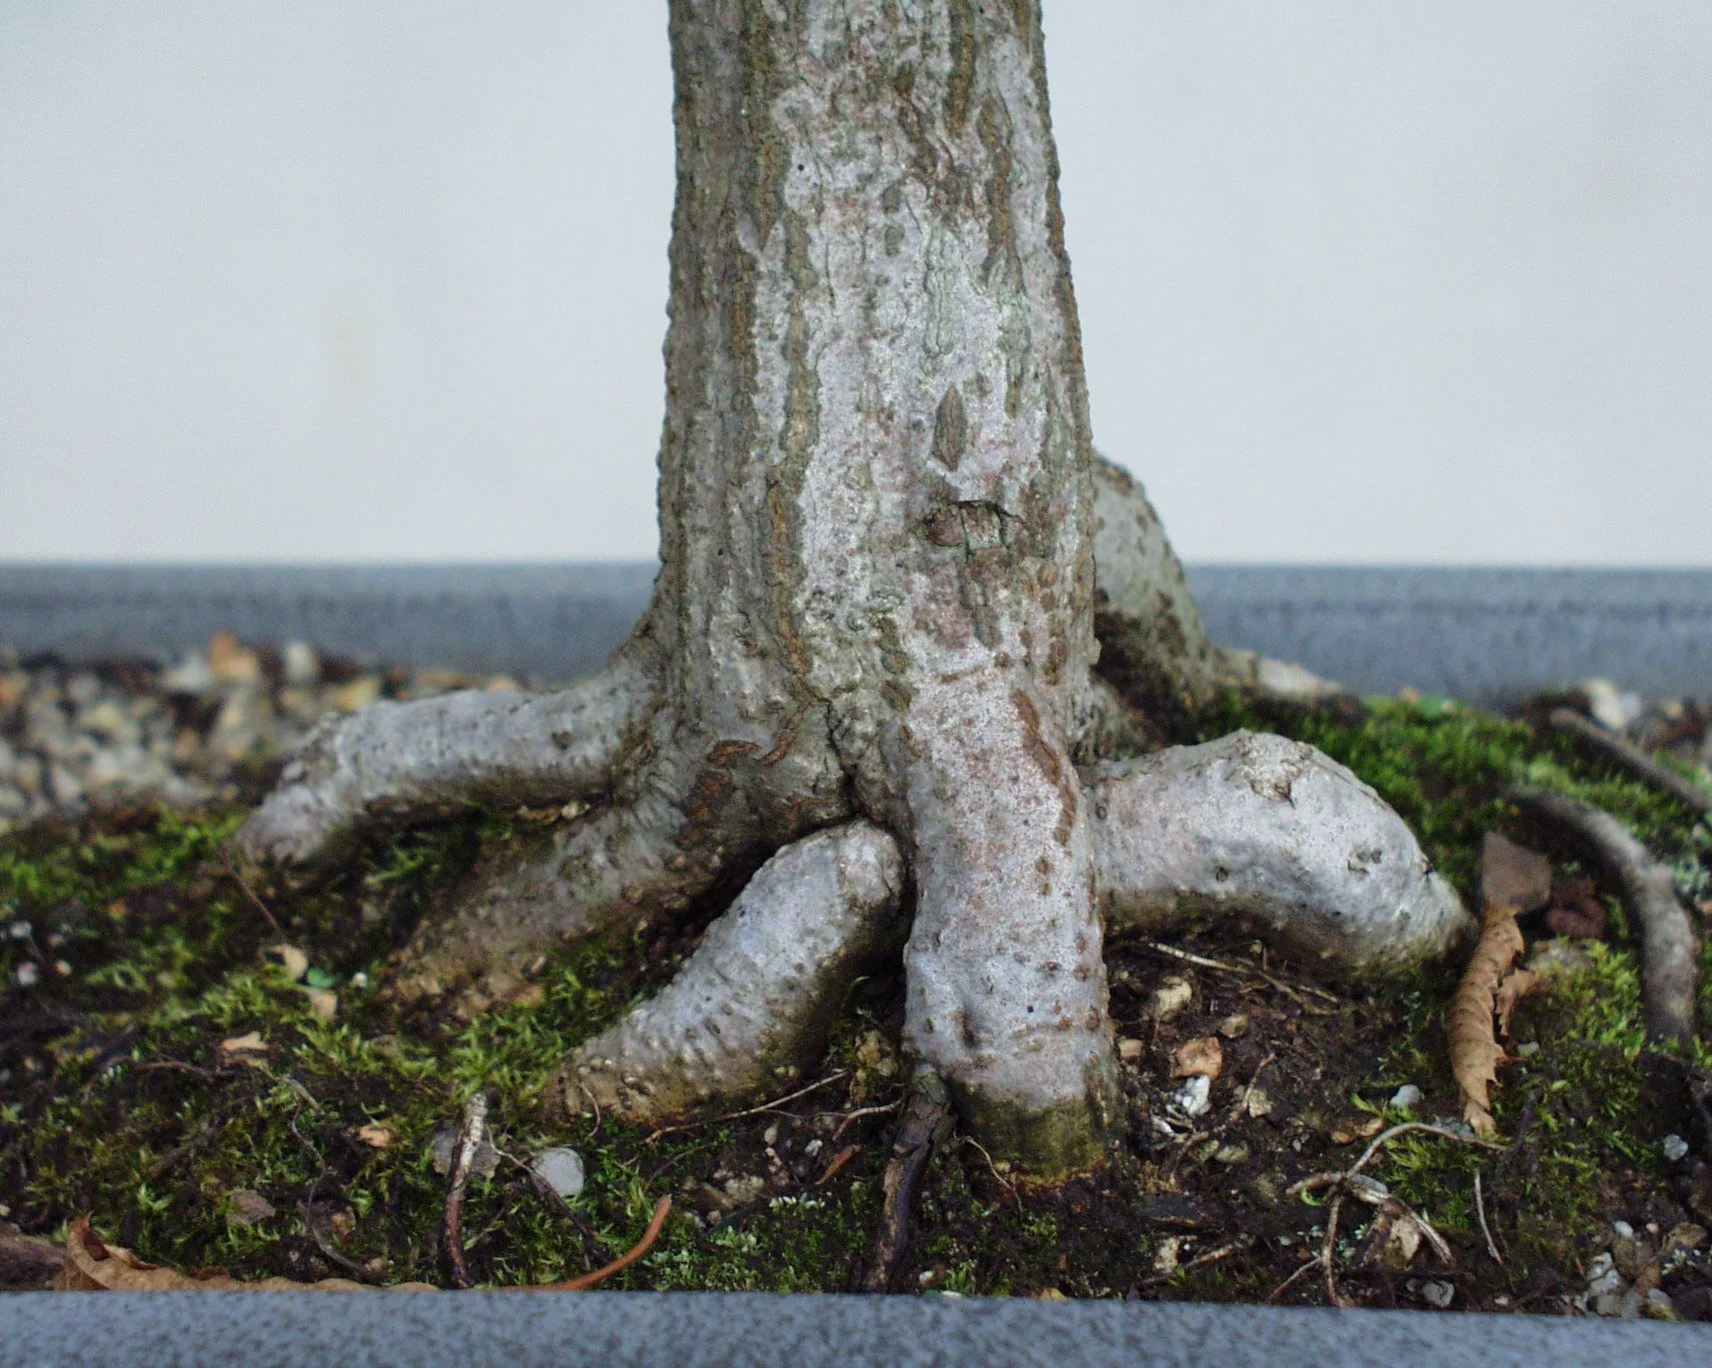
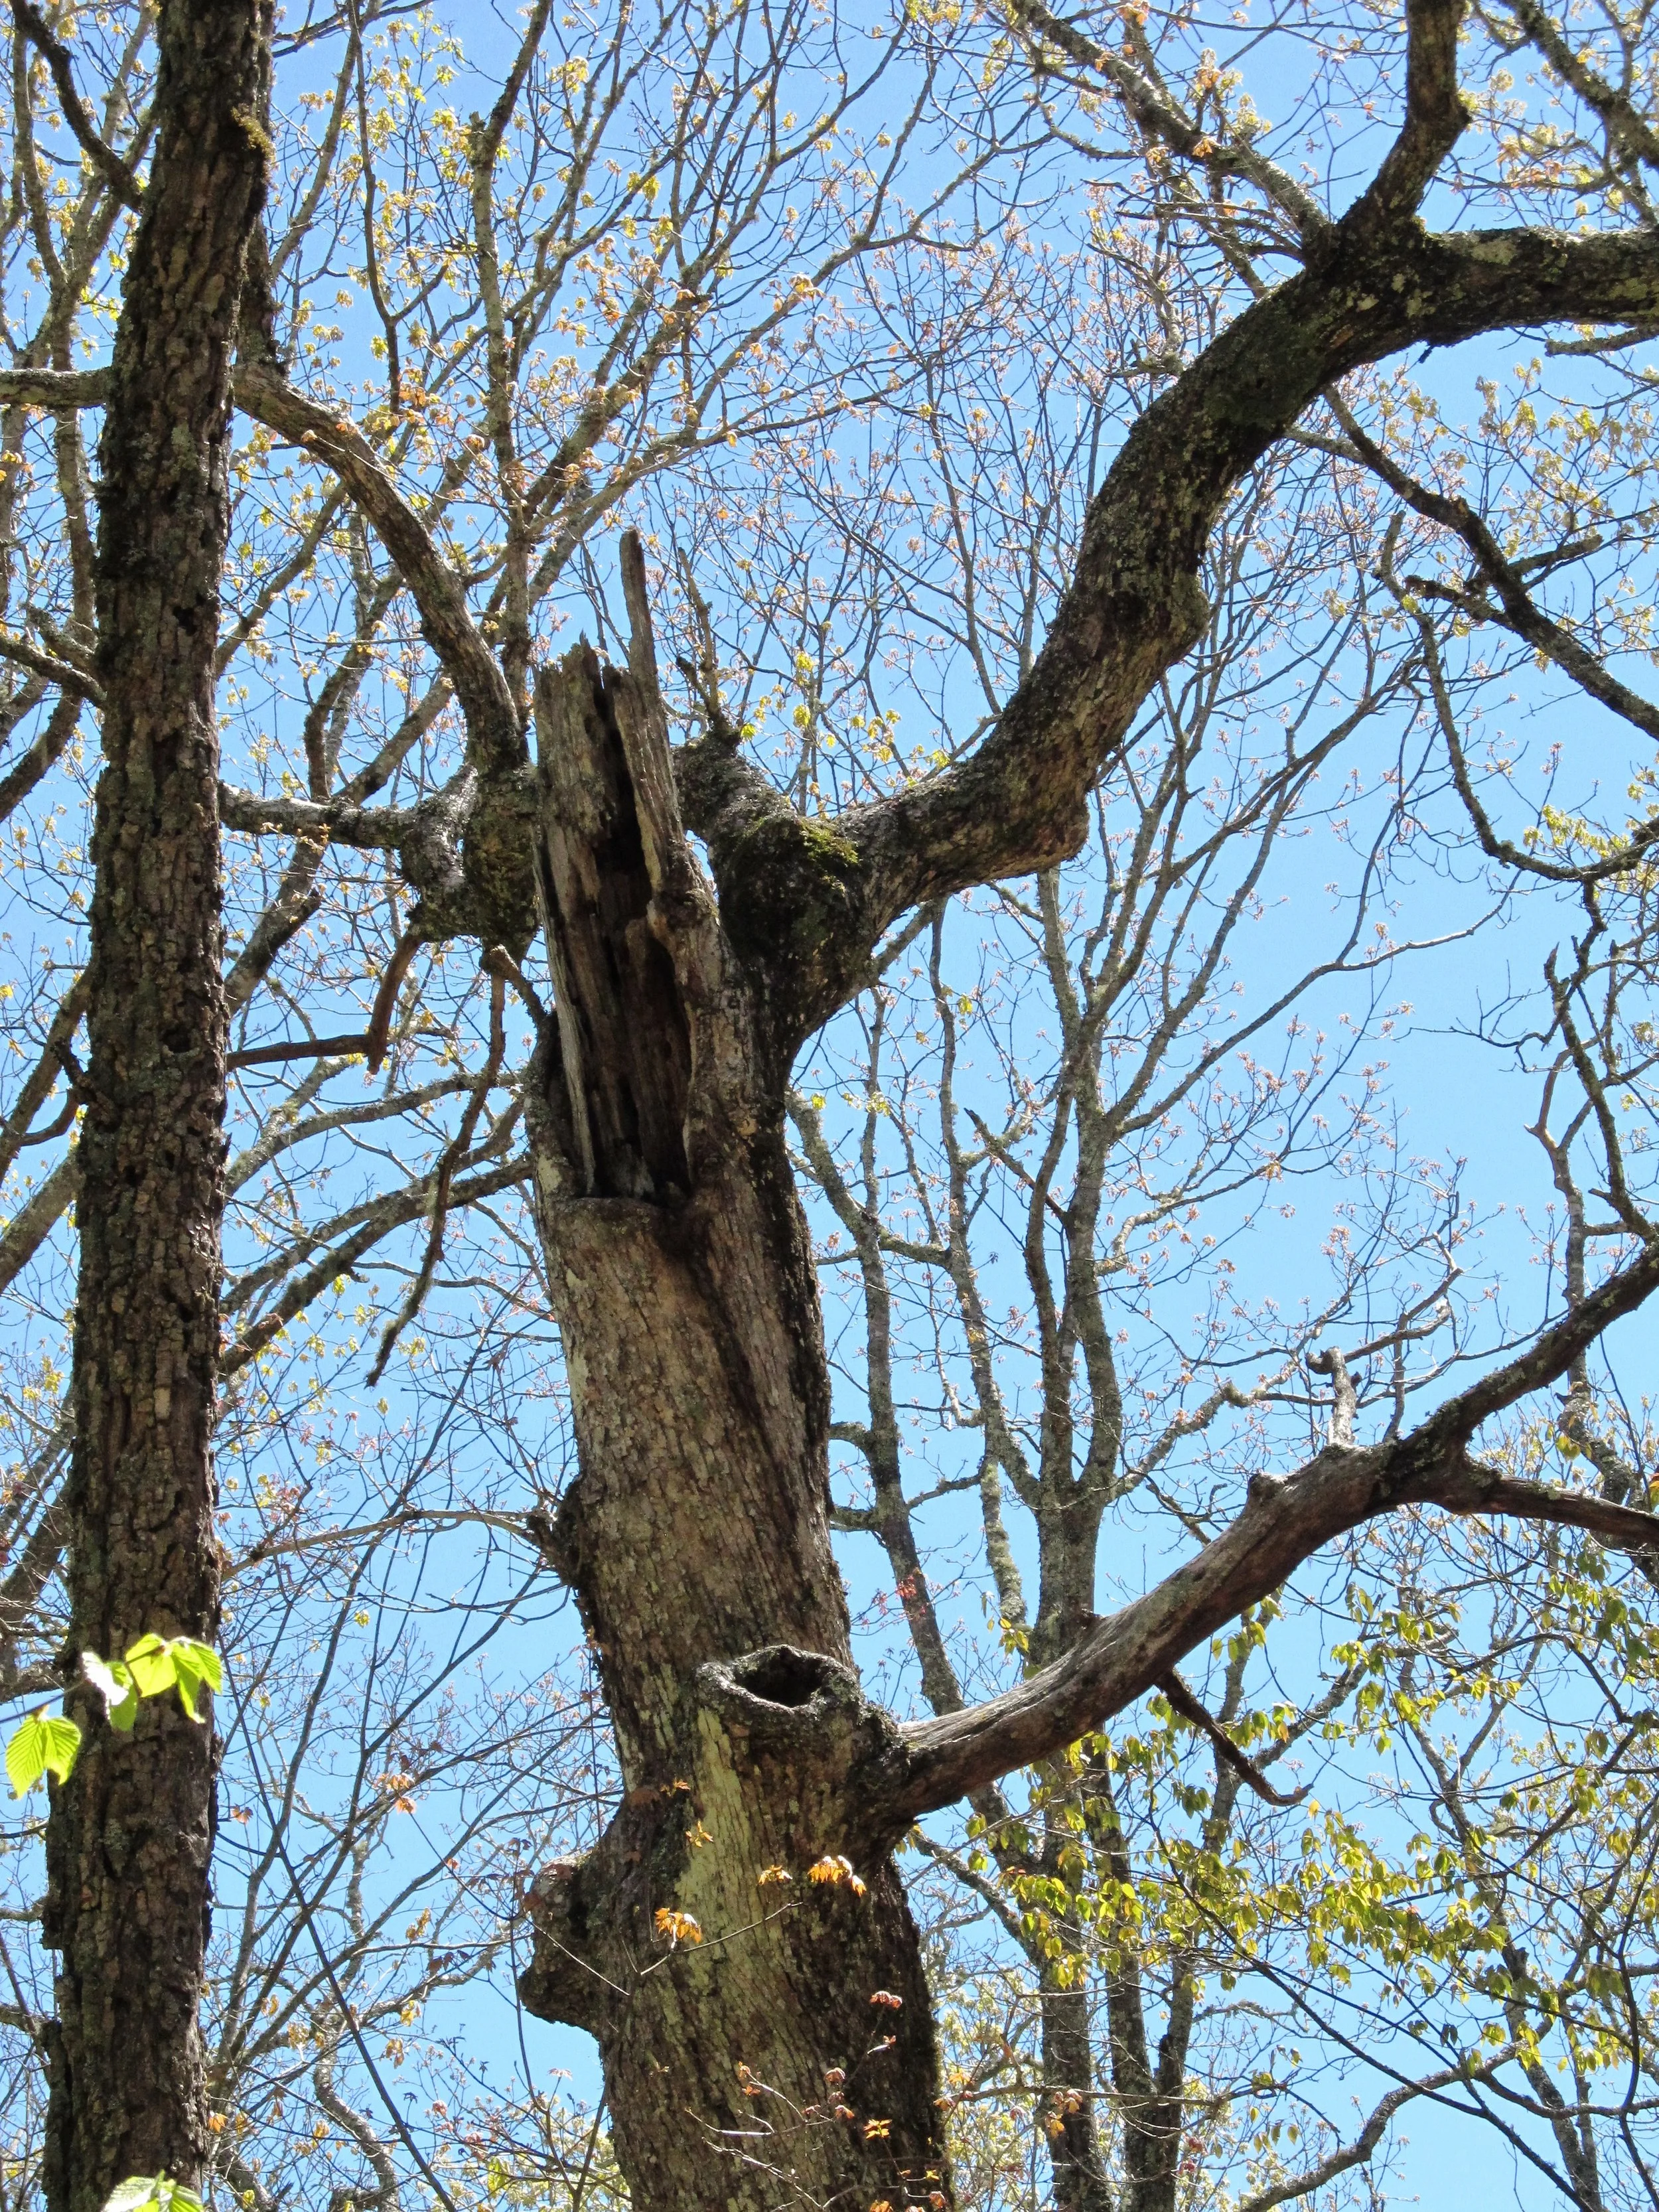
2006
The root problem wasn’t difficult to address because the wayward one was simply pruned out. The other design issues presented more of a challenge and would require more time and effort to be resolved.
After living with the tree for a few years and thinking about it, I went ahead and cut the trunk down to a point just above the two lowest branches. Unfortunately there is not a photo of this to show. The next available images are from several years later:

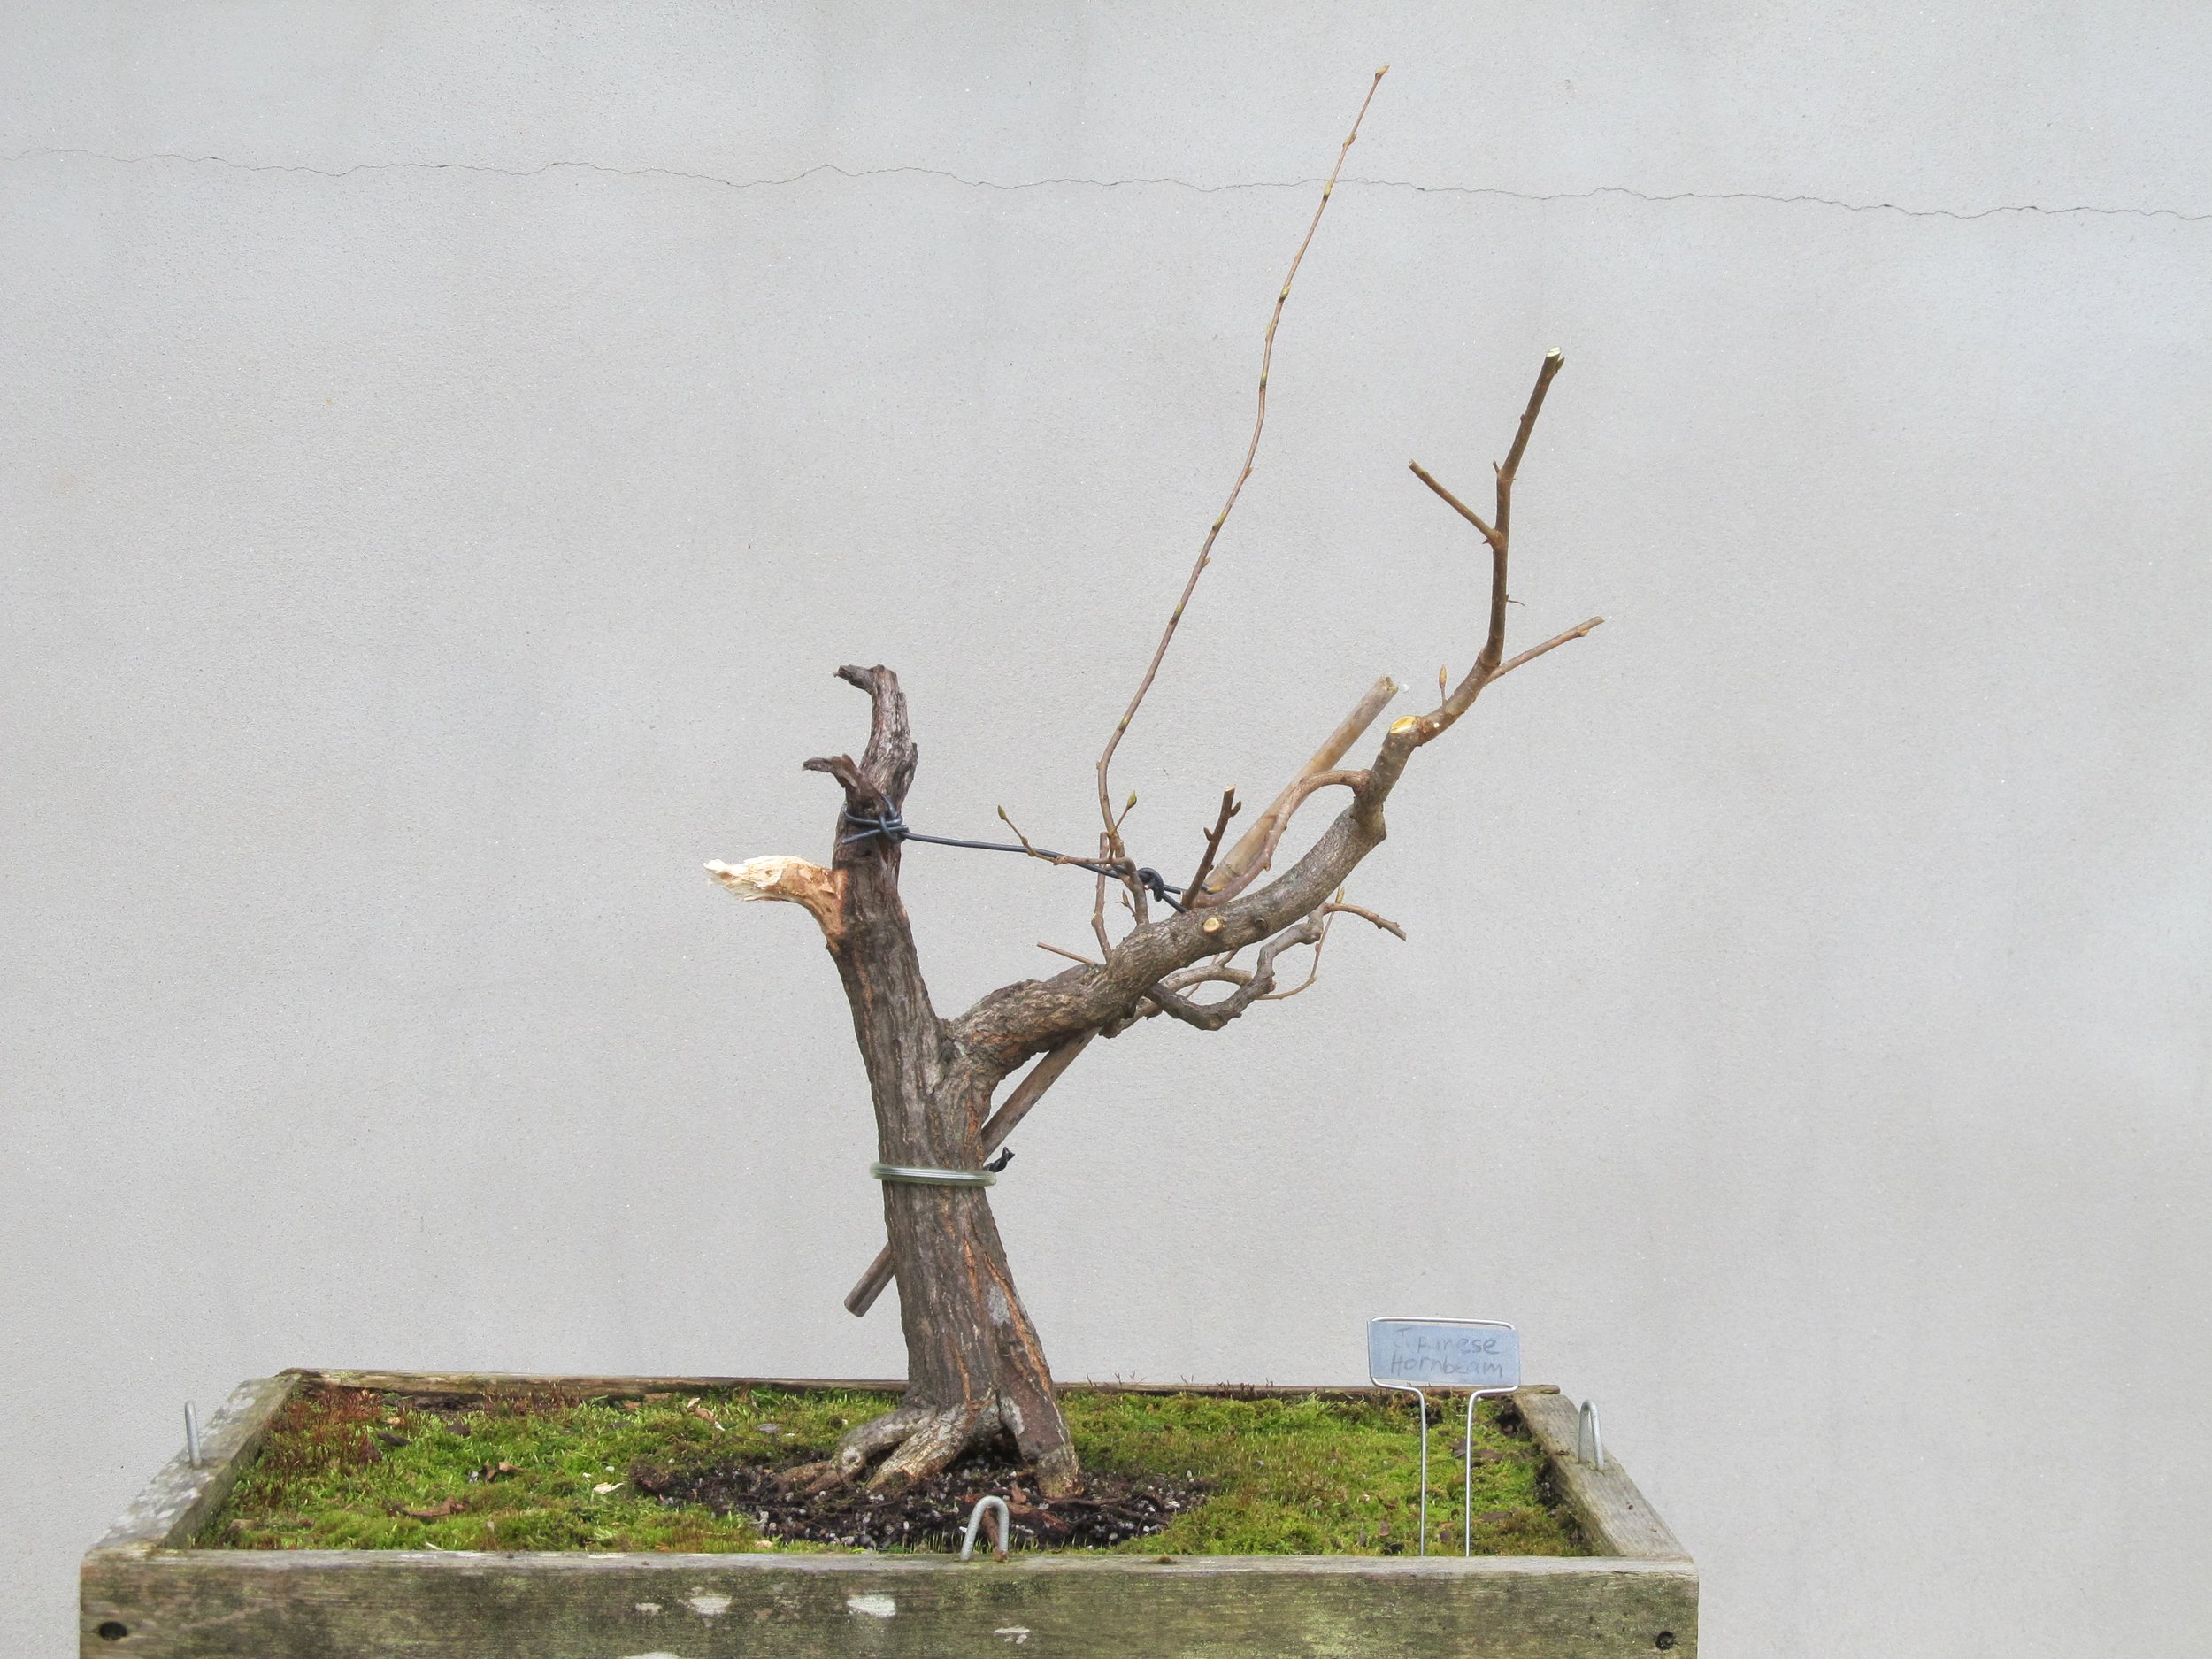
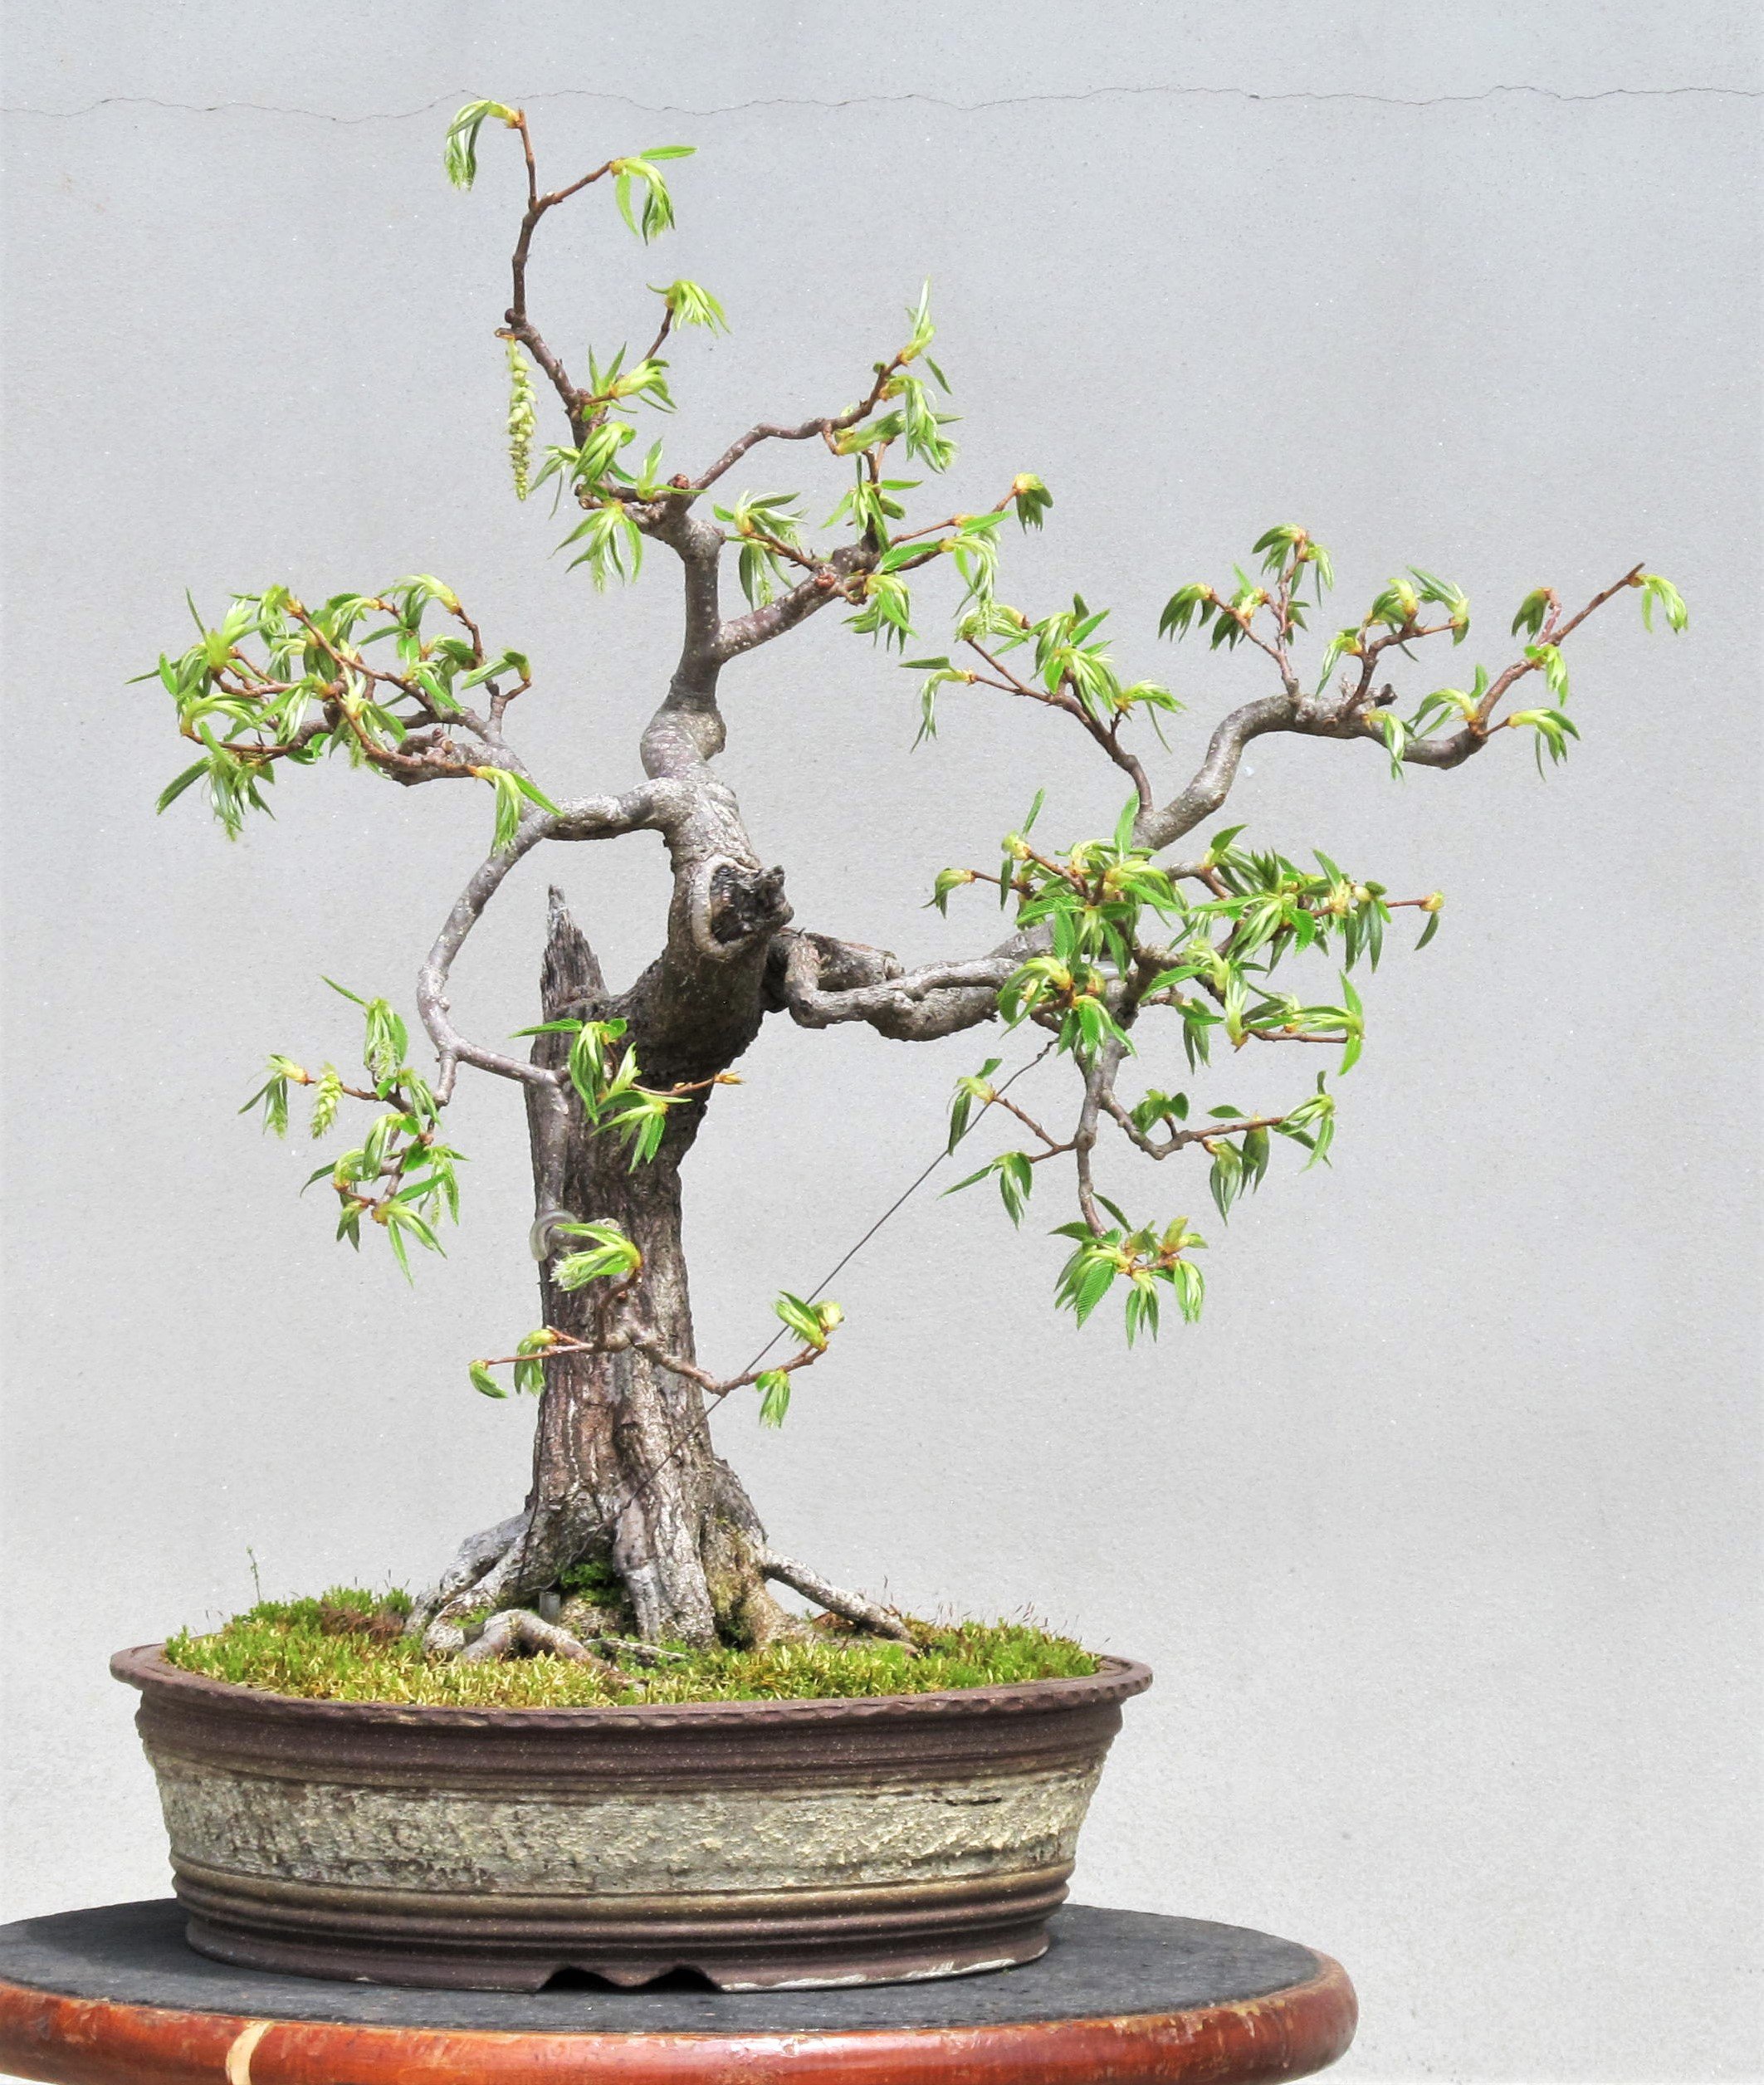
March 2014
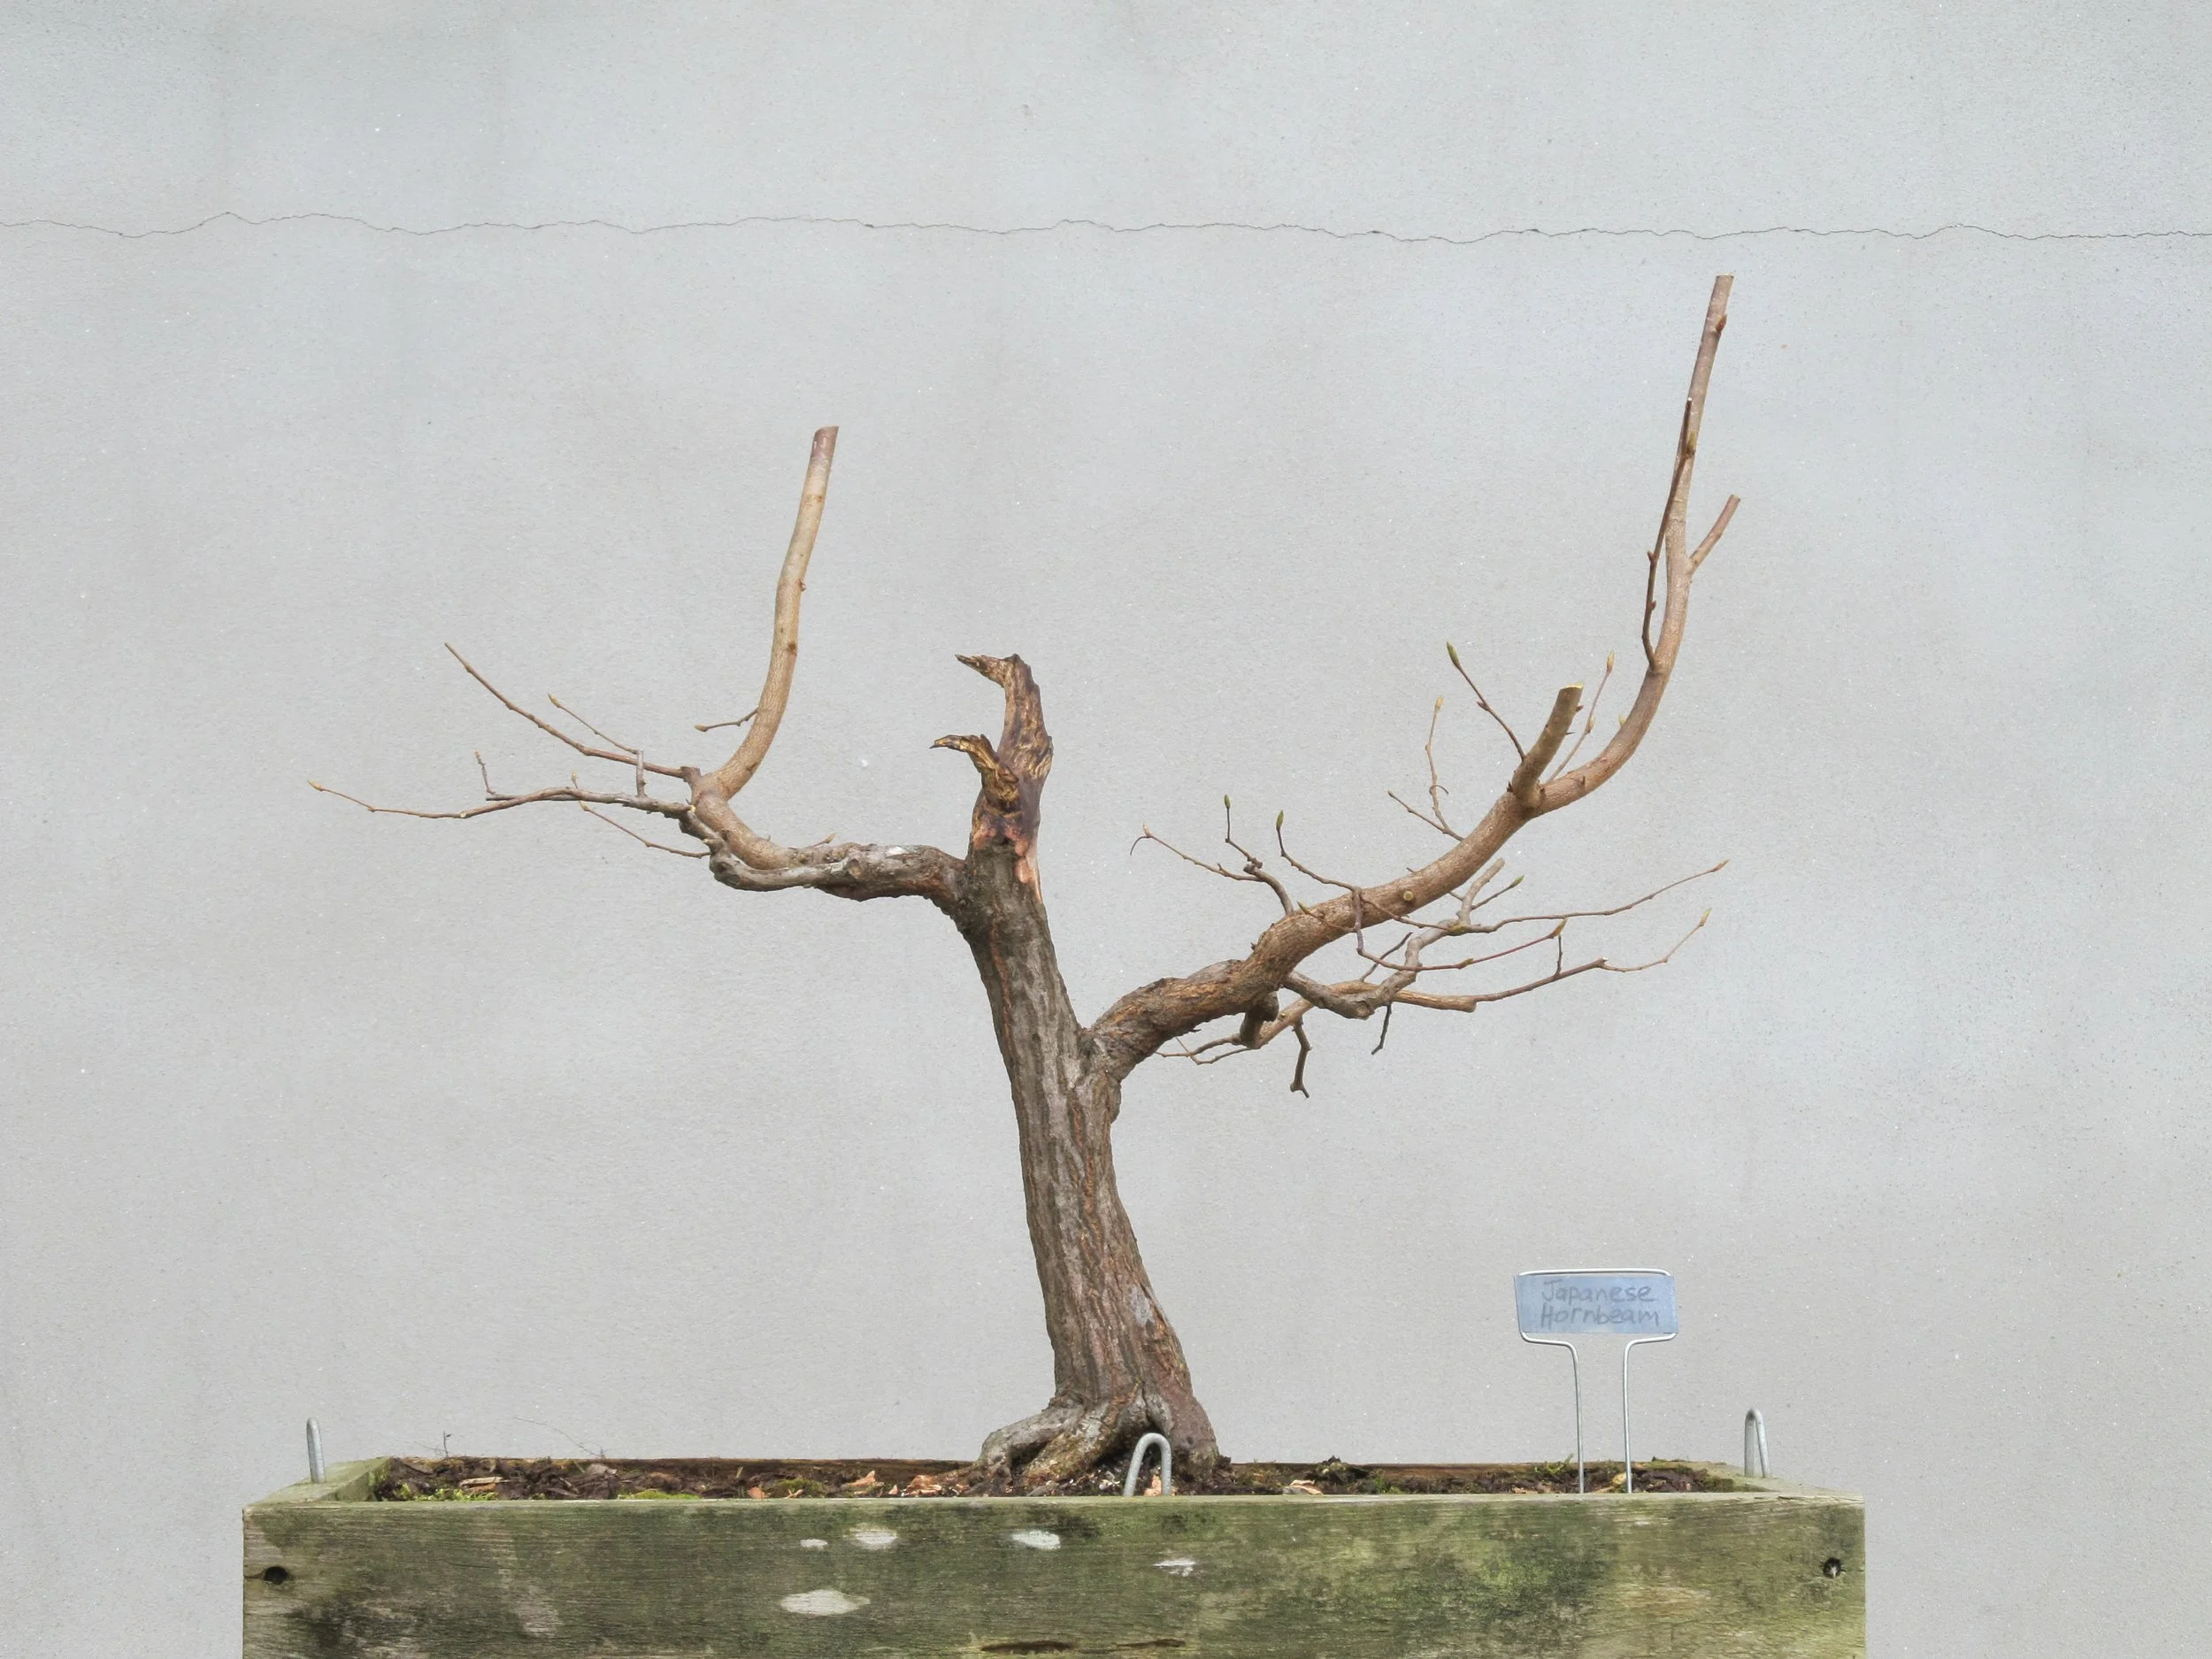
March 2014
The effect of the trunk-chop can clearly be seen in the above two images. The long spindly trunk with the single-line leader is no longer an issue! In the years following the dramatic shortening of the trunk, the remaining branches were allowed to grow freely. The rank growth they produced was then cut back just to shorten it, without any thought given to styling. Actually, the two images above were taken as “before” shots just prior to a major design session.
Let us pause a moment to consider the design process employed to reach this point. A decision had been made to radically change the appearance of this bonsai, and the action taken was to cut off approximately the upper two thirds of the tree. I didn’t have a clear vision of how the tree might ultimately be shaped. I was thinking only in terms of one or the other of the two remaining branches taking over as the continuation of the trunk line. It did not seem likely that both of the branches would be allowed to remain in the end because they headed in opposite directions. I didn’t know, however, which of the branches would be better for the intended purpose. There was no reason for me to make that decision at the time so I left two branches in order to give myself options. The tree was then allowed to grow robustly, thickening the remaining branches while allowing them to grow more branches of their own.
There was no great design scheme beforehand. The plan was nothing more than to make a move that forever changed the course of the tree’s life and then see what the tree did.
The tree did what it did and when there was enough new stuff to work with and I had taken time to evaluate and think about it, I made my next move:
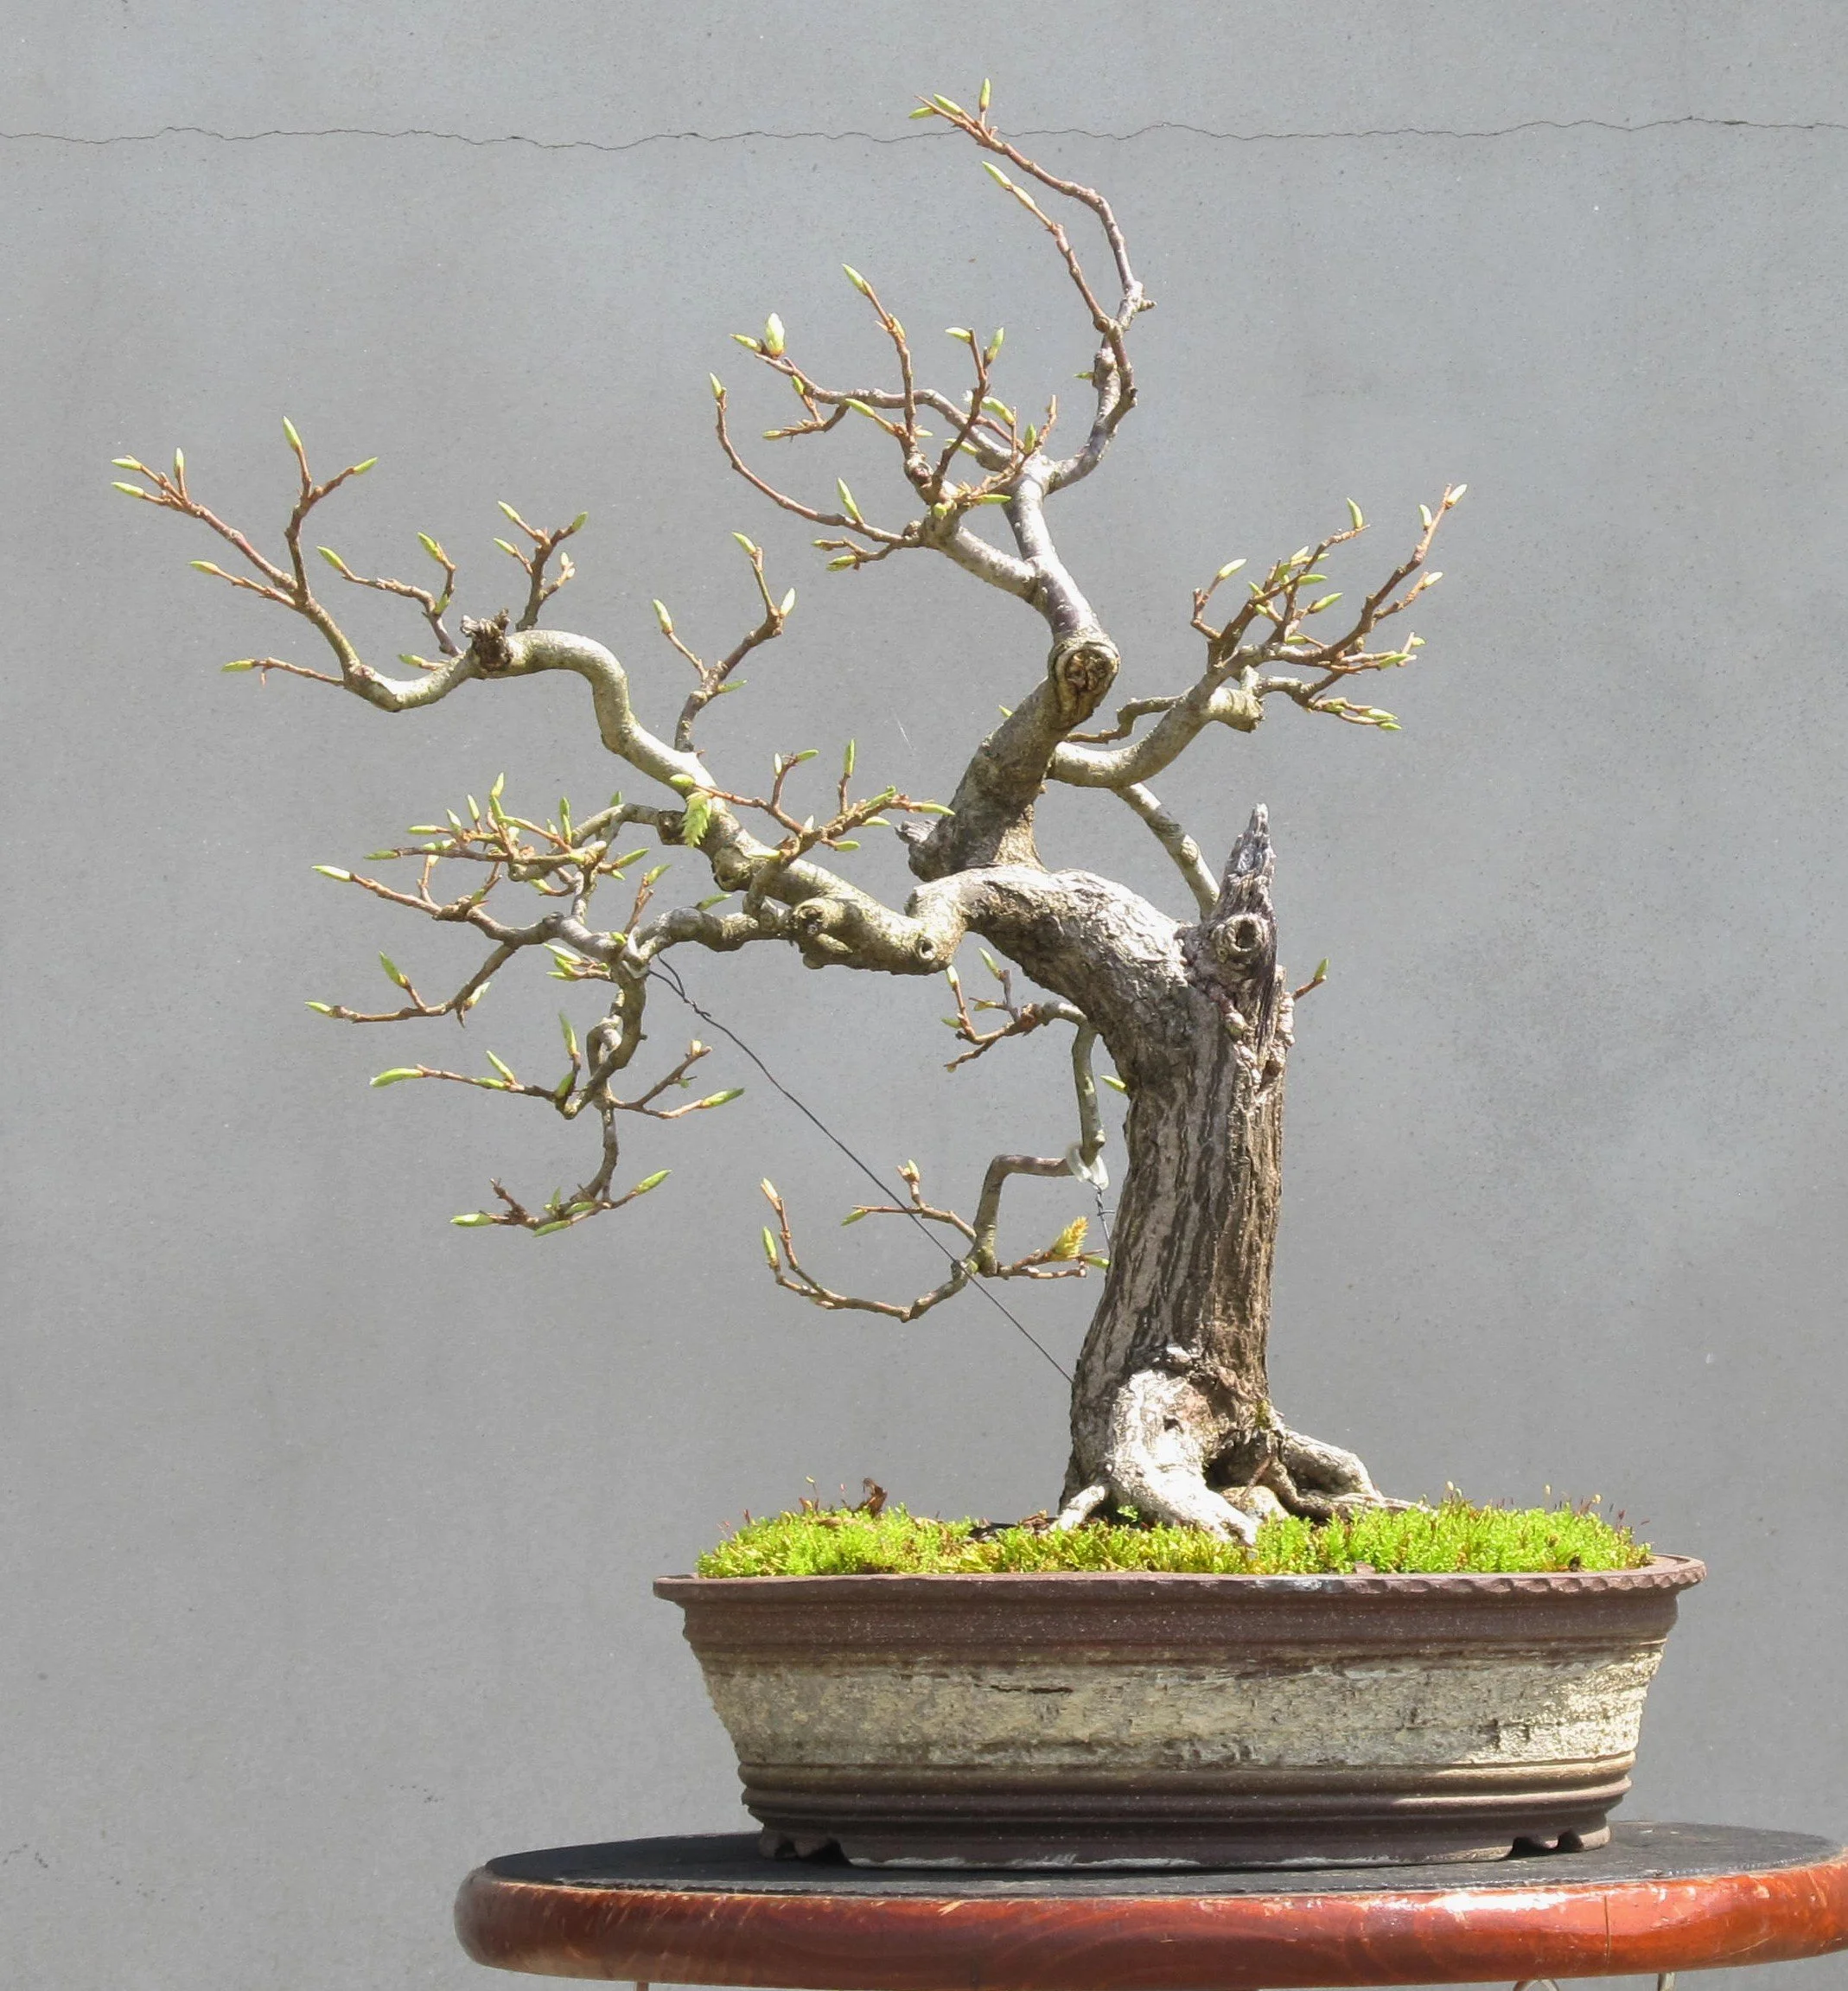
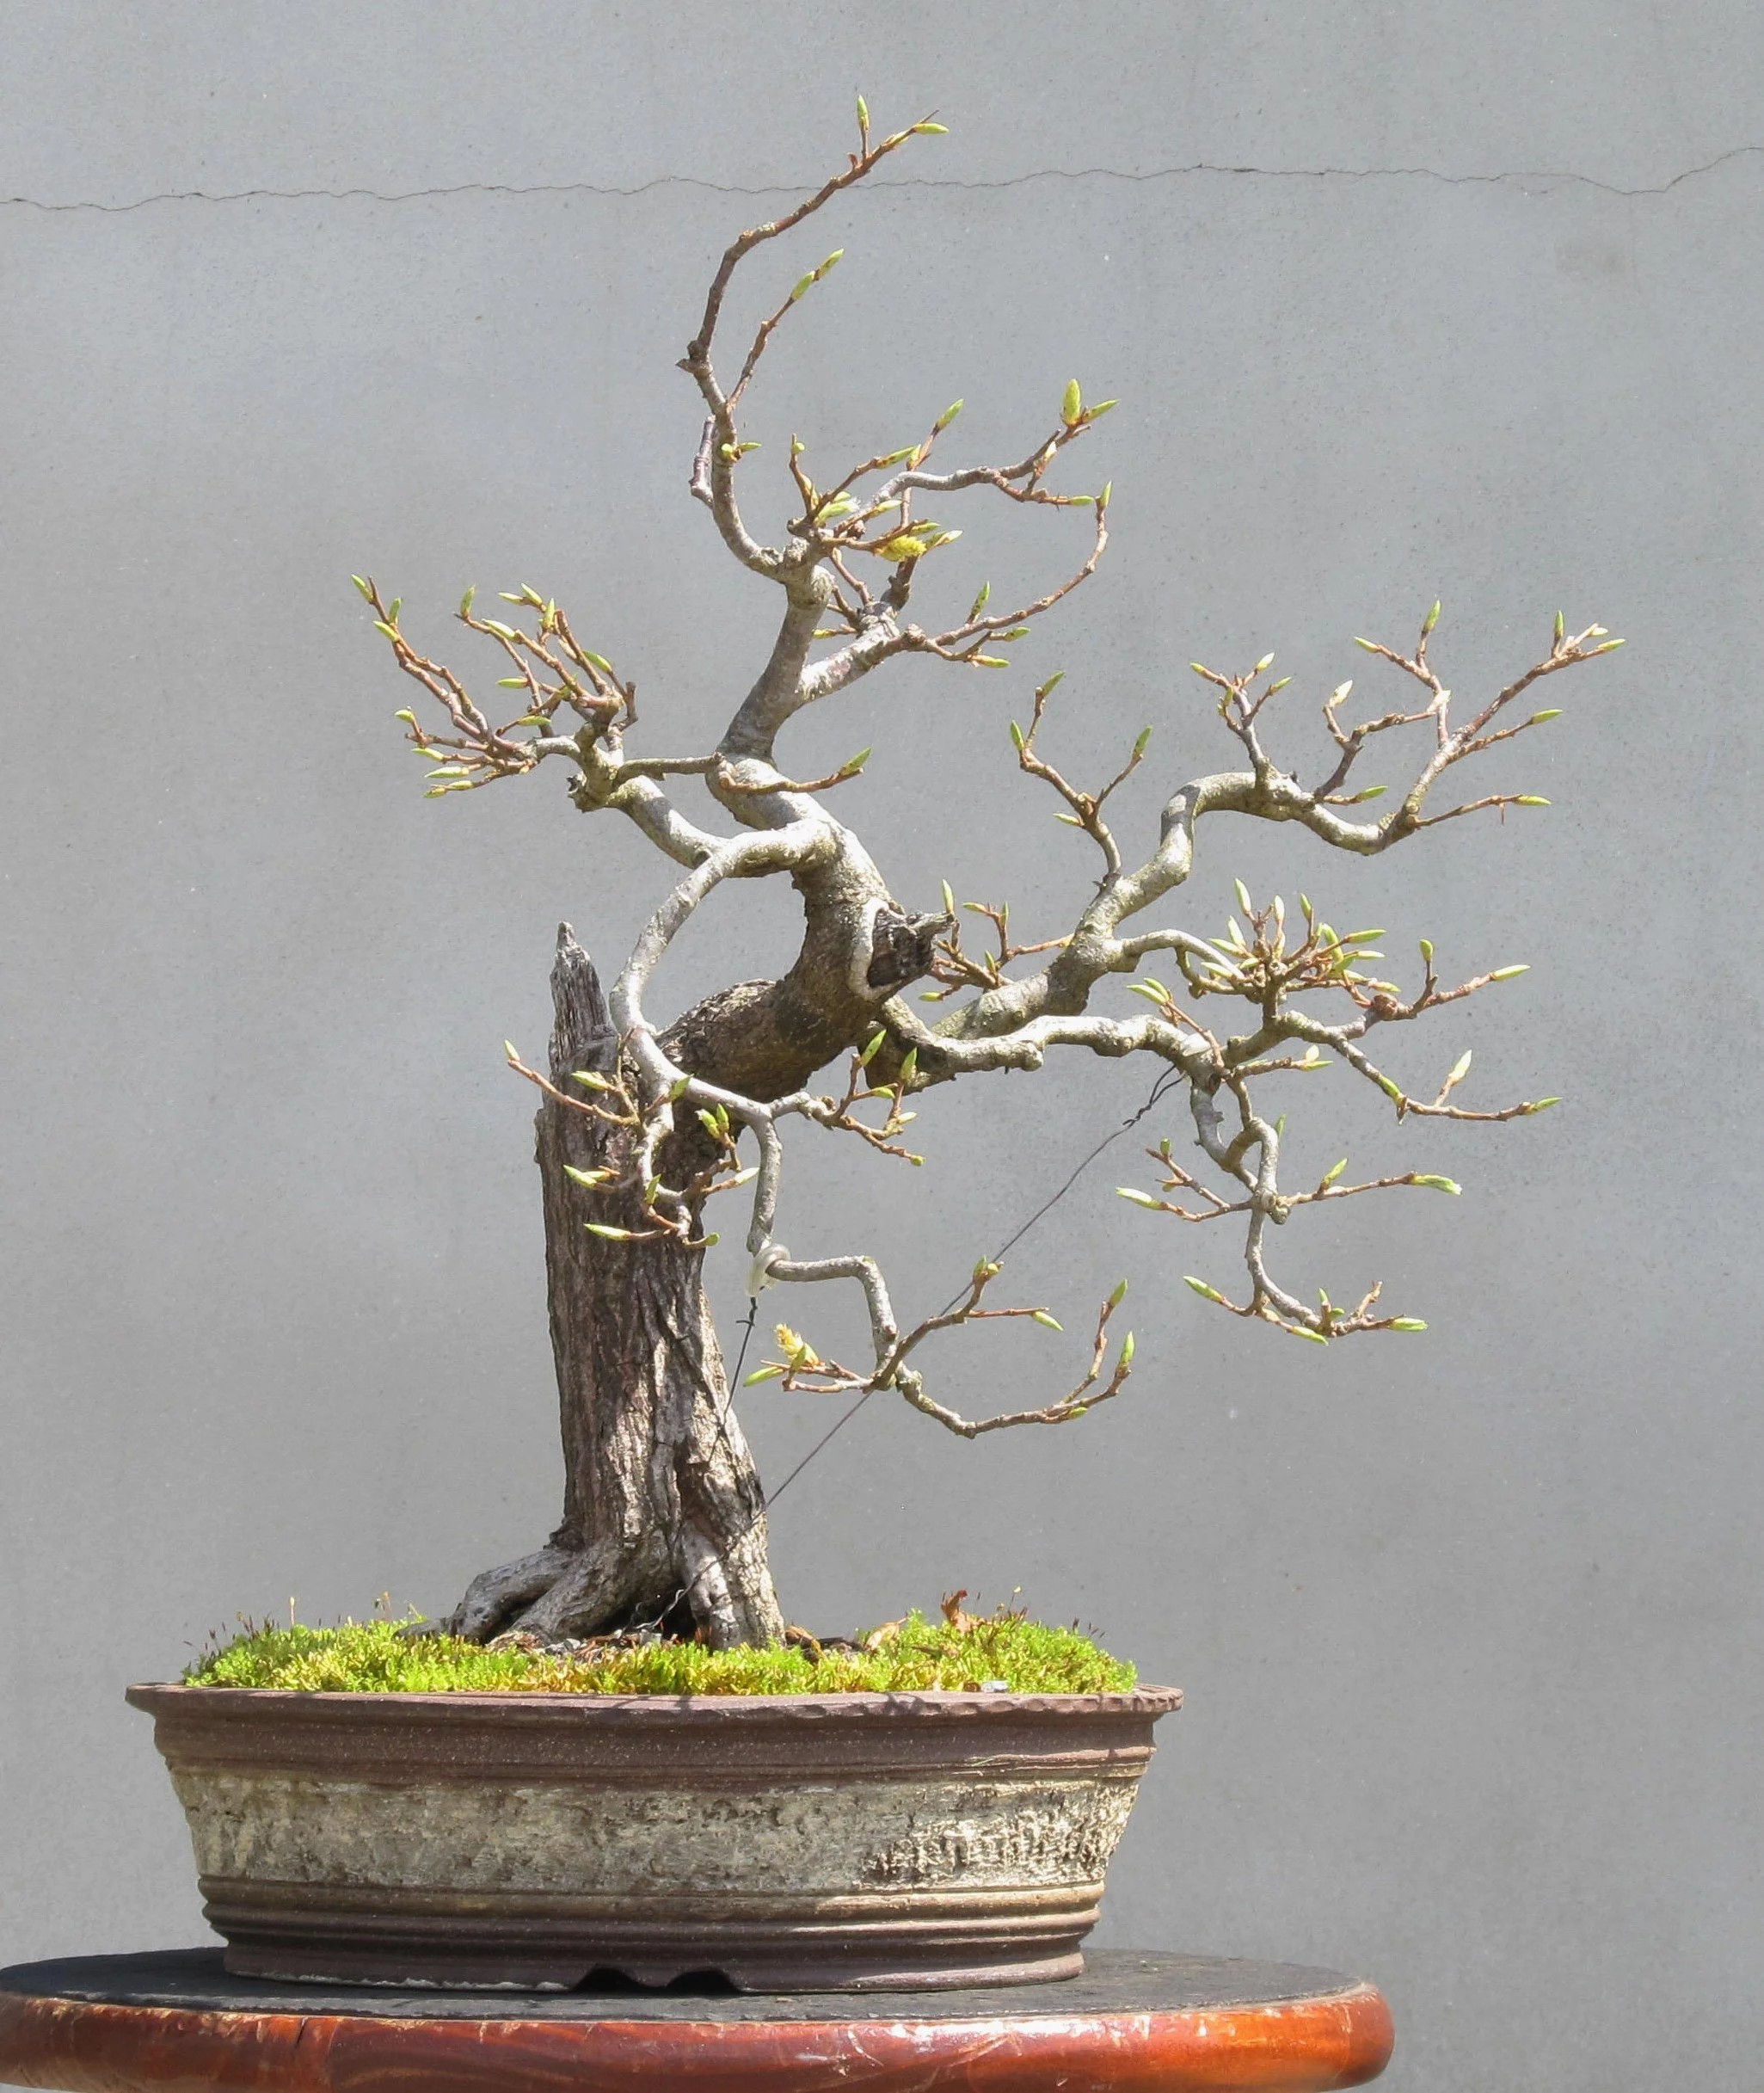
March 2014
March 2014
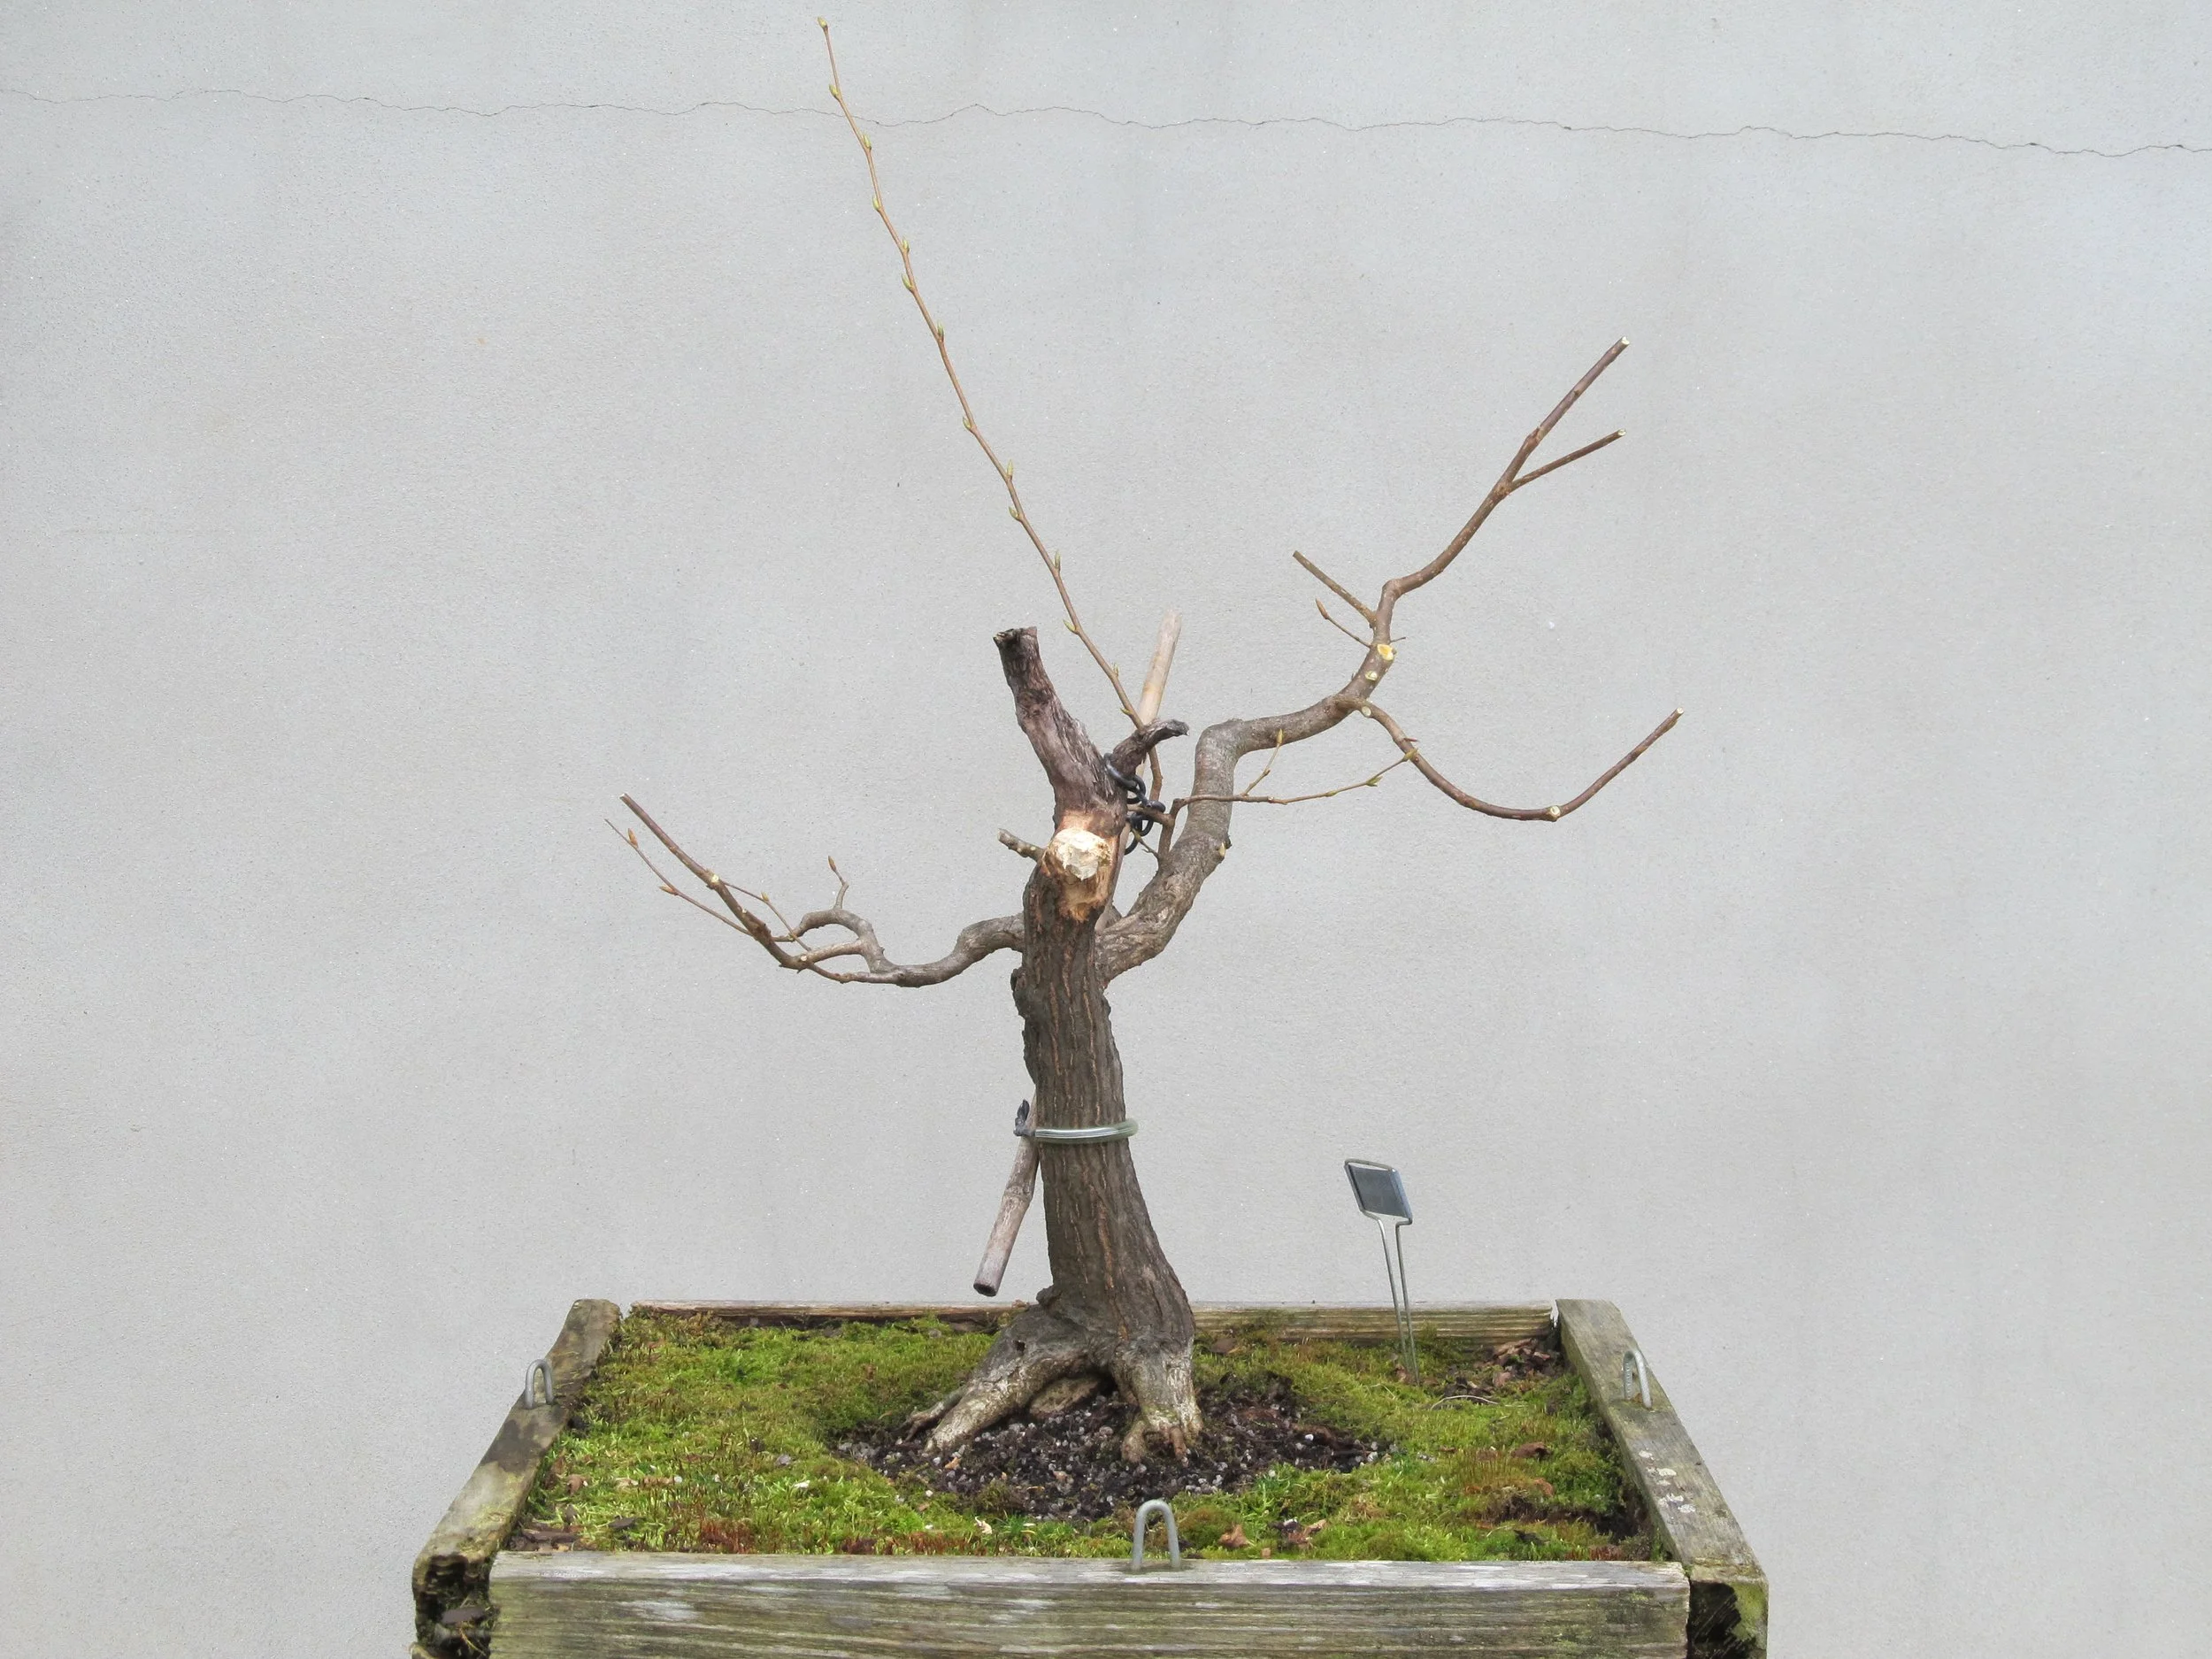
March 2014
March 2014
Here is what can be observed in the above images: The lowest branch on the hornbeam was chosen to be the continuation of the trunk line. The other branch was cut back to a stump and skinned of bark, thereby becoming part of the deadwood element remaining from when the trunk chop was done. A rod was attached to the trunk of the tree in such a manner as to provide stout anchorage for pulling a side branch into a strongly upward position. This turned out to be an important action and worth noting:
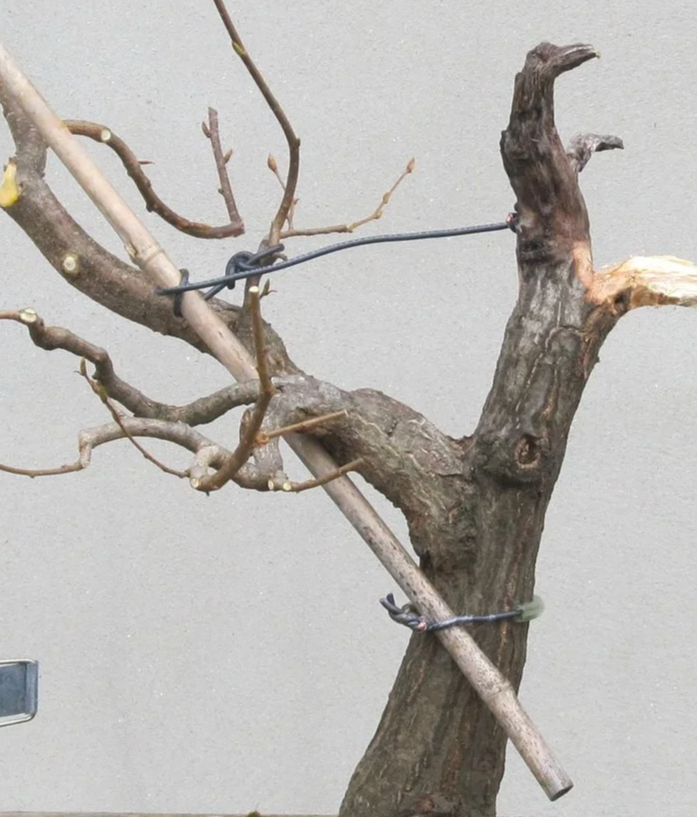
Again, let us take stock of the process: A decision was made to remove the upper branch and the remaining branch was then given a shape suggesting a continuation of the trunk line. In other words, the remaining branch was pruned with the idea that it was now the new top of the tree, and care was taken to give the new top the desired movement and taper. Thinking along those lines, a heavy branch coming off the base of what had been the lower branch was now positioned to be the lowest branch of the new crown.
Looking at the image below, the potential new top angles upward to the left side while the new lowest branch travels horizontally to the right:
The image above also gives a different perspective of the branch that has been yanked into a more upright position by means of a guy wire pulling off a rod strapped to the tree’s trunk. Why was so much trouble taken to make this adjustment? As I was looking at it, the repositioned branch was now aimed to grow into a space that needed filling. Thinking in terms of tree biology, a branch appearing in that position on a tree in nature having the same shape as the tree in the above photo would naturally grow upwards. Such a branch would have full access to the sun and no compelling reason to grow laterally. Why did I not reposition that branch using the customary wrap-around wiring method? The branch in question was young and would need several years to grow larger and stay set in its new position, which meant it would outgrow any wire wrapped around it. The training wire would need reapplication multiple times. The guy wire technique allows the training device to remain in place as long as needed with less chance for damage.
At this juncture, it might be said that the tree has been given a new design. Such a statement is true only to the extent that the new design is understood to be in transition. The design idea is not locked in. In naturalistic bonsai, the design process is both incremental and collaborative. In naturalistic bonsai design the tree’s agency is recognized and respected; the tree is partner to the design process.
The grower selects a subject plant and begins to work with it.
The plant responds to the work being done. If the response is positive, the plant will produce new growth.
The grower evaluates the new growth provided by the plant and makes decisions as to what new parts the plant will be allowed to keep and what will be removed.
The plant responds to the latest round of work and if the response is positive, more new growth will appear.
Back and forth this collaboration goes, for years and even decades. Ideally, the right design for the subject plant comes more clearly into focus each time the grower works with the plant. The plant determines what the grower has to work with. If the plant does not produce it, the grower cannot make use of it. The grower can only shape the plant in a design that suits the plant’s inclinations.
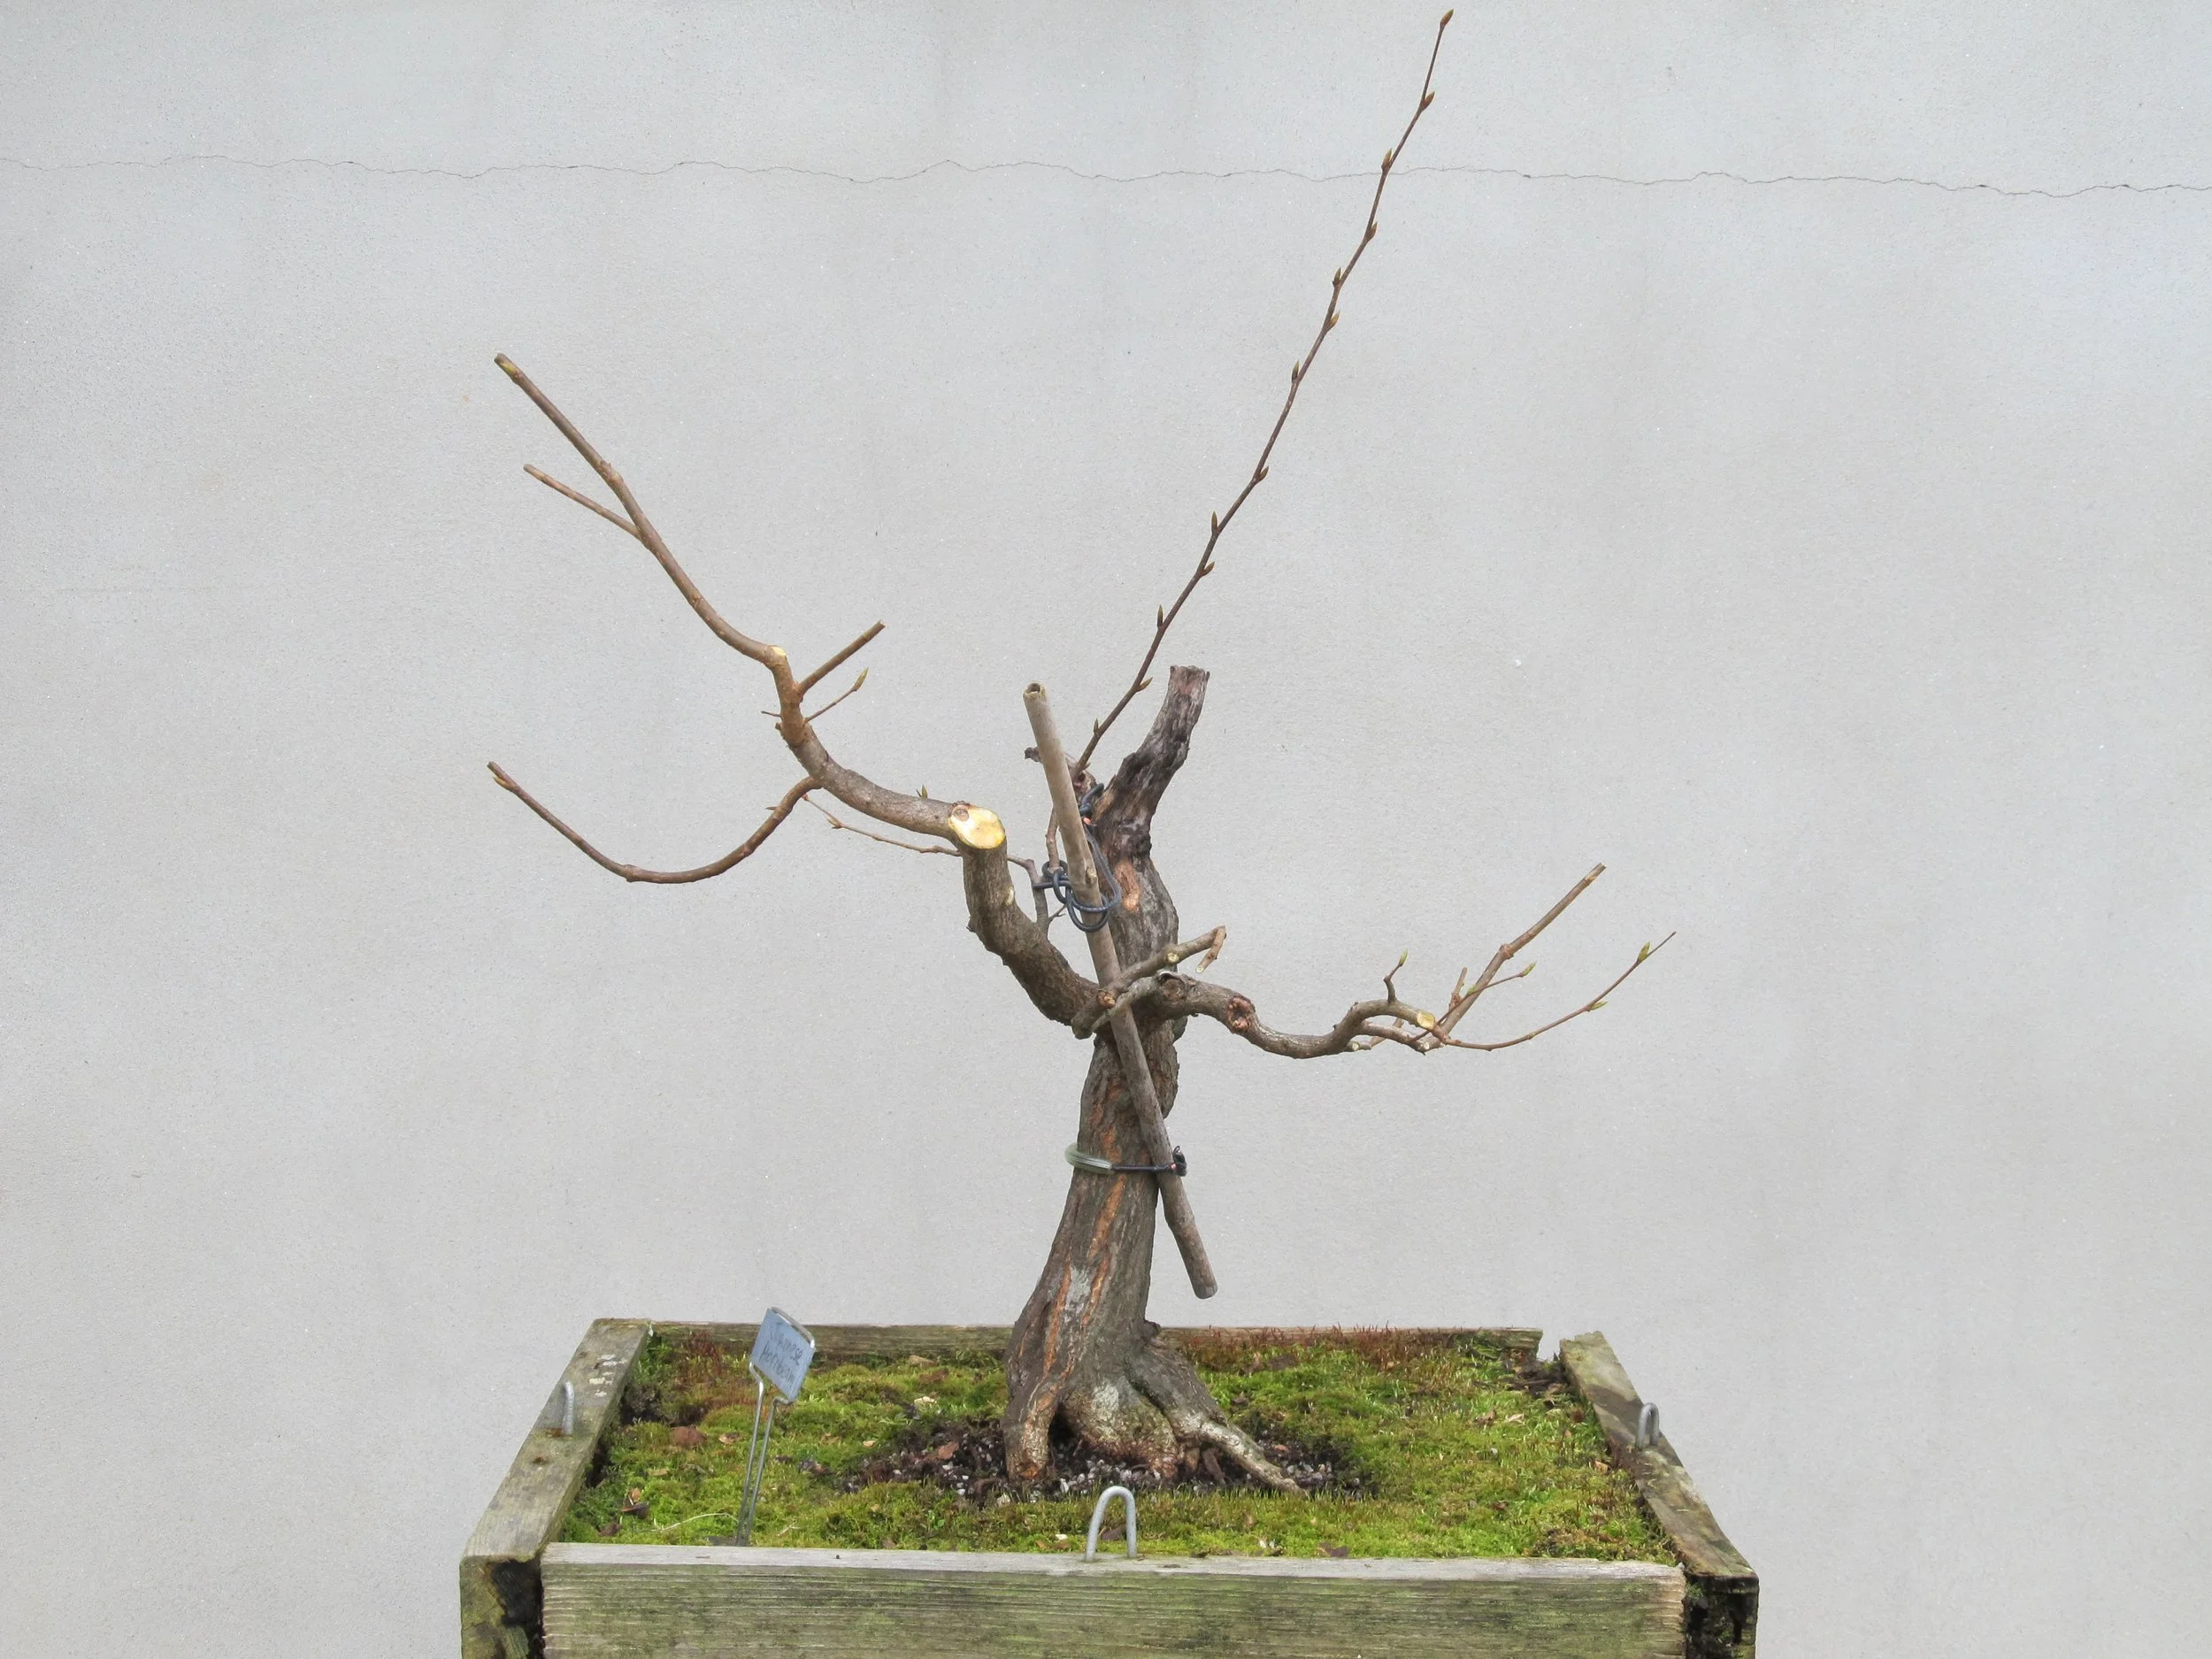
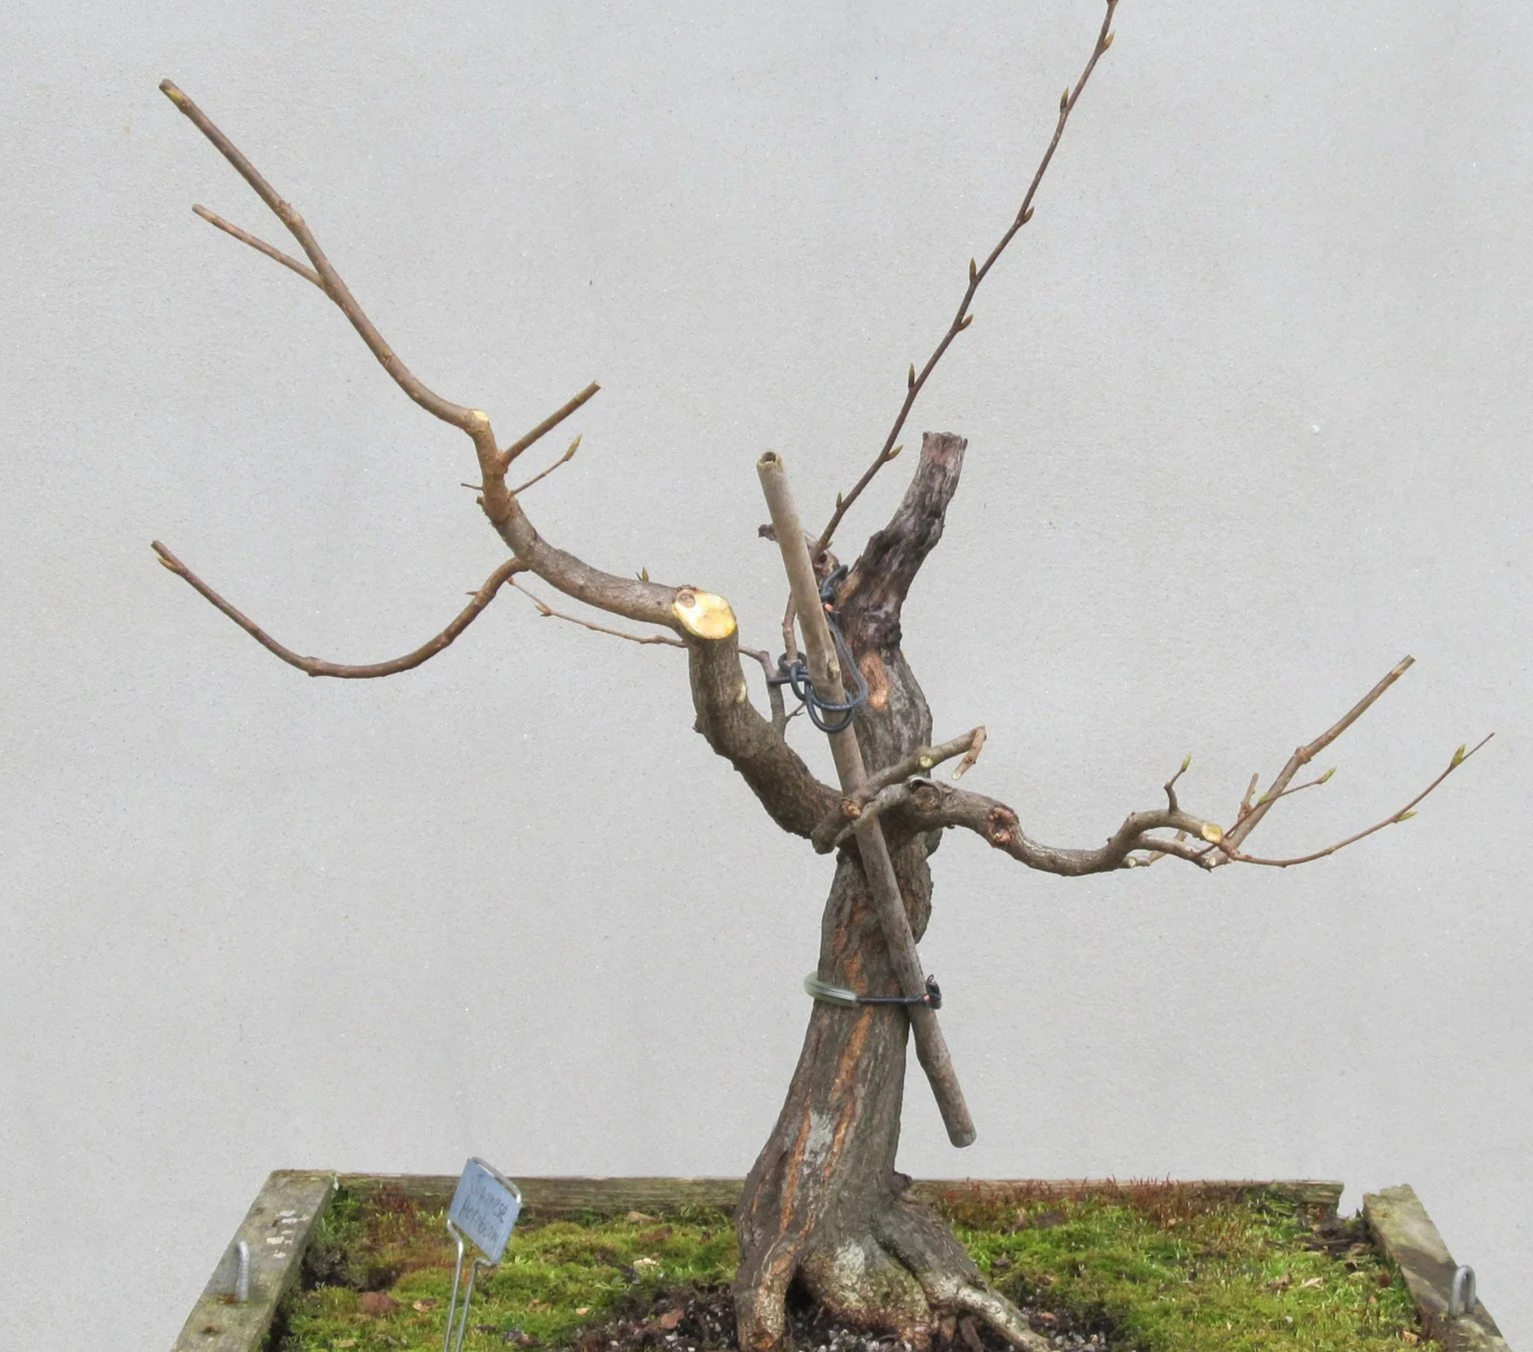
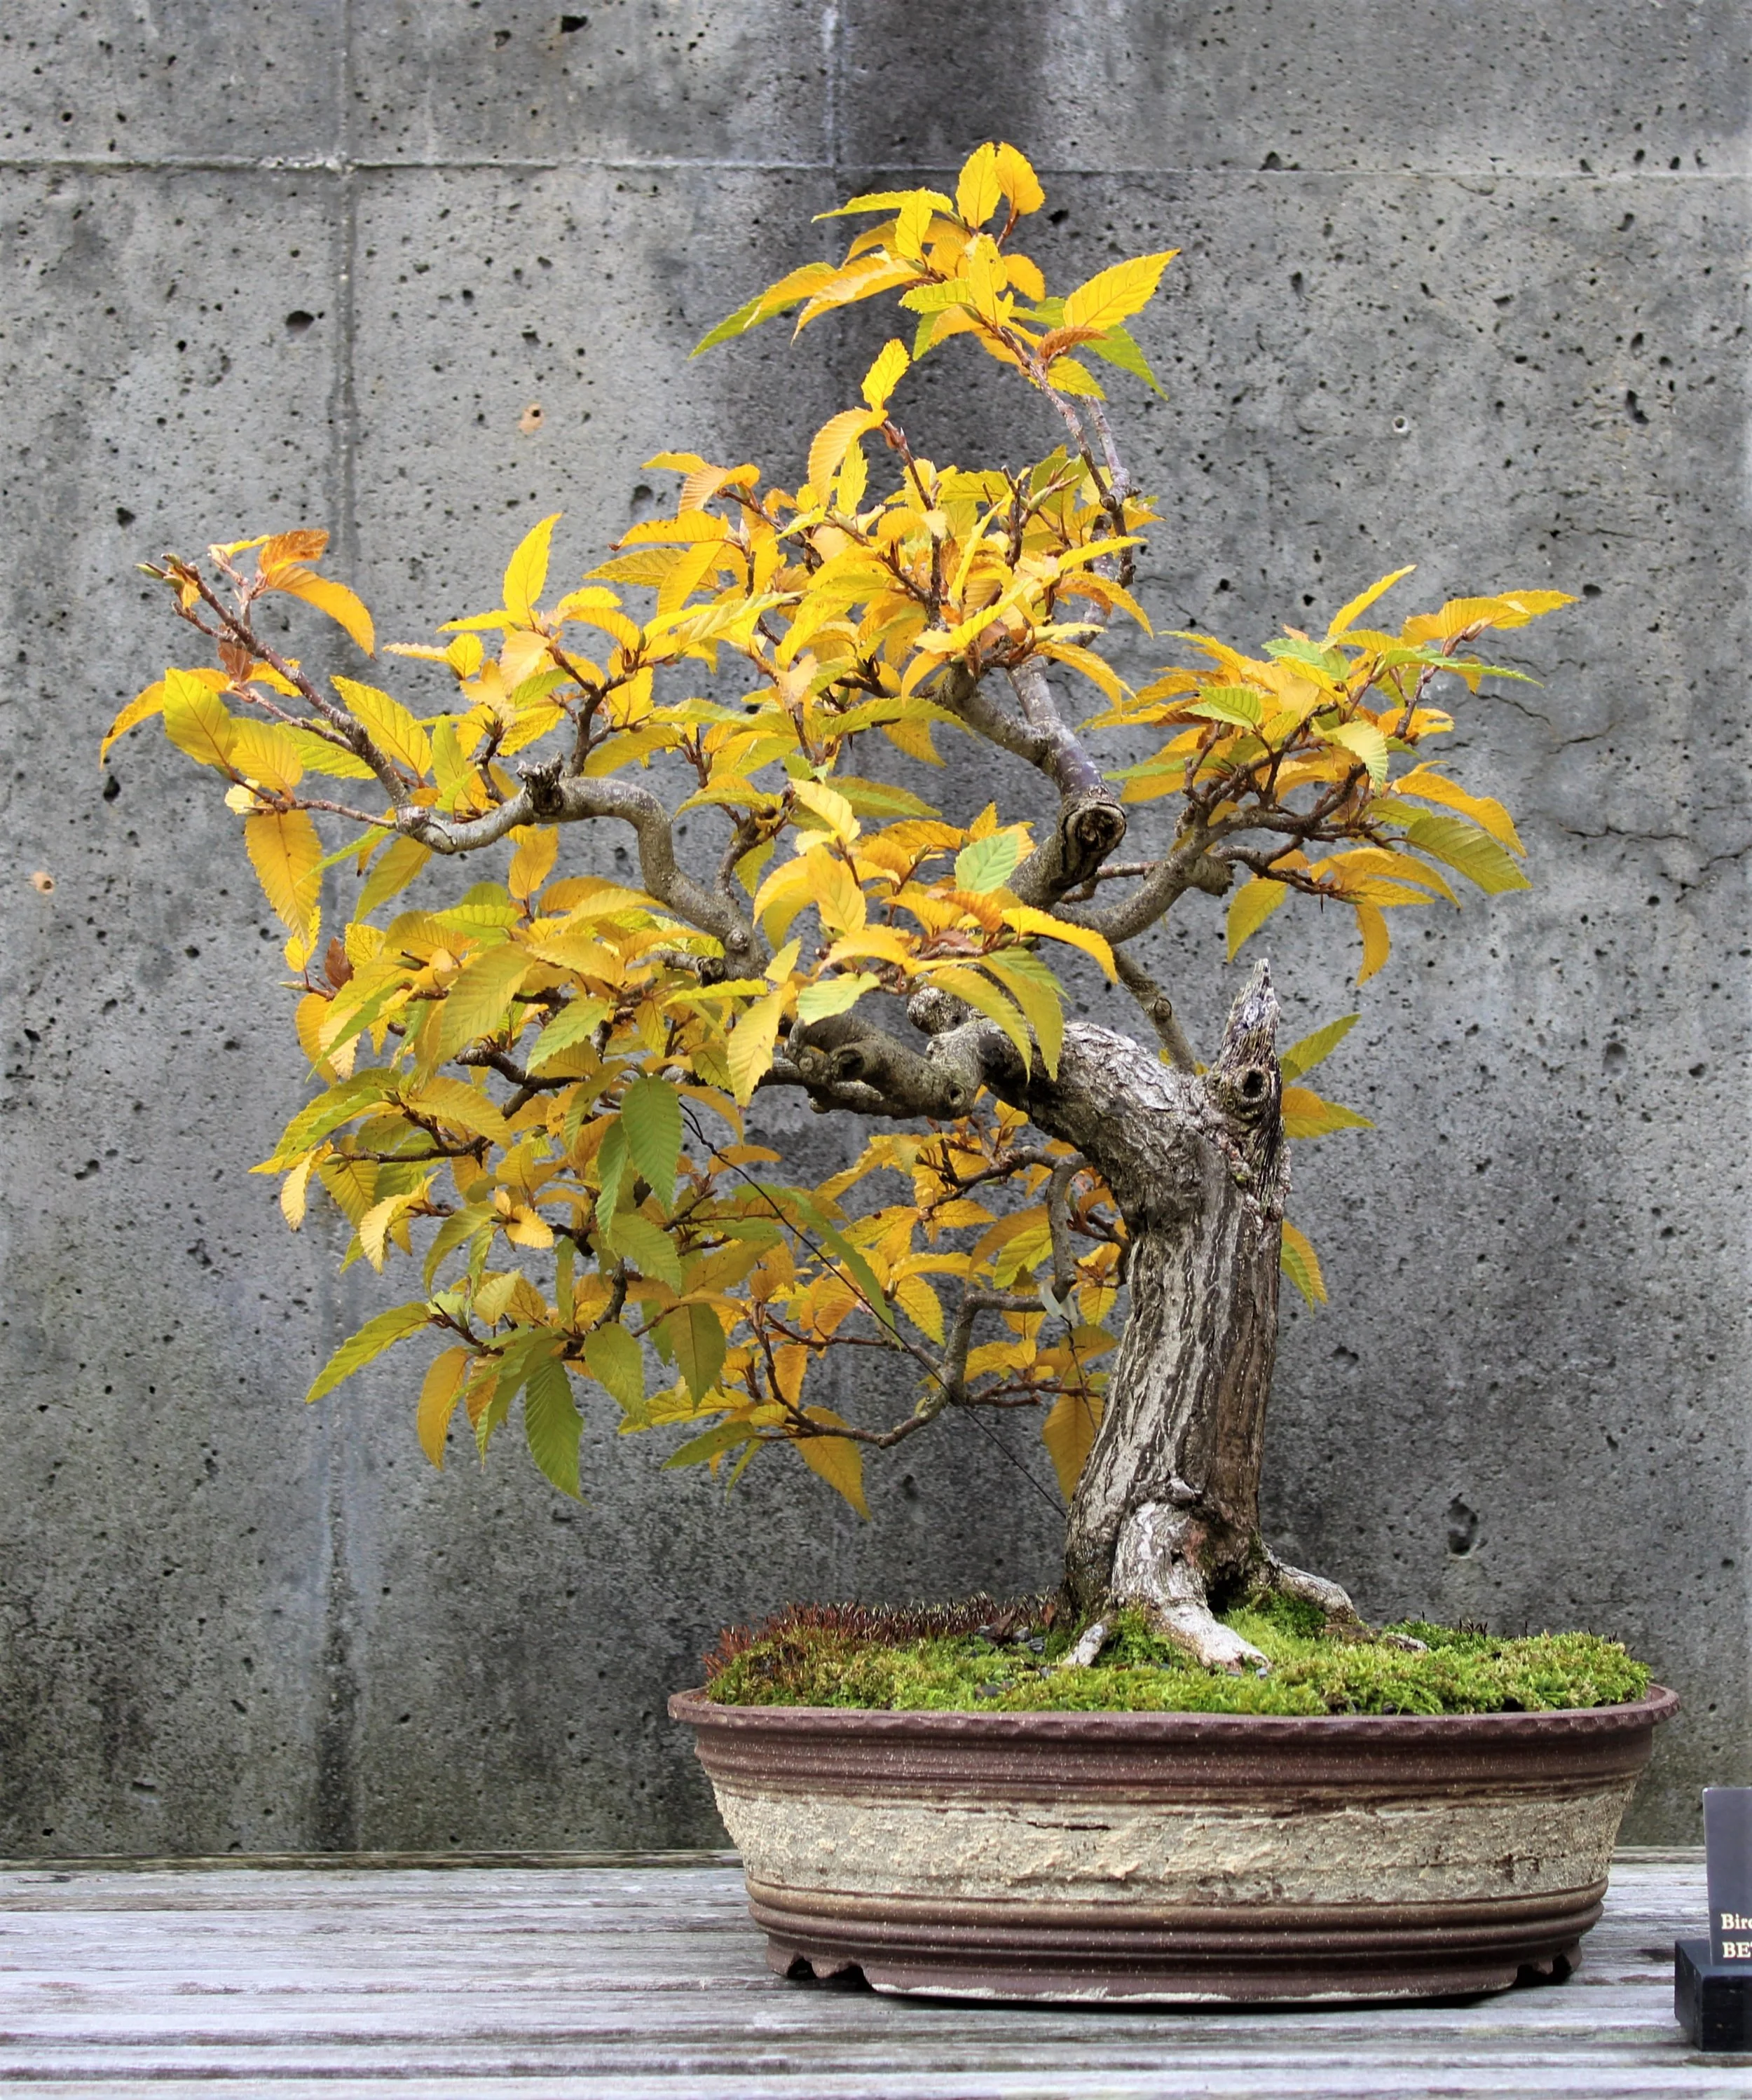
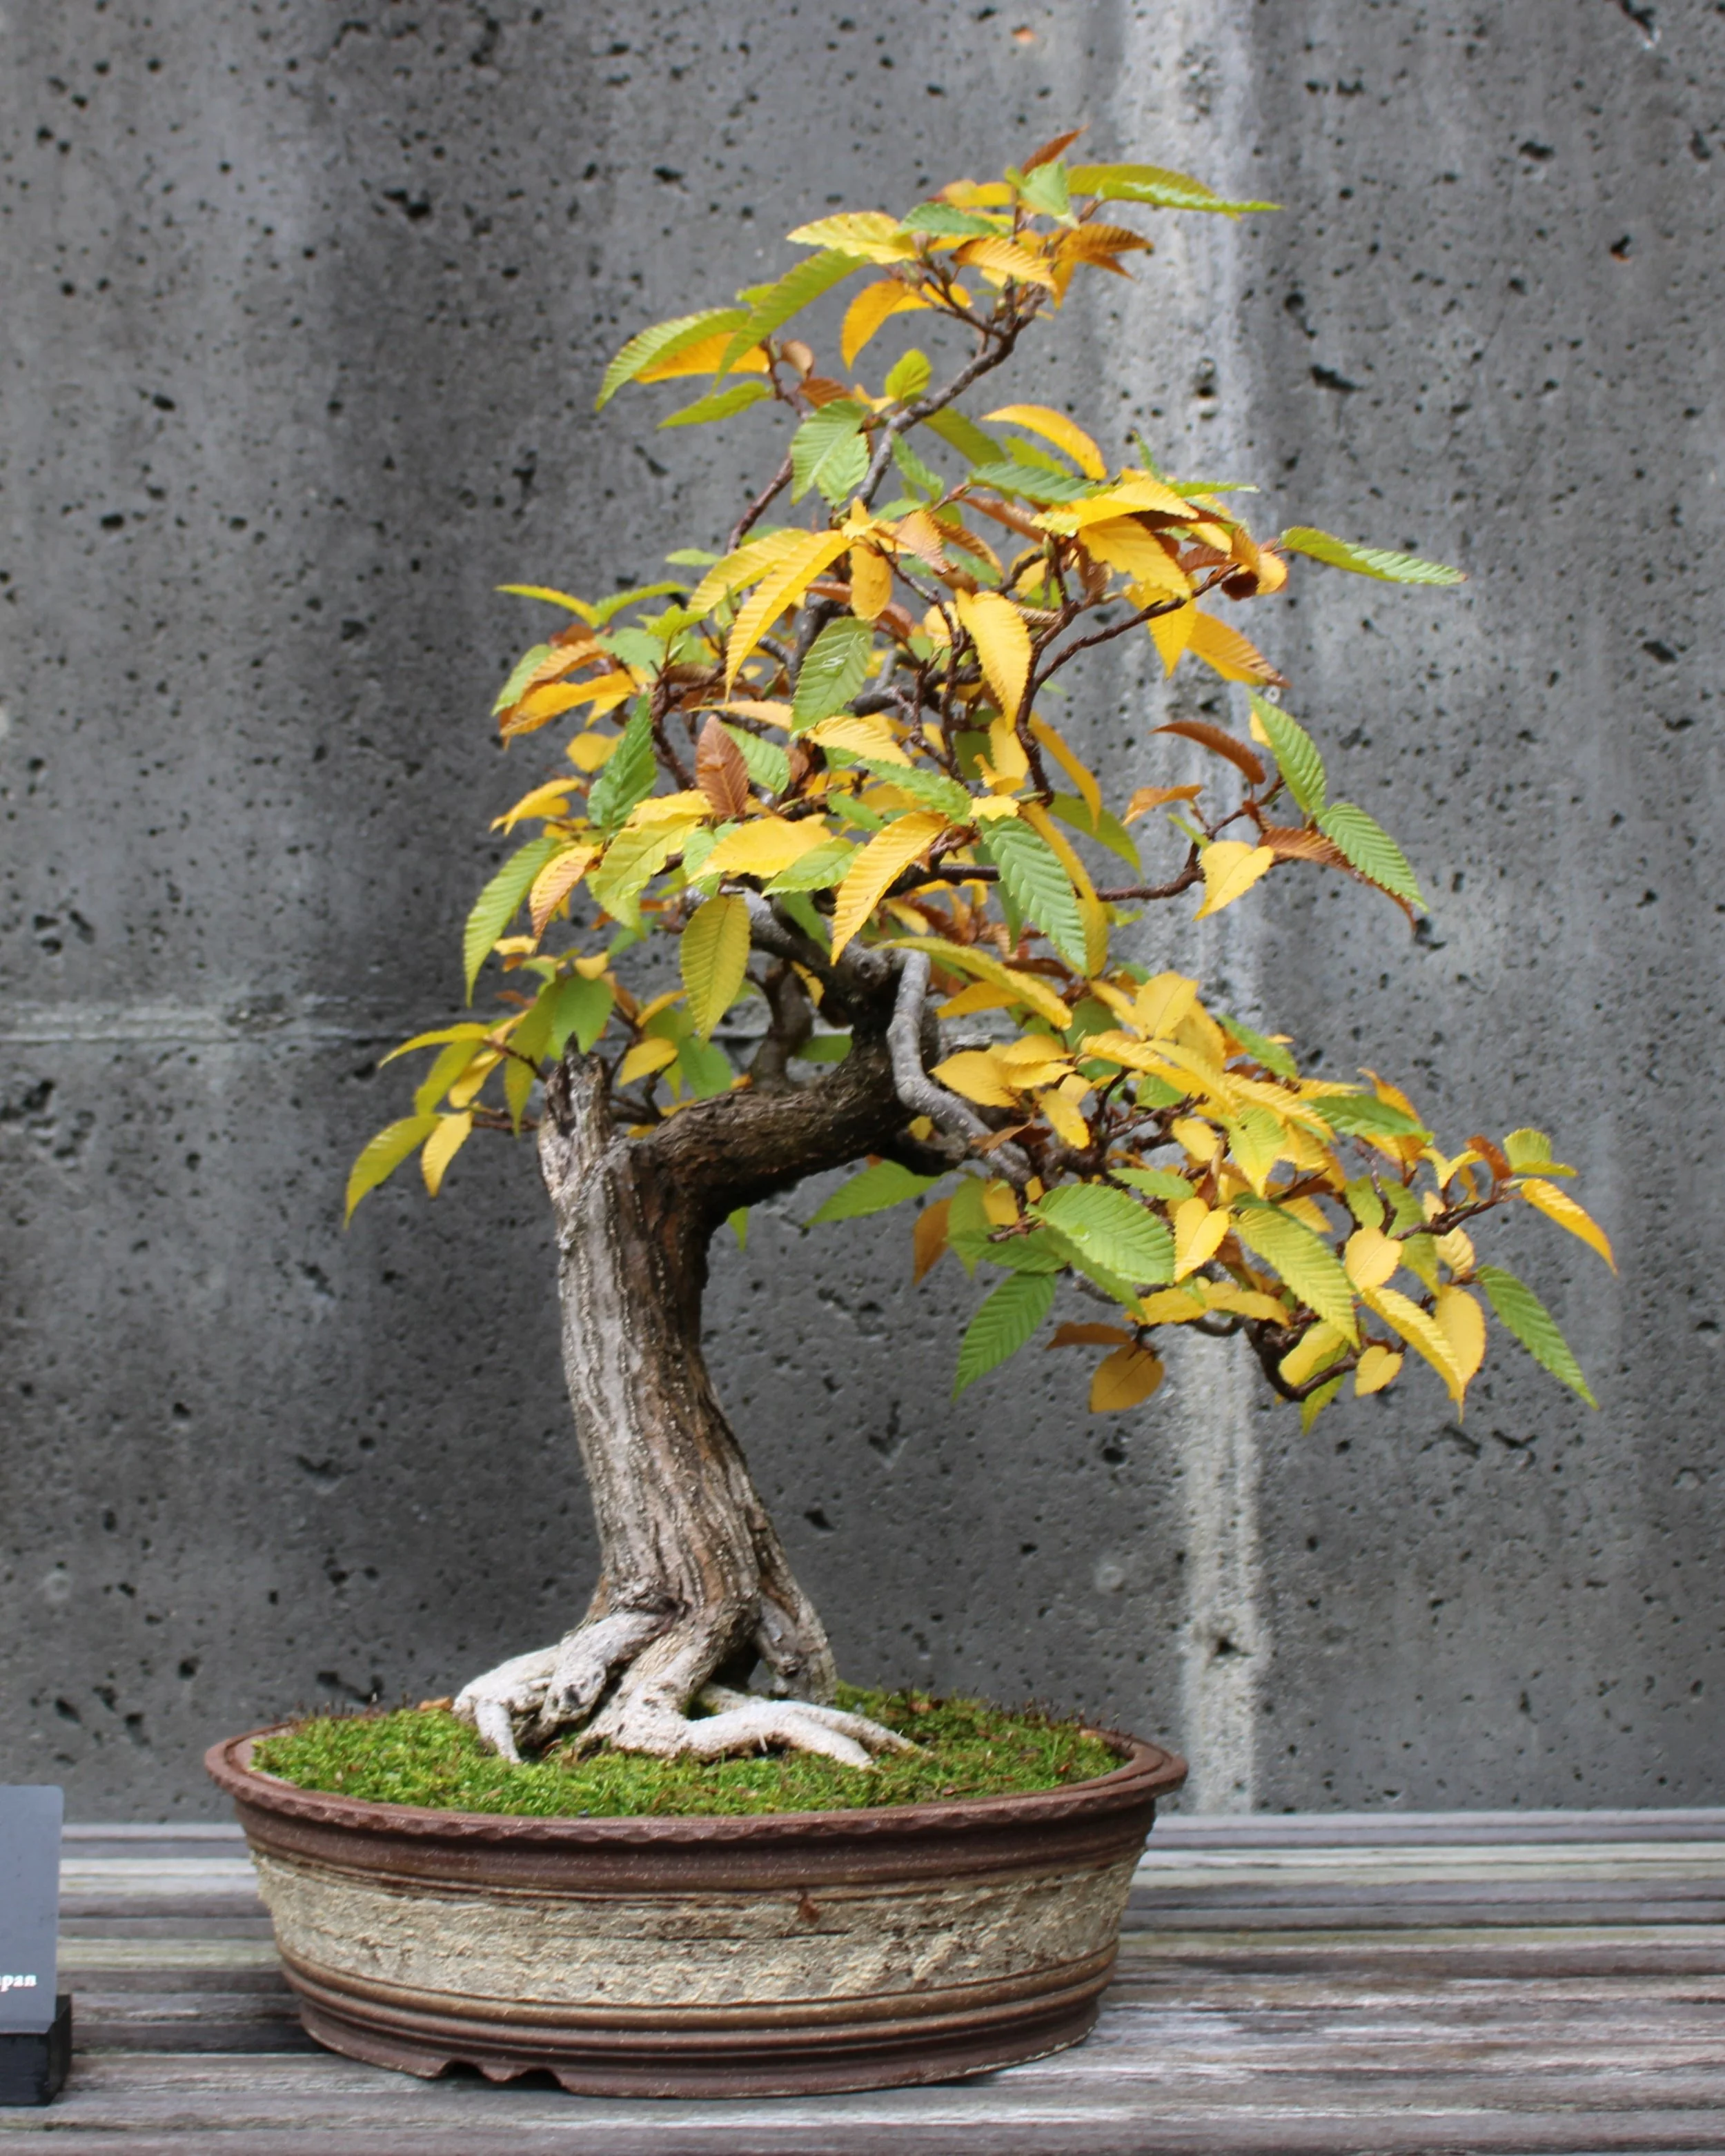
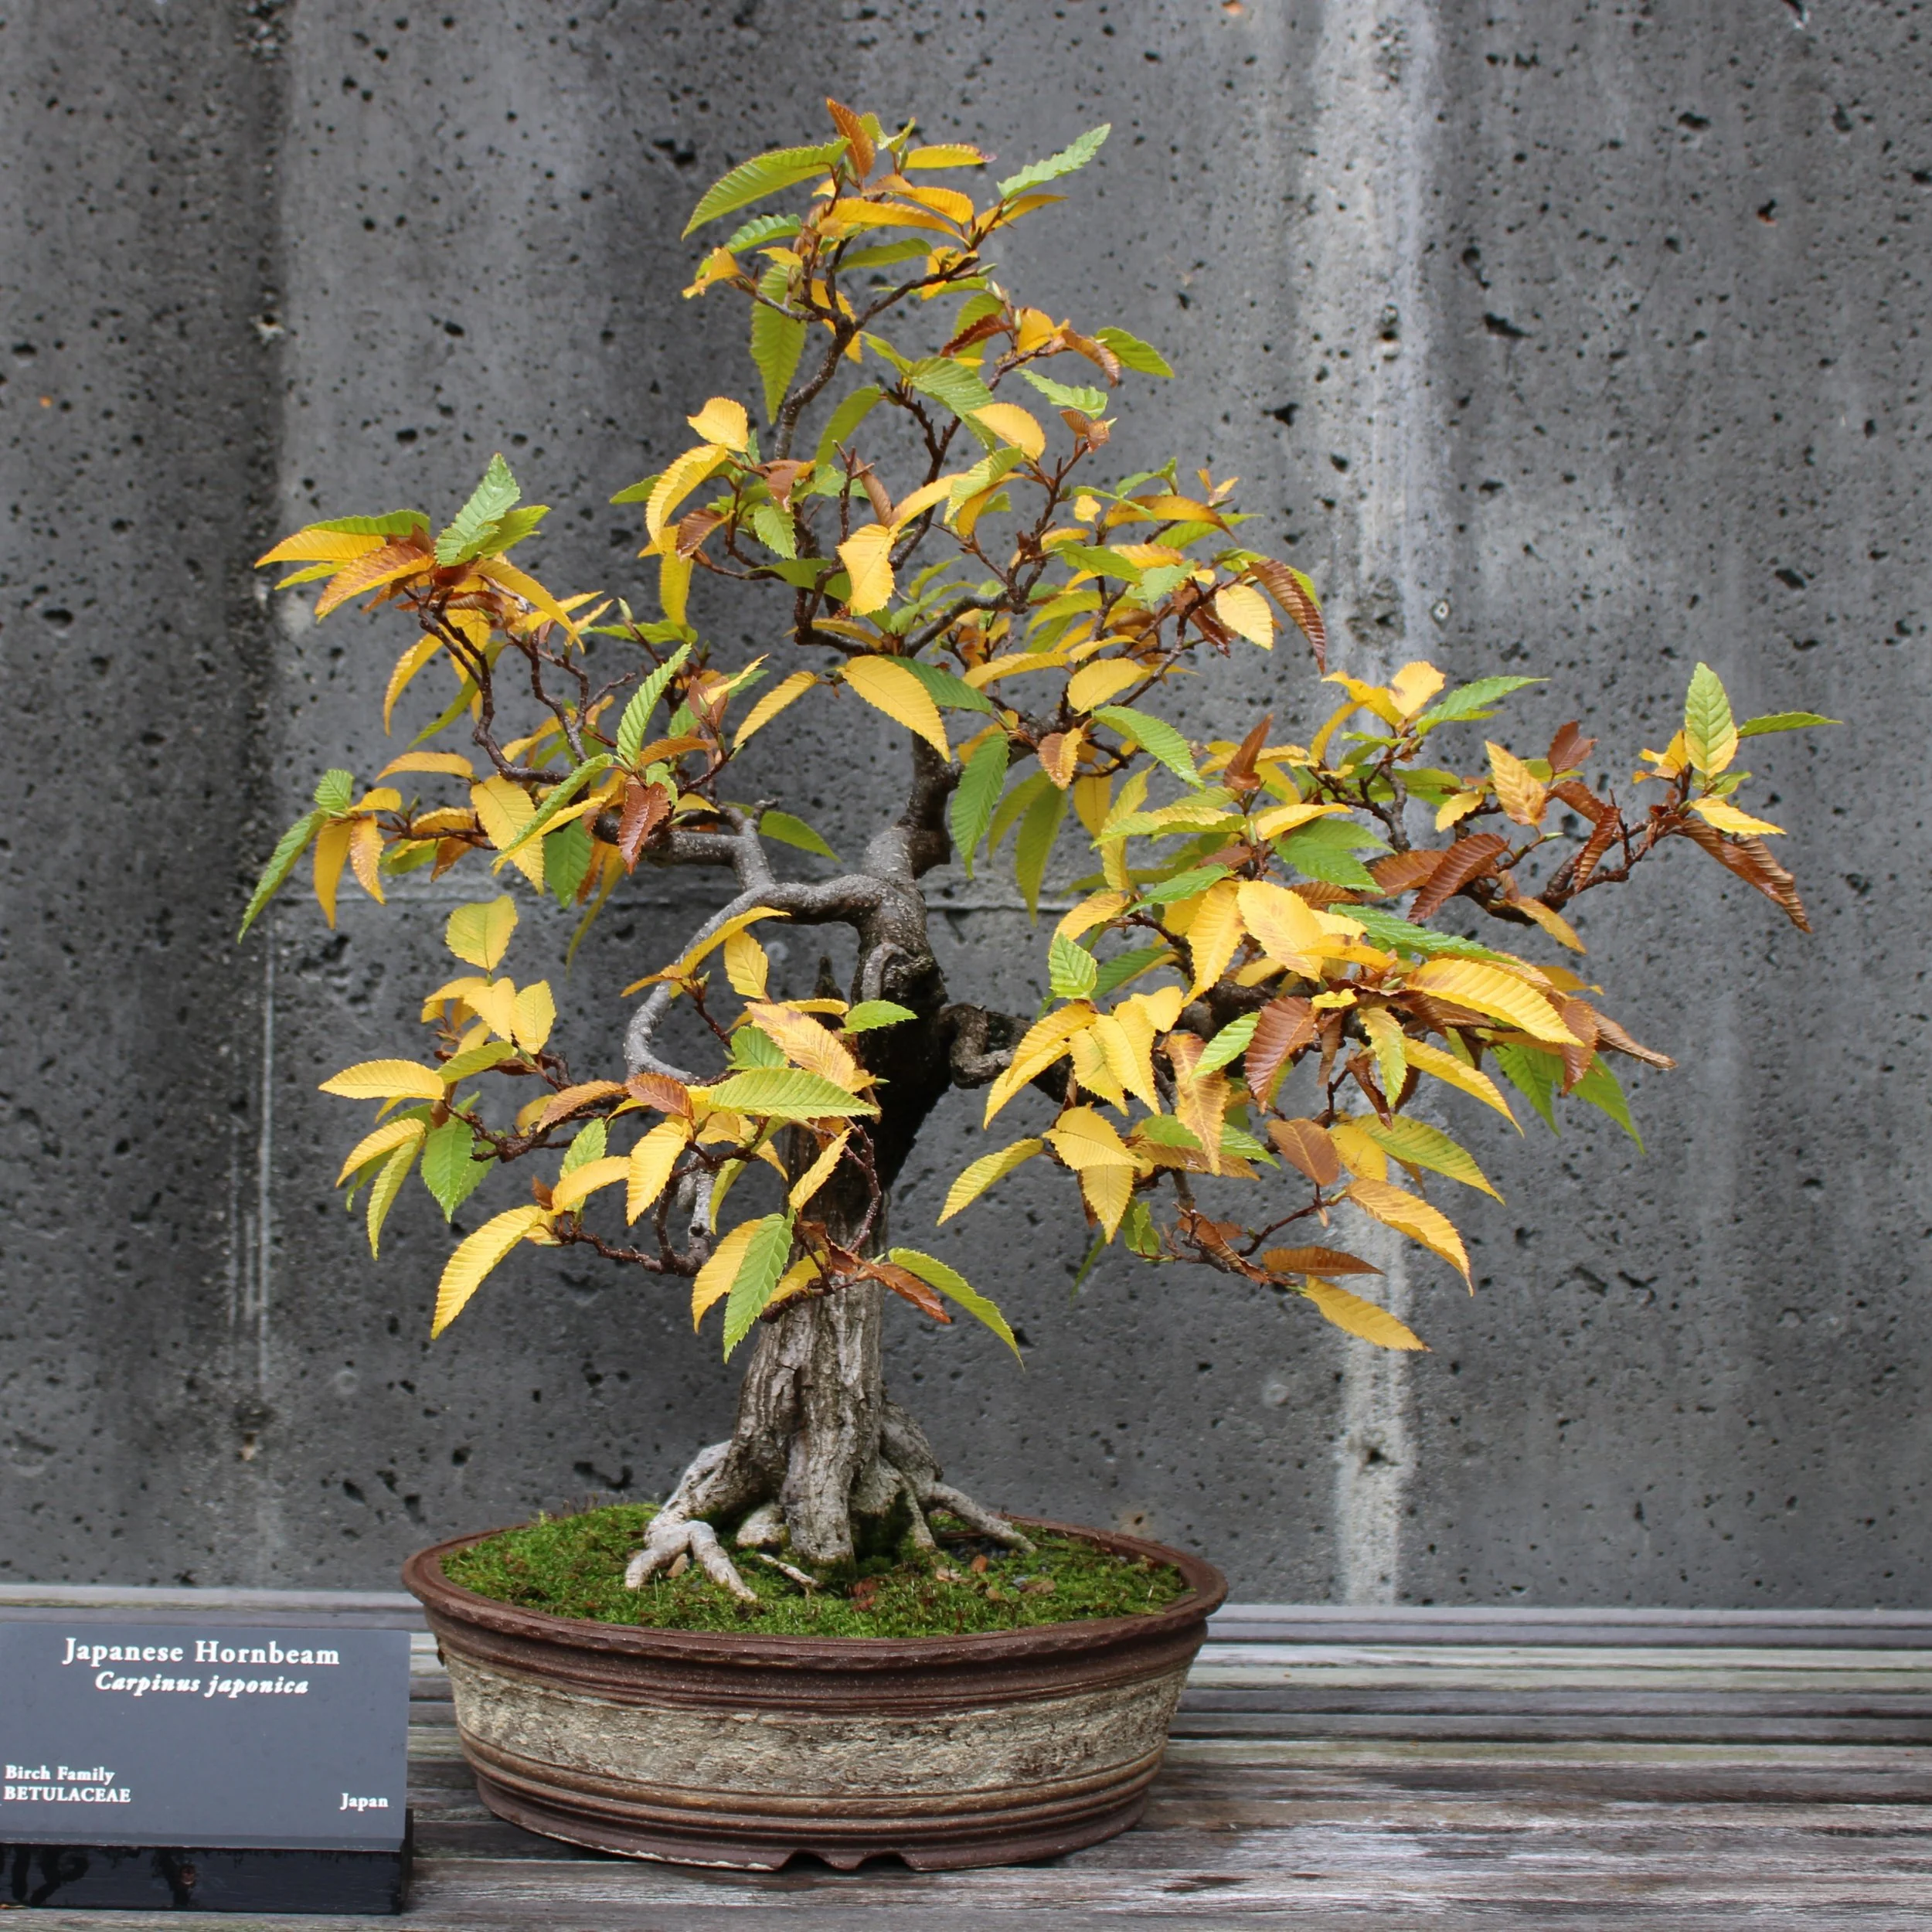
This process is what led to our Japanese hornbeam looking like this five years later:
January 2019
January 2019
There are no photographs to document the incremental steps taken between the 2014 images and those from 2019. The process was just as I described it, though. The plant and I went back and forth until we found a shape that suited both of us. As it happened, that small branch lifted upright by use of the rod and guy wire arrangement ultimately became the the continuation of the trunk line, the new top of the tree. This outcome was not necessarily foreseen in the design session of 2014, but the work done then made it possible for that branch to eventually evolve into that role. Only after time had passed and the tree grew some more did the new possibility present itself.
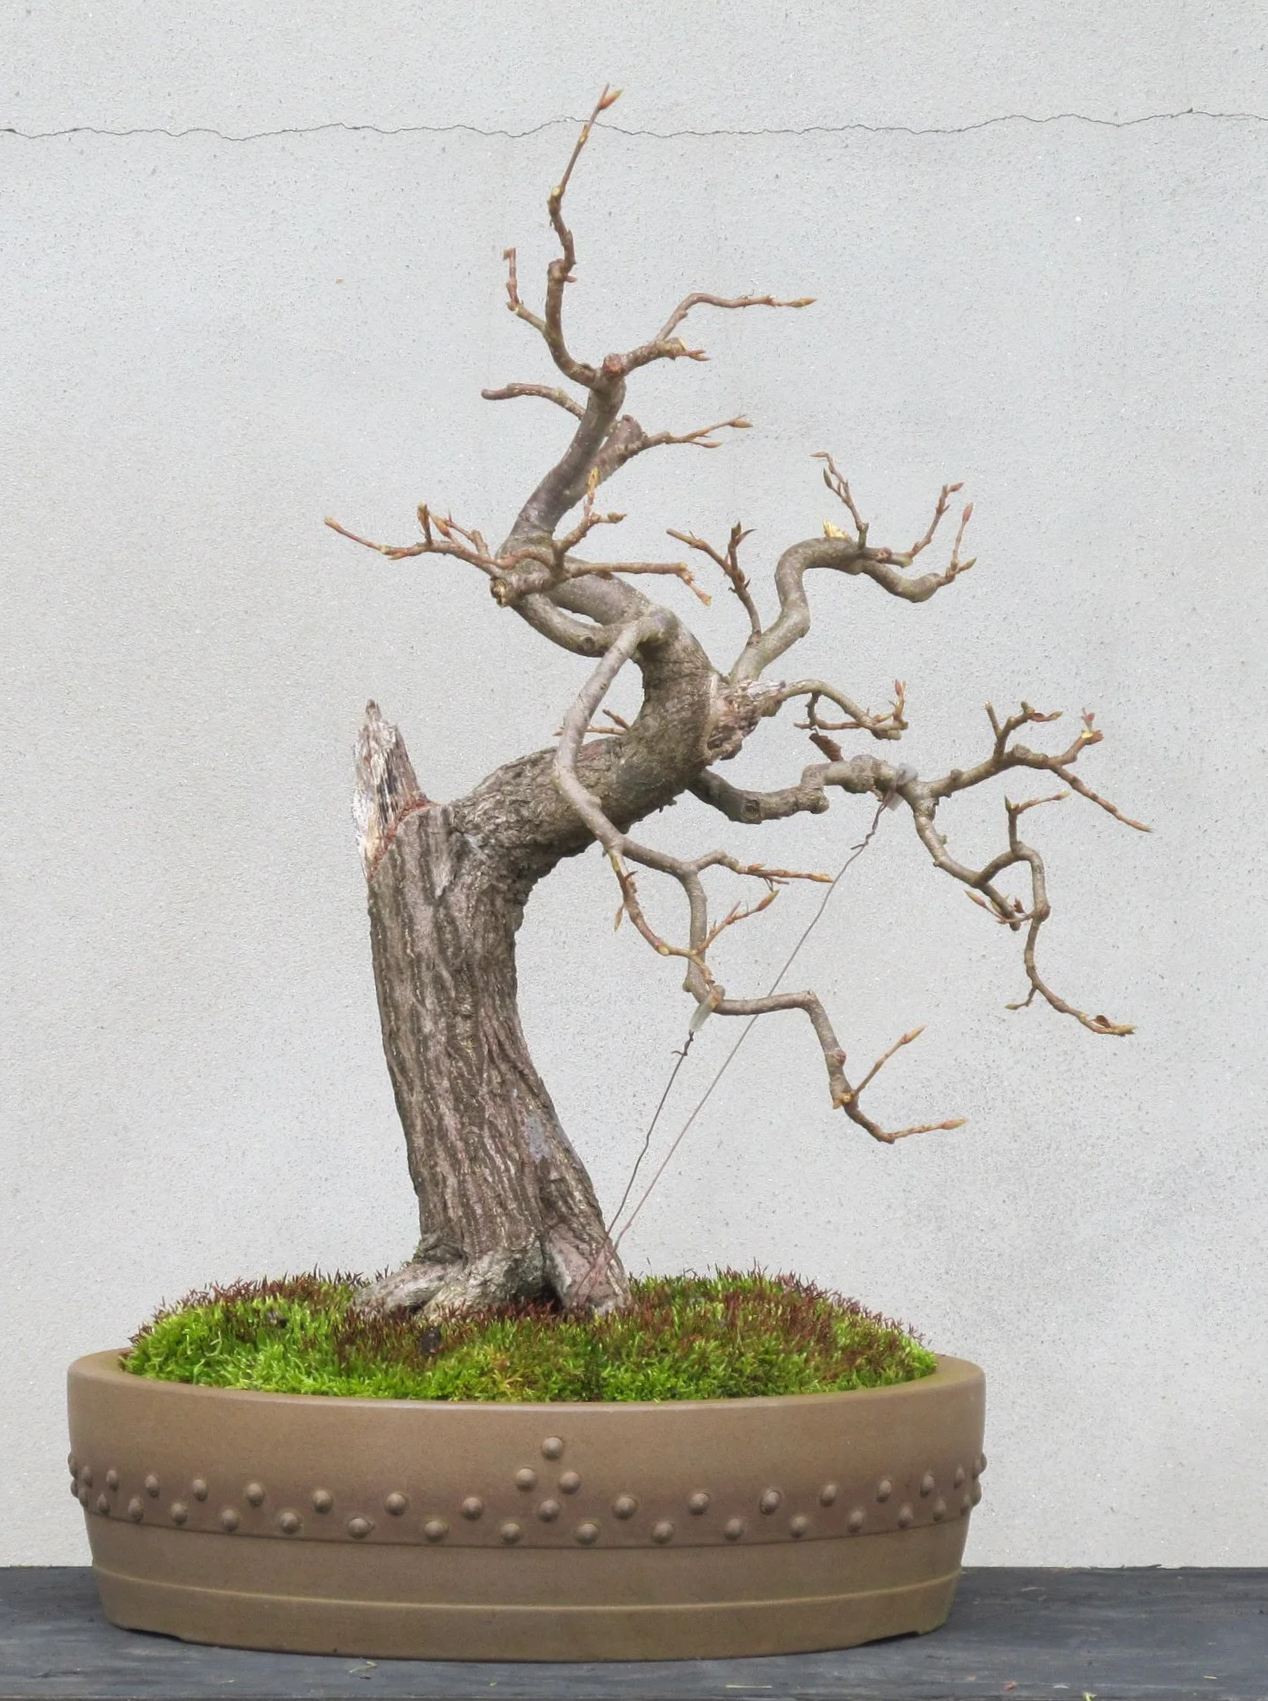
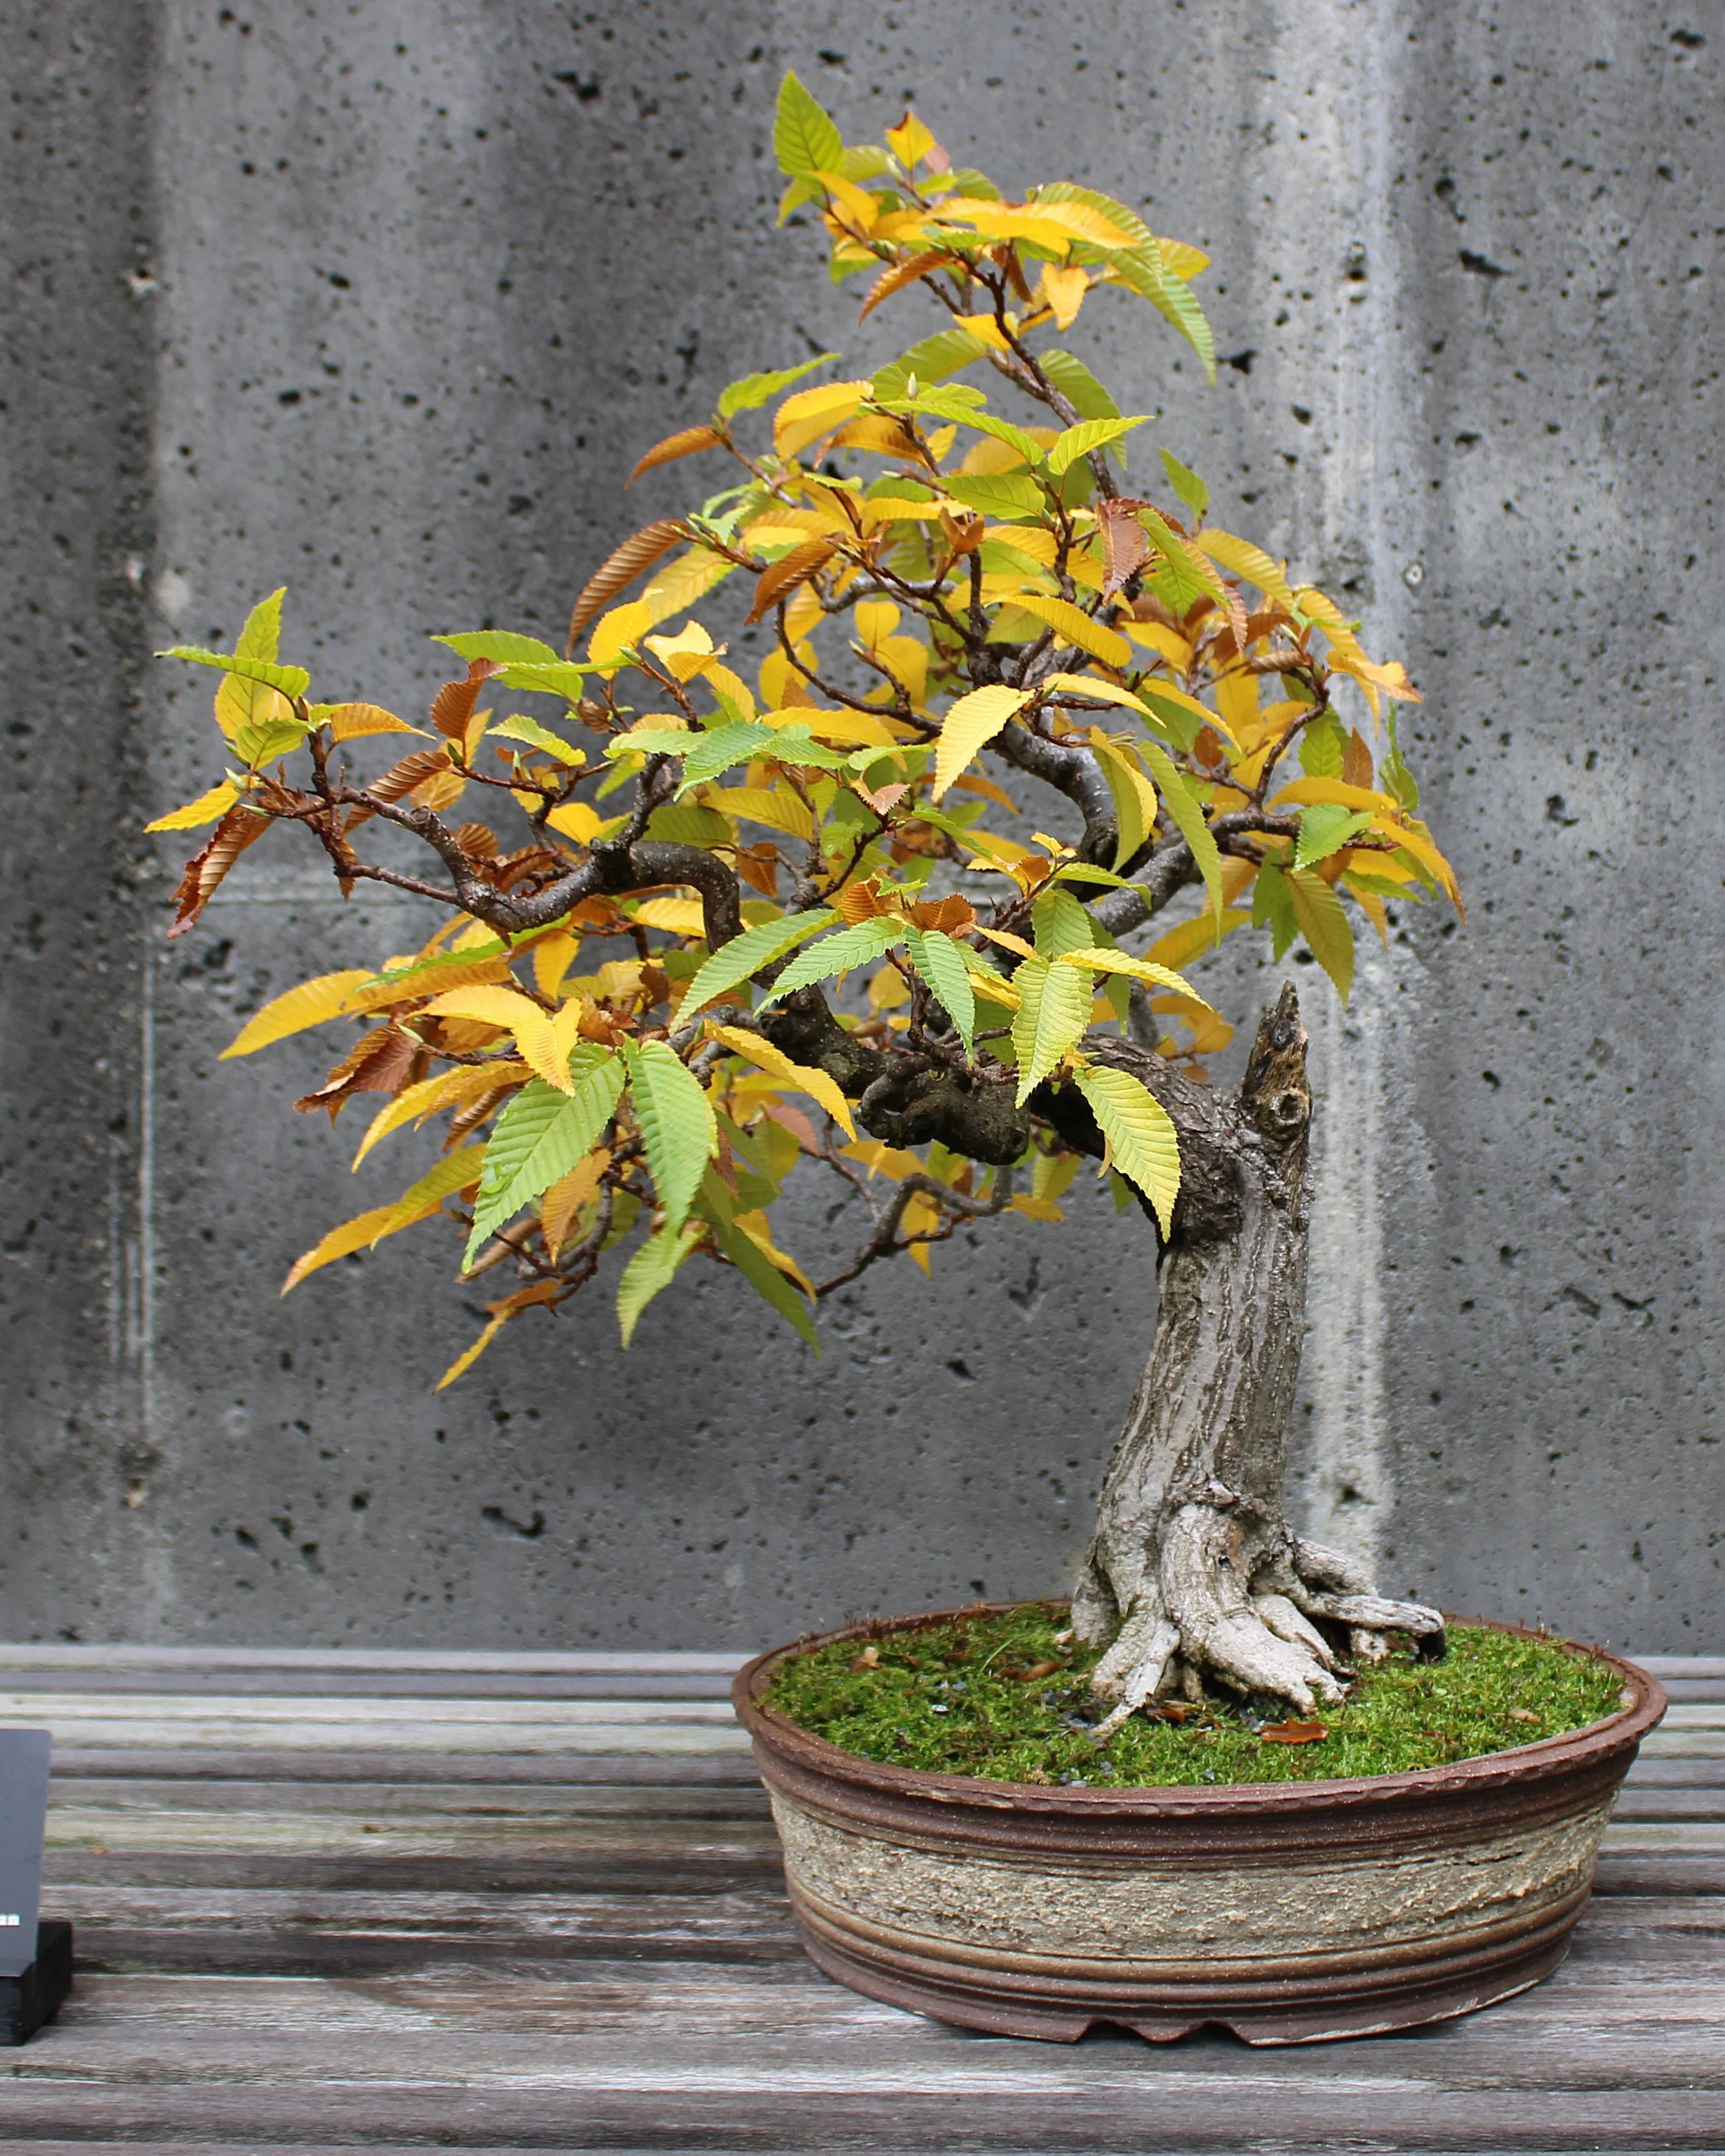
Just five months later, the Japanese hornbeam made its display debut in the bonsai garden, now potted in a container made by North Carolina potter Richard Boggs:
May 2019
So, was the little tree designed at this point? It was to the degree that I felt comfortable showing it publicly, but the design process continued. In truth, the design process goes on until the plant is no longer alive, or until it’s released from bonsai service, which does happen sometimes. If all goes well in the collaboration between grower and plant, the bonsai will become increasingly refined and its design more fully realized as the years pass.
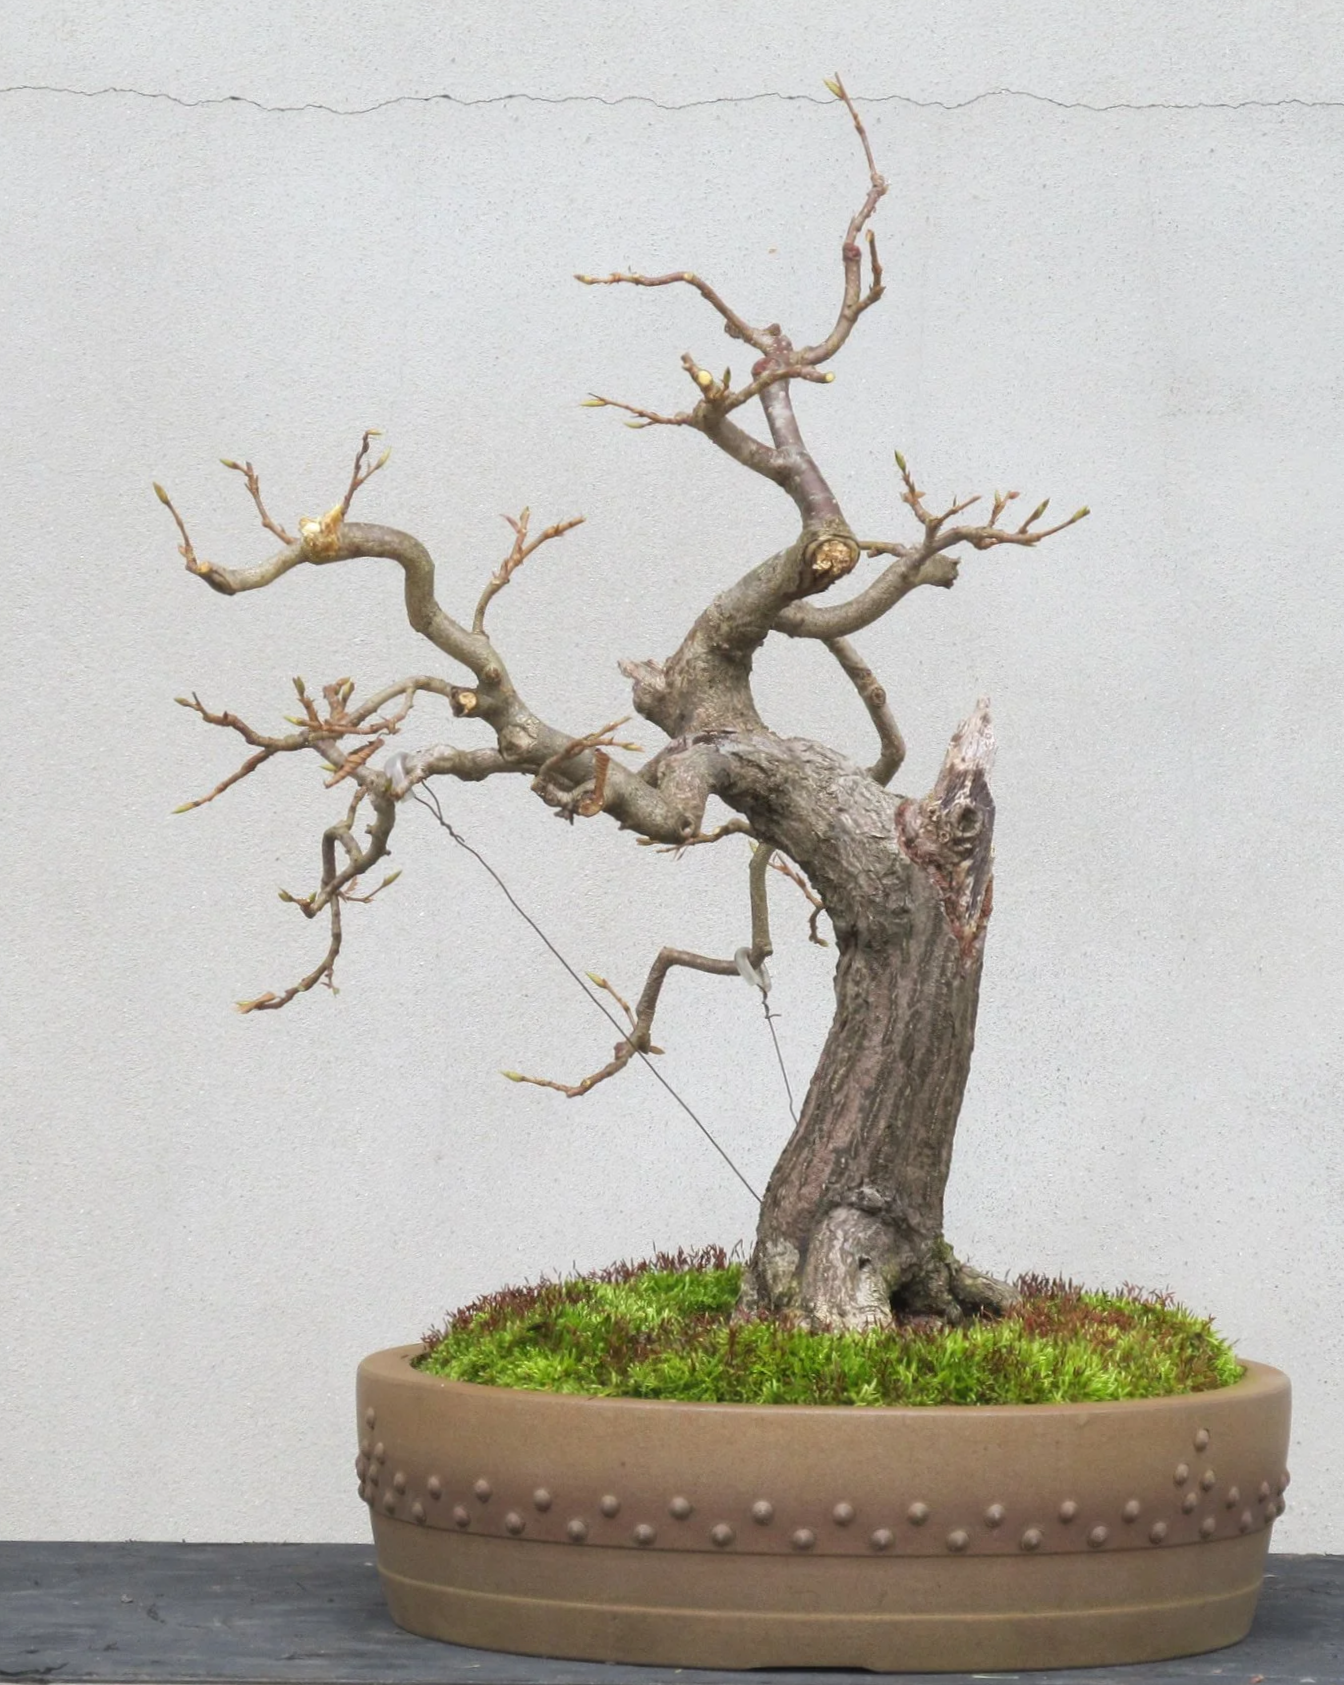
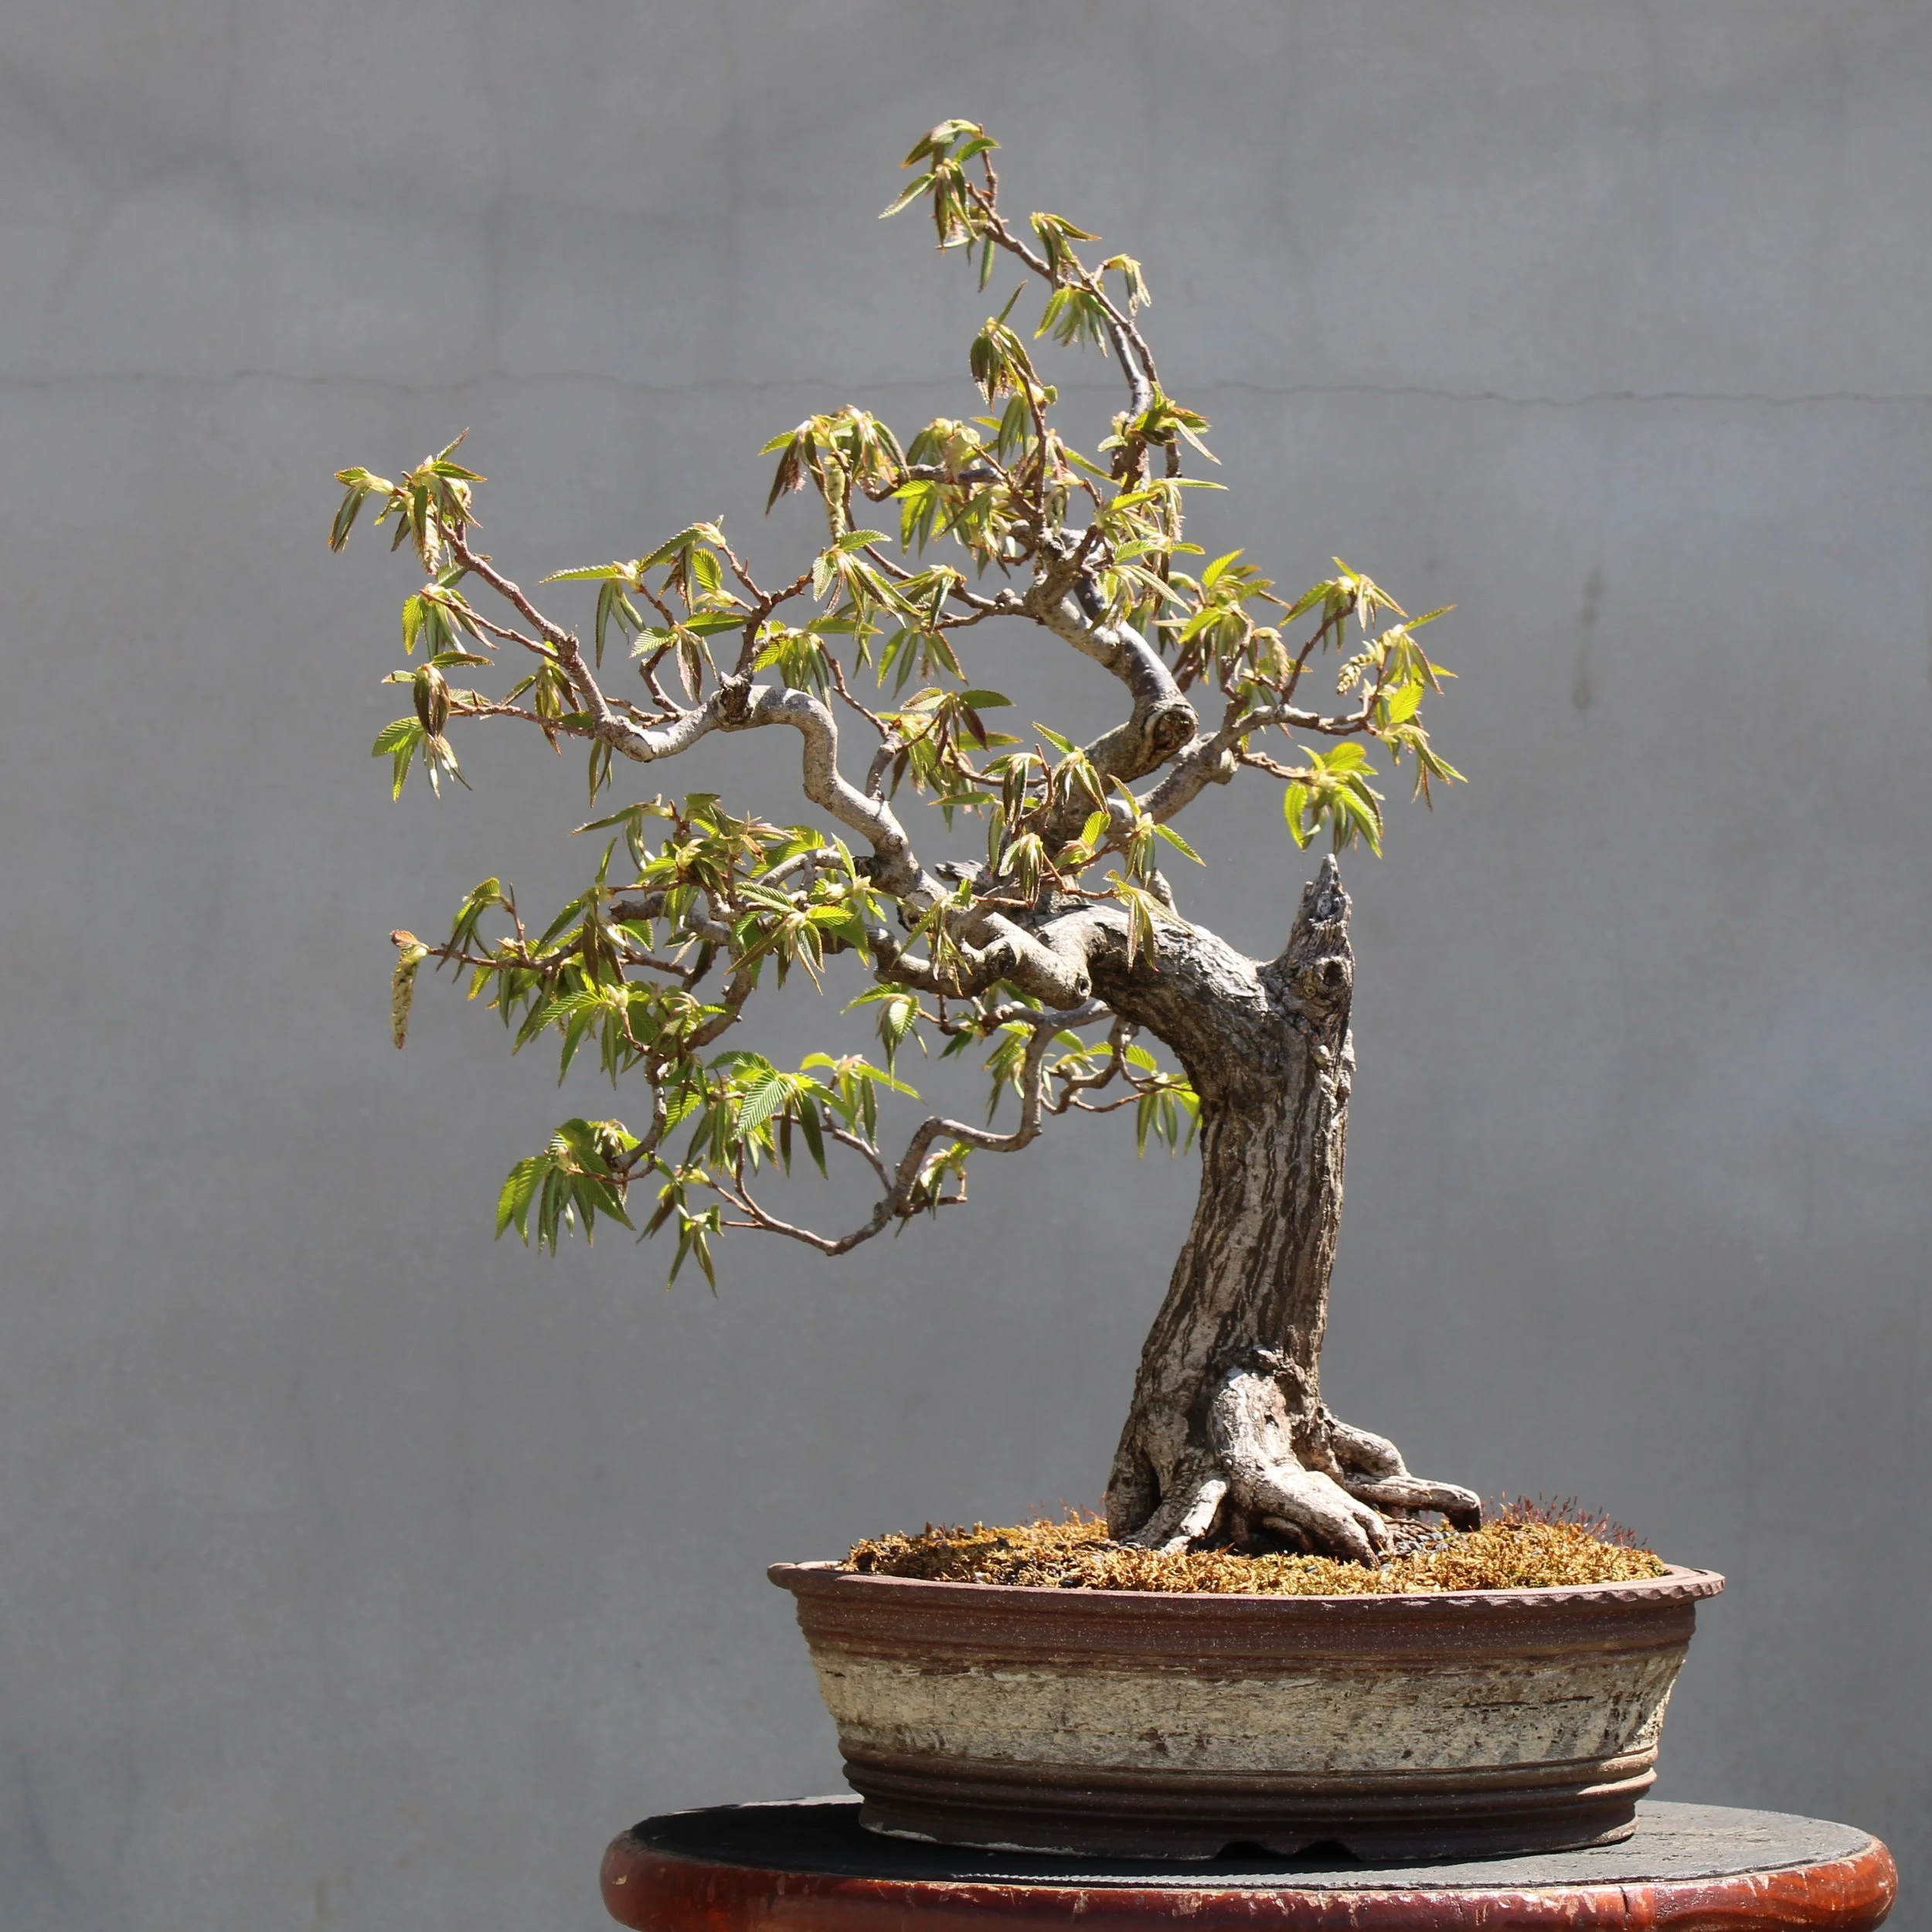
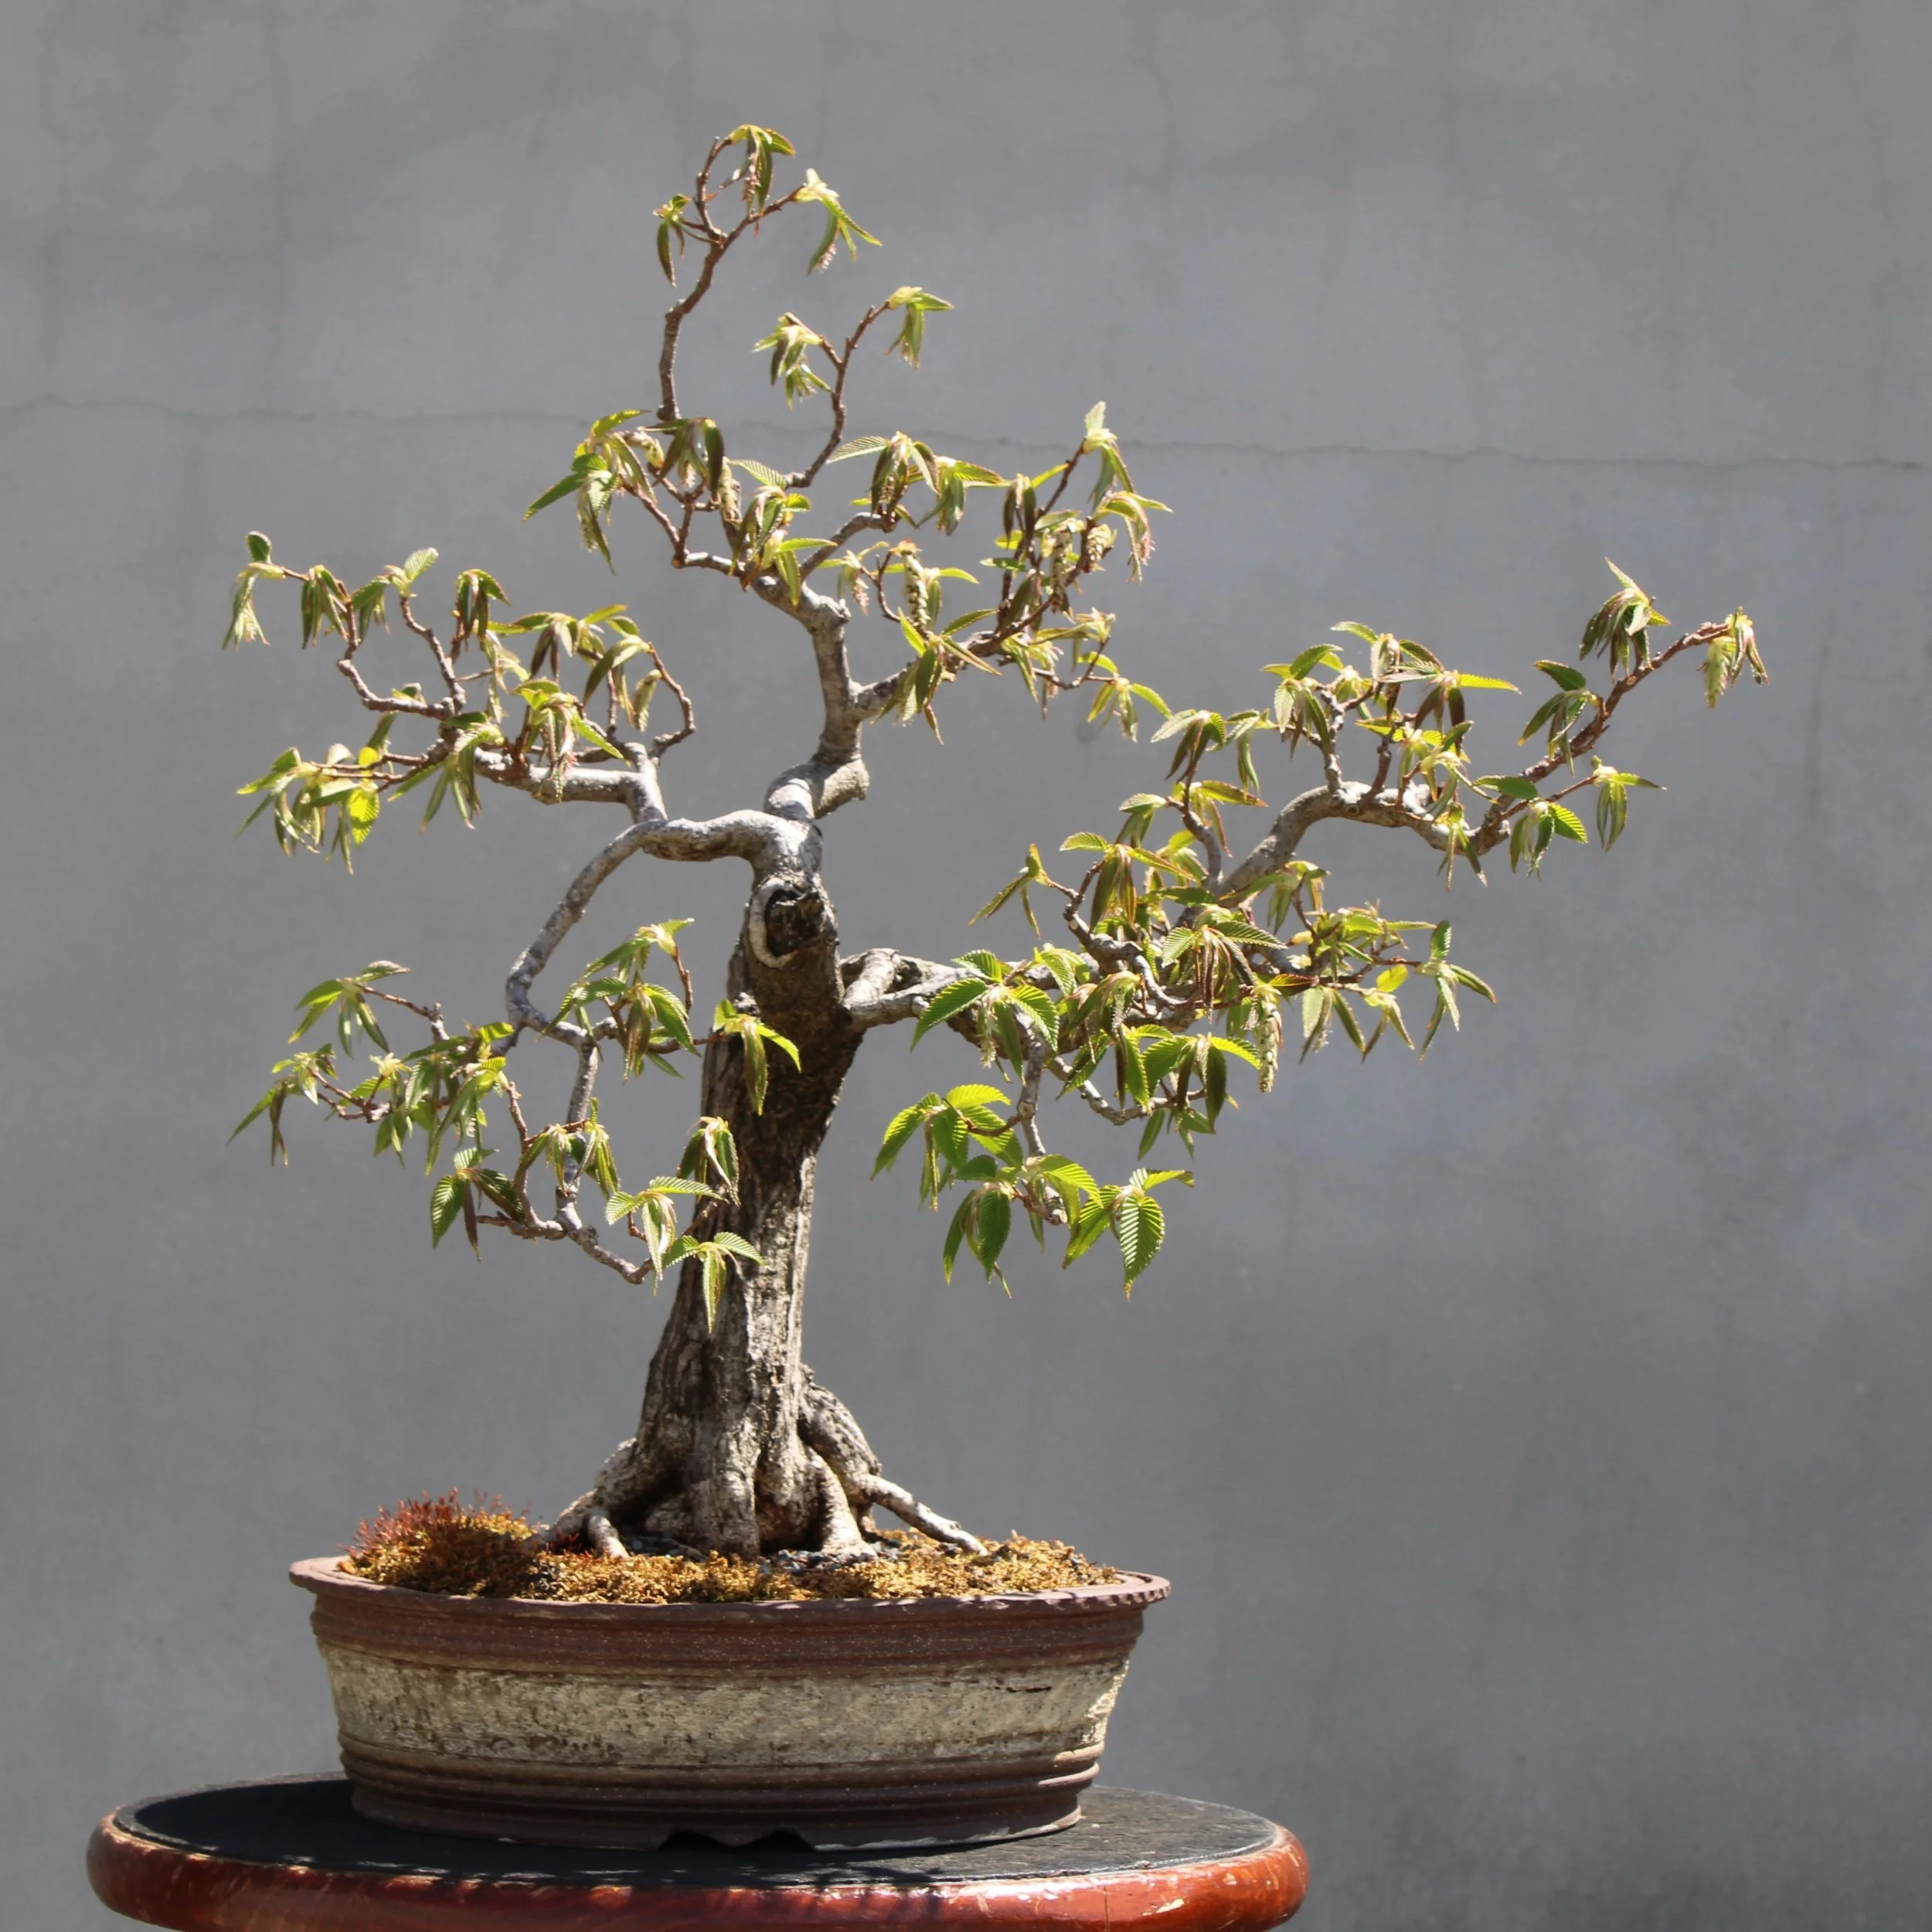
The following images track the development of this specimen over the next six years. Particular attention should be given to those photos made in springtime, as they allow for the most unobstructed view of the tree’s evolving structure.
April 2020

April 2020
April 2021
April 2021
November 2021
May 2022
May 2022
May 2022
May 2023
November 2024
November 2024
November 2024

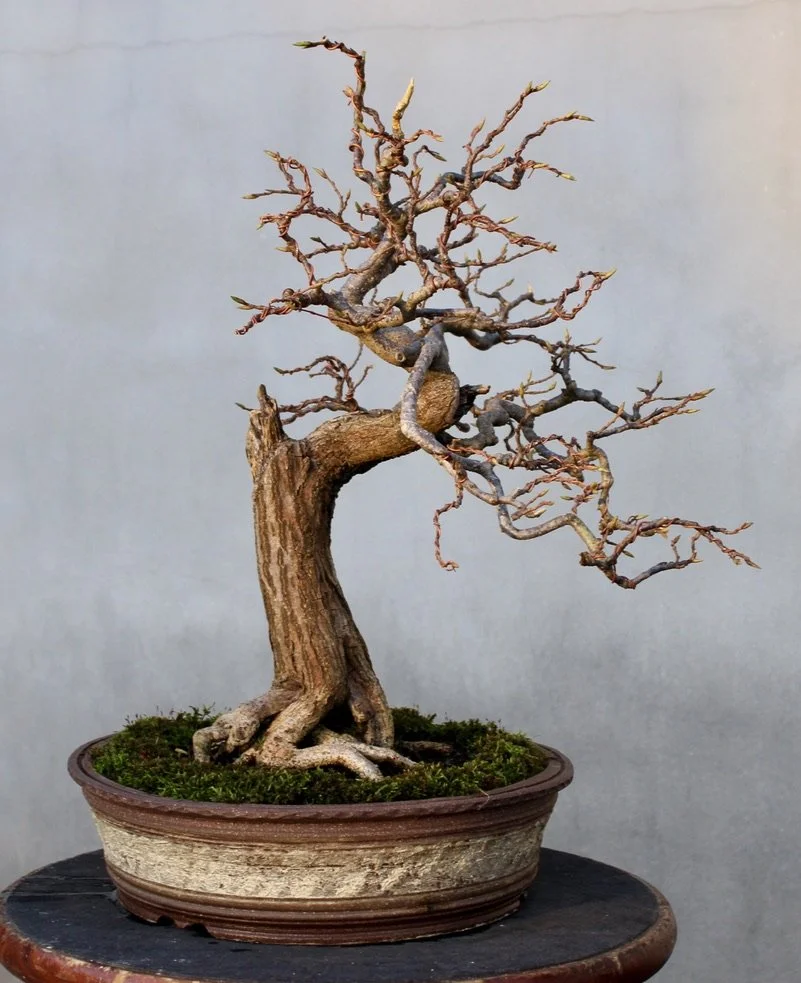
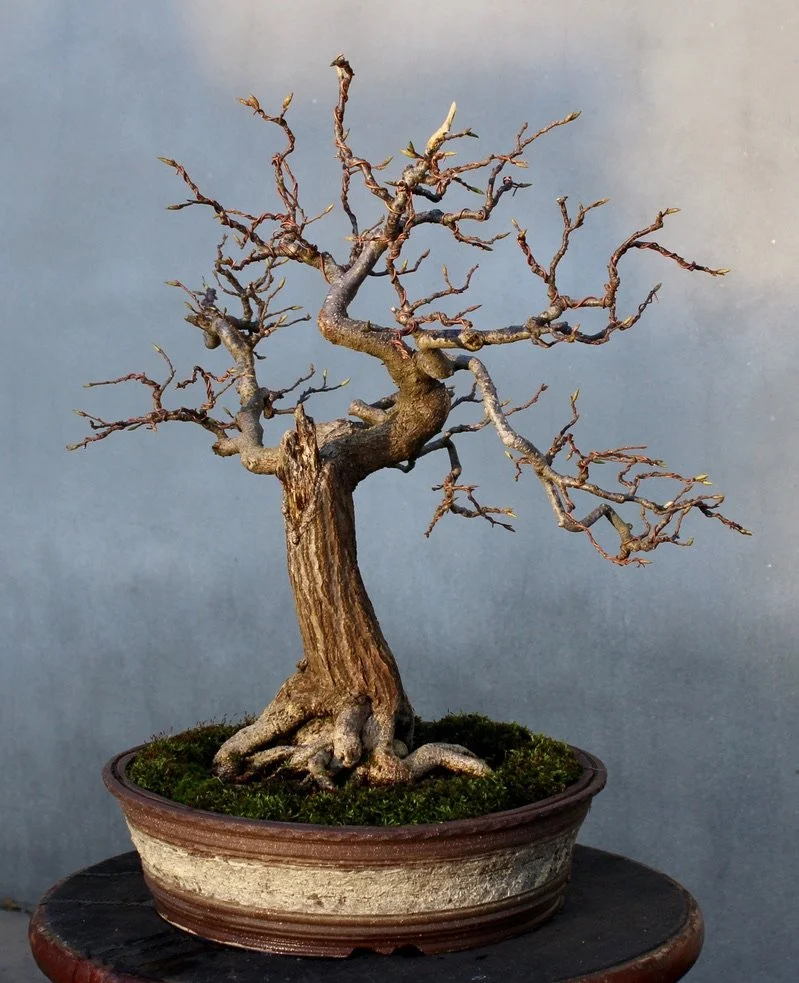
June 2025
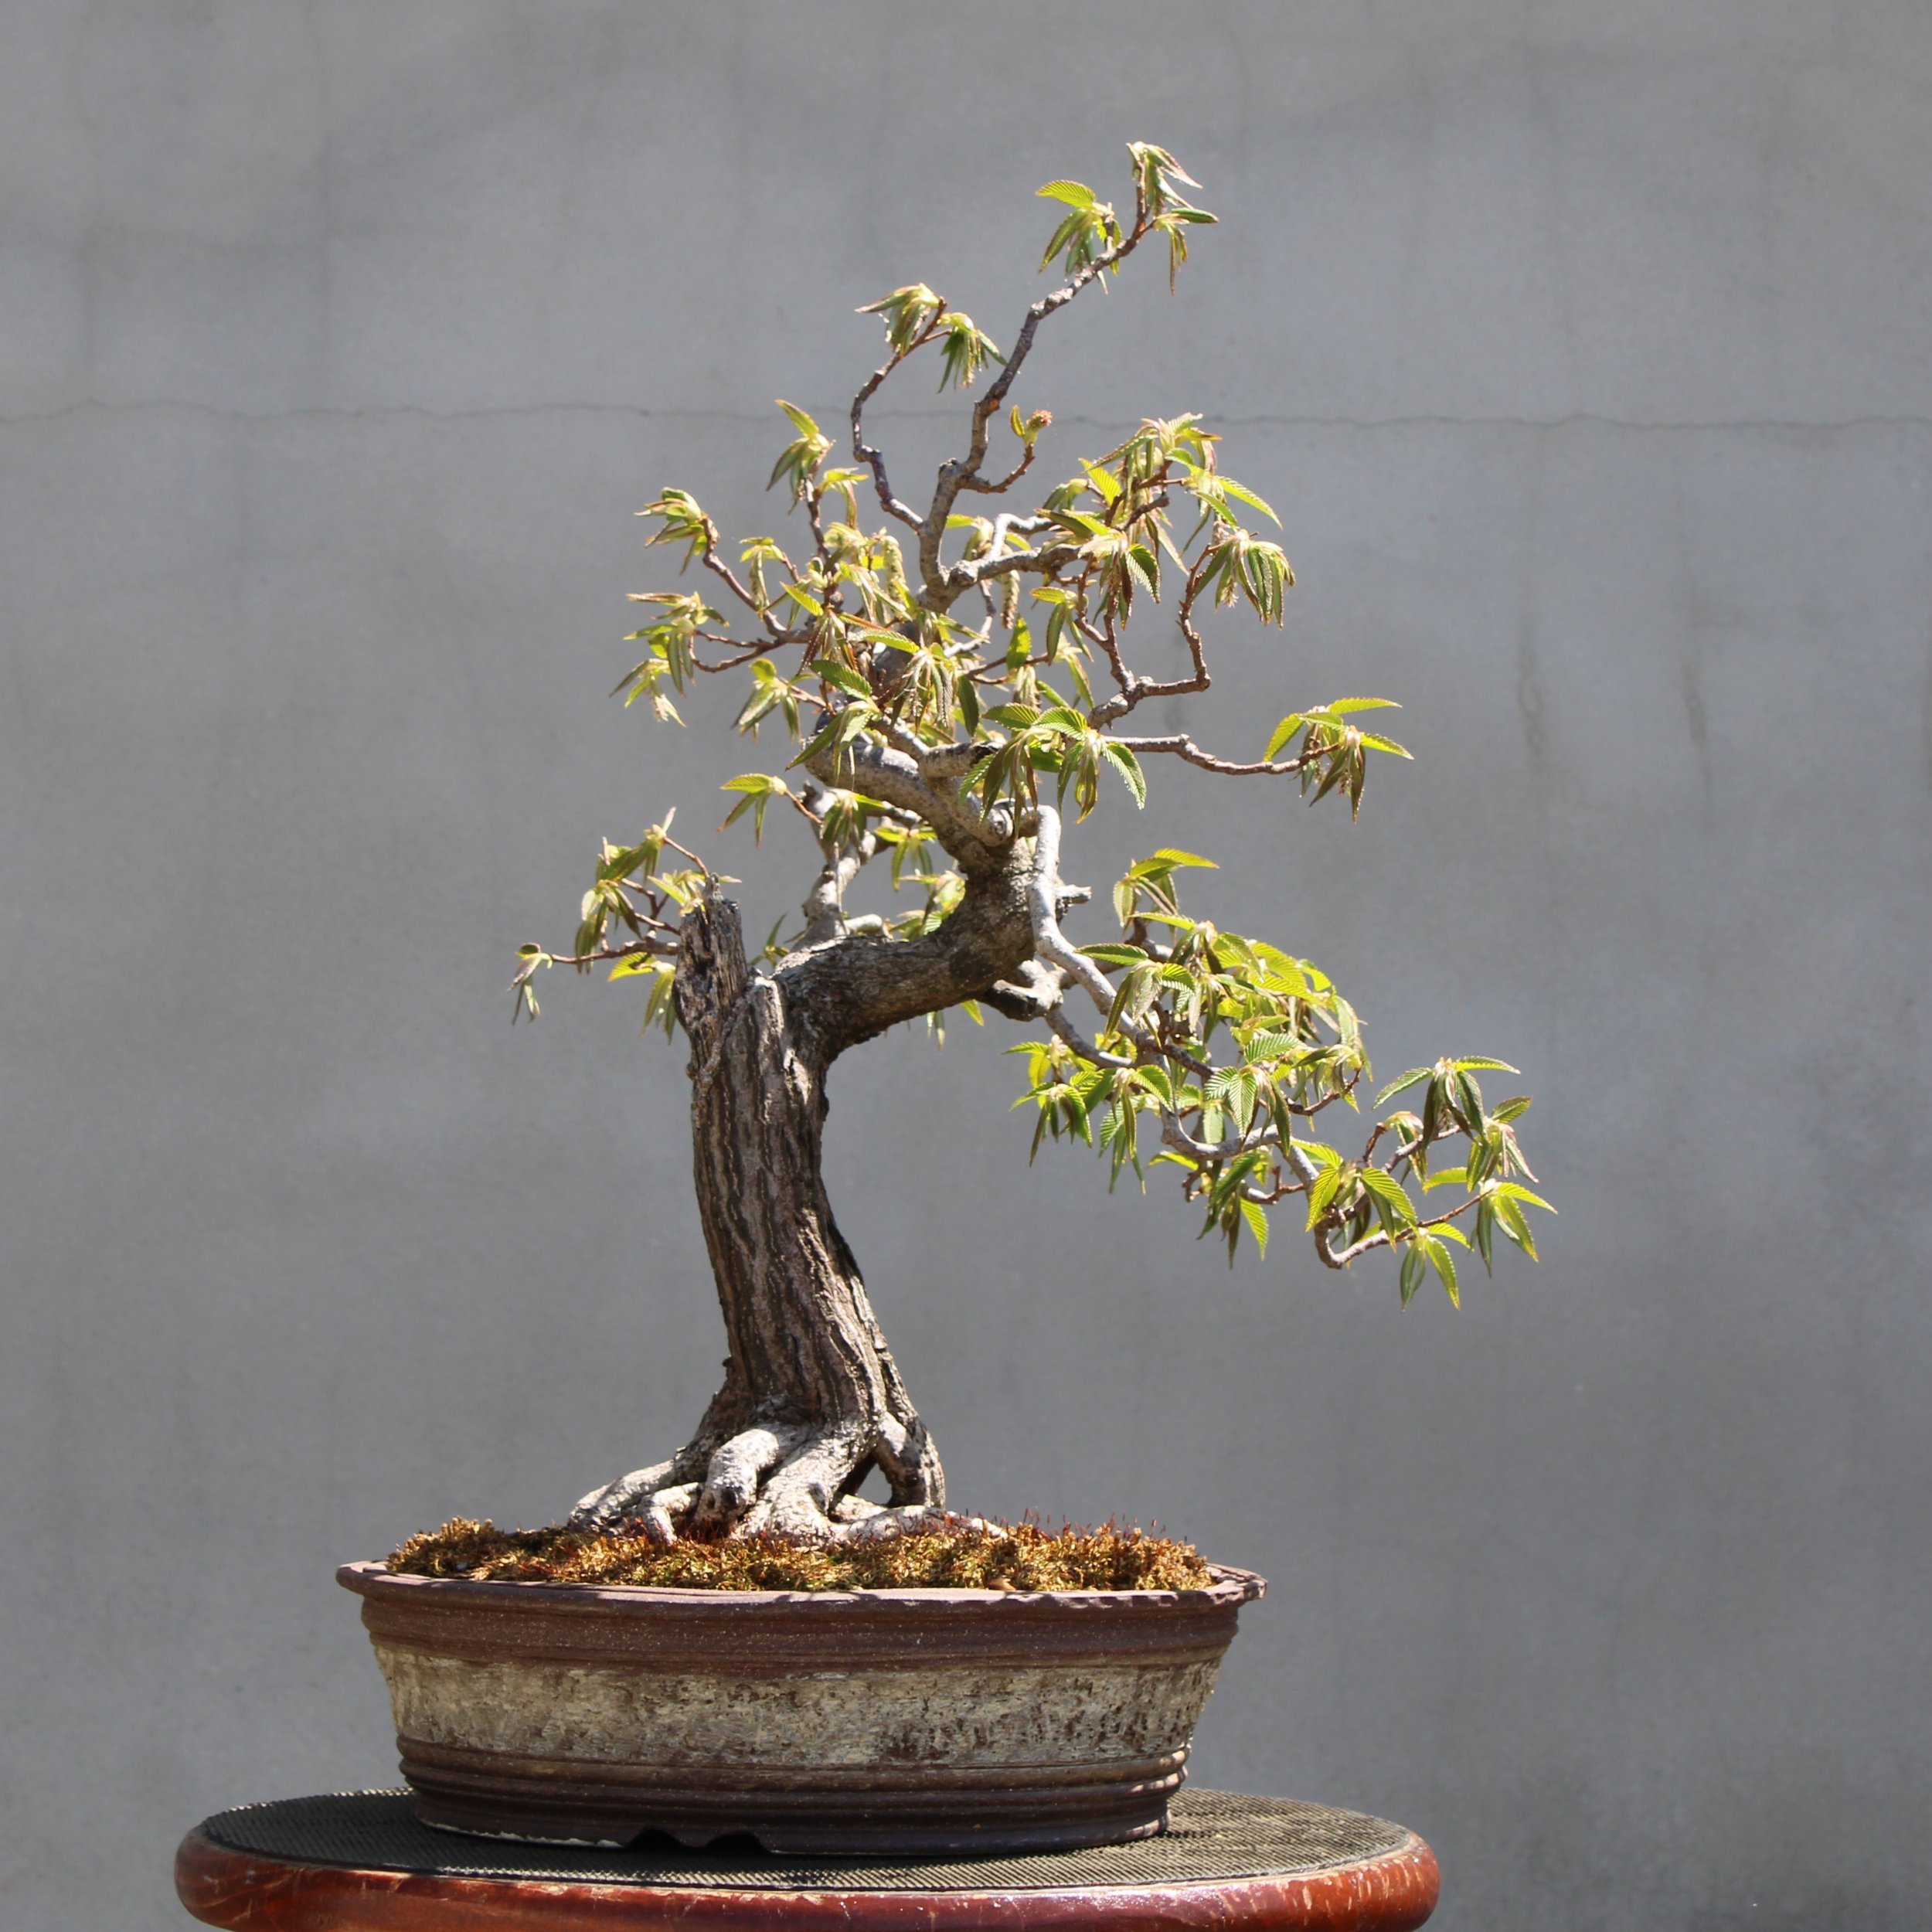
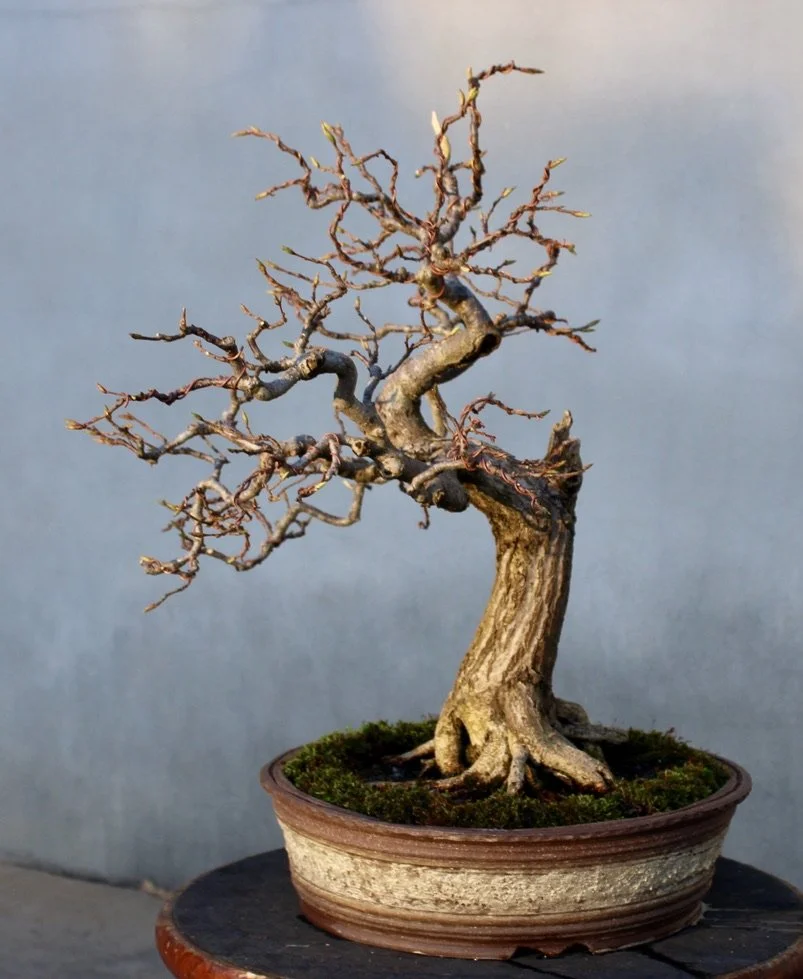
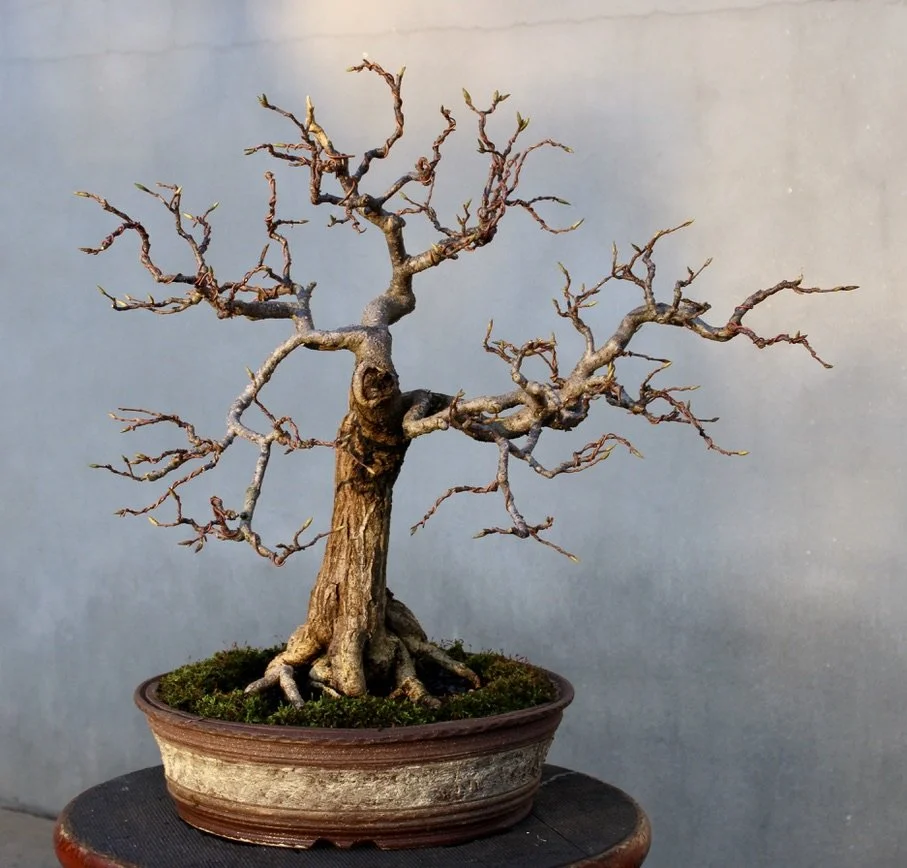
This hornbeam was shaped early on by use of both conventional wrap-around wiring and guy wires. For the last few years, however, the shape has been guided by pruning alone, using the cut-and-grow method. By the end of 2025 it seemed to me the crown of the tree had lost definition and become too loose in its construction. Recently this specimen received a work session focused on tightening up its branch structure, not only by pruning but using wire to more specifically affect the line and direction of secondary and tertiary branching. Copper wire was used to minimize the size needed and so make the wiring less obtrusive. Most of the wire was 16-gauge, with some 18-gauge and just one piece of 14-gauge (the higher the gauge number the smaller the diameter of the wire). Here are the results of the recent work:
So, what’s “natural” about doing all this shaping by cutting and wiring and otherwise manipulating the plant? Absolutely nothing. That’s why this style of bonsai design is properly referred to as naturalistic bonsai, and not natural bonsai. The mechanics of creating a naturalistic bonsai are not very different from creating a classical bonsai or any other style. The term “naturalistic” refers to the inspiration for the style, which comes from observation and study of the natural forces that give shape to full-scale trees growing in the landscape.
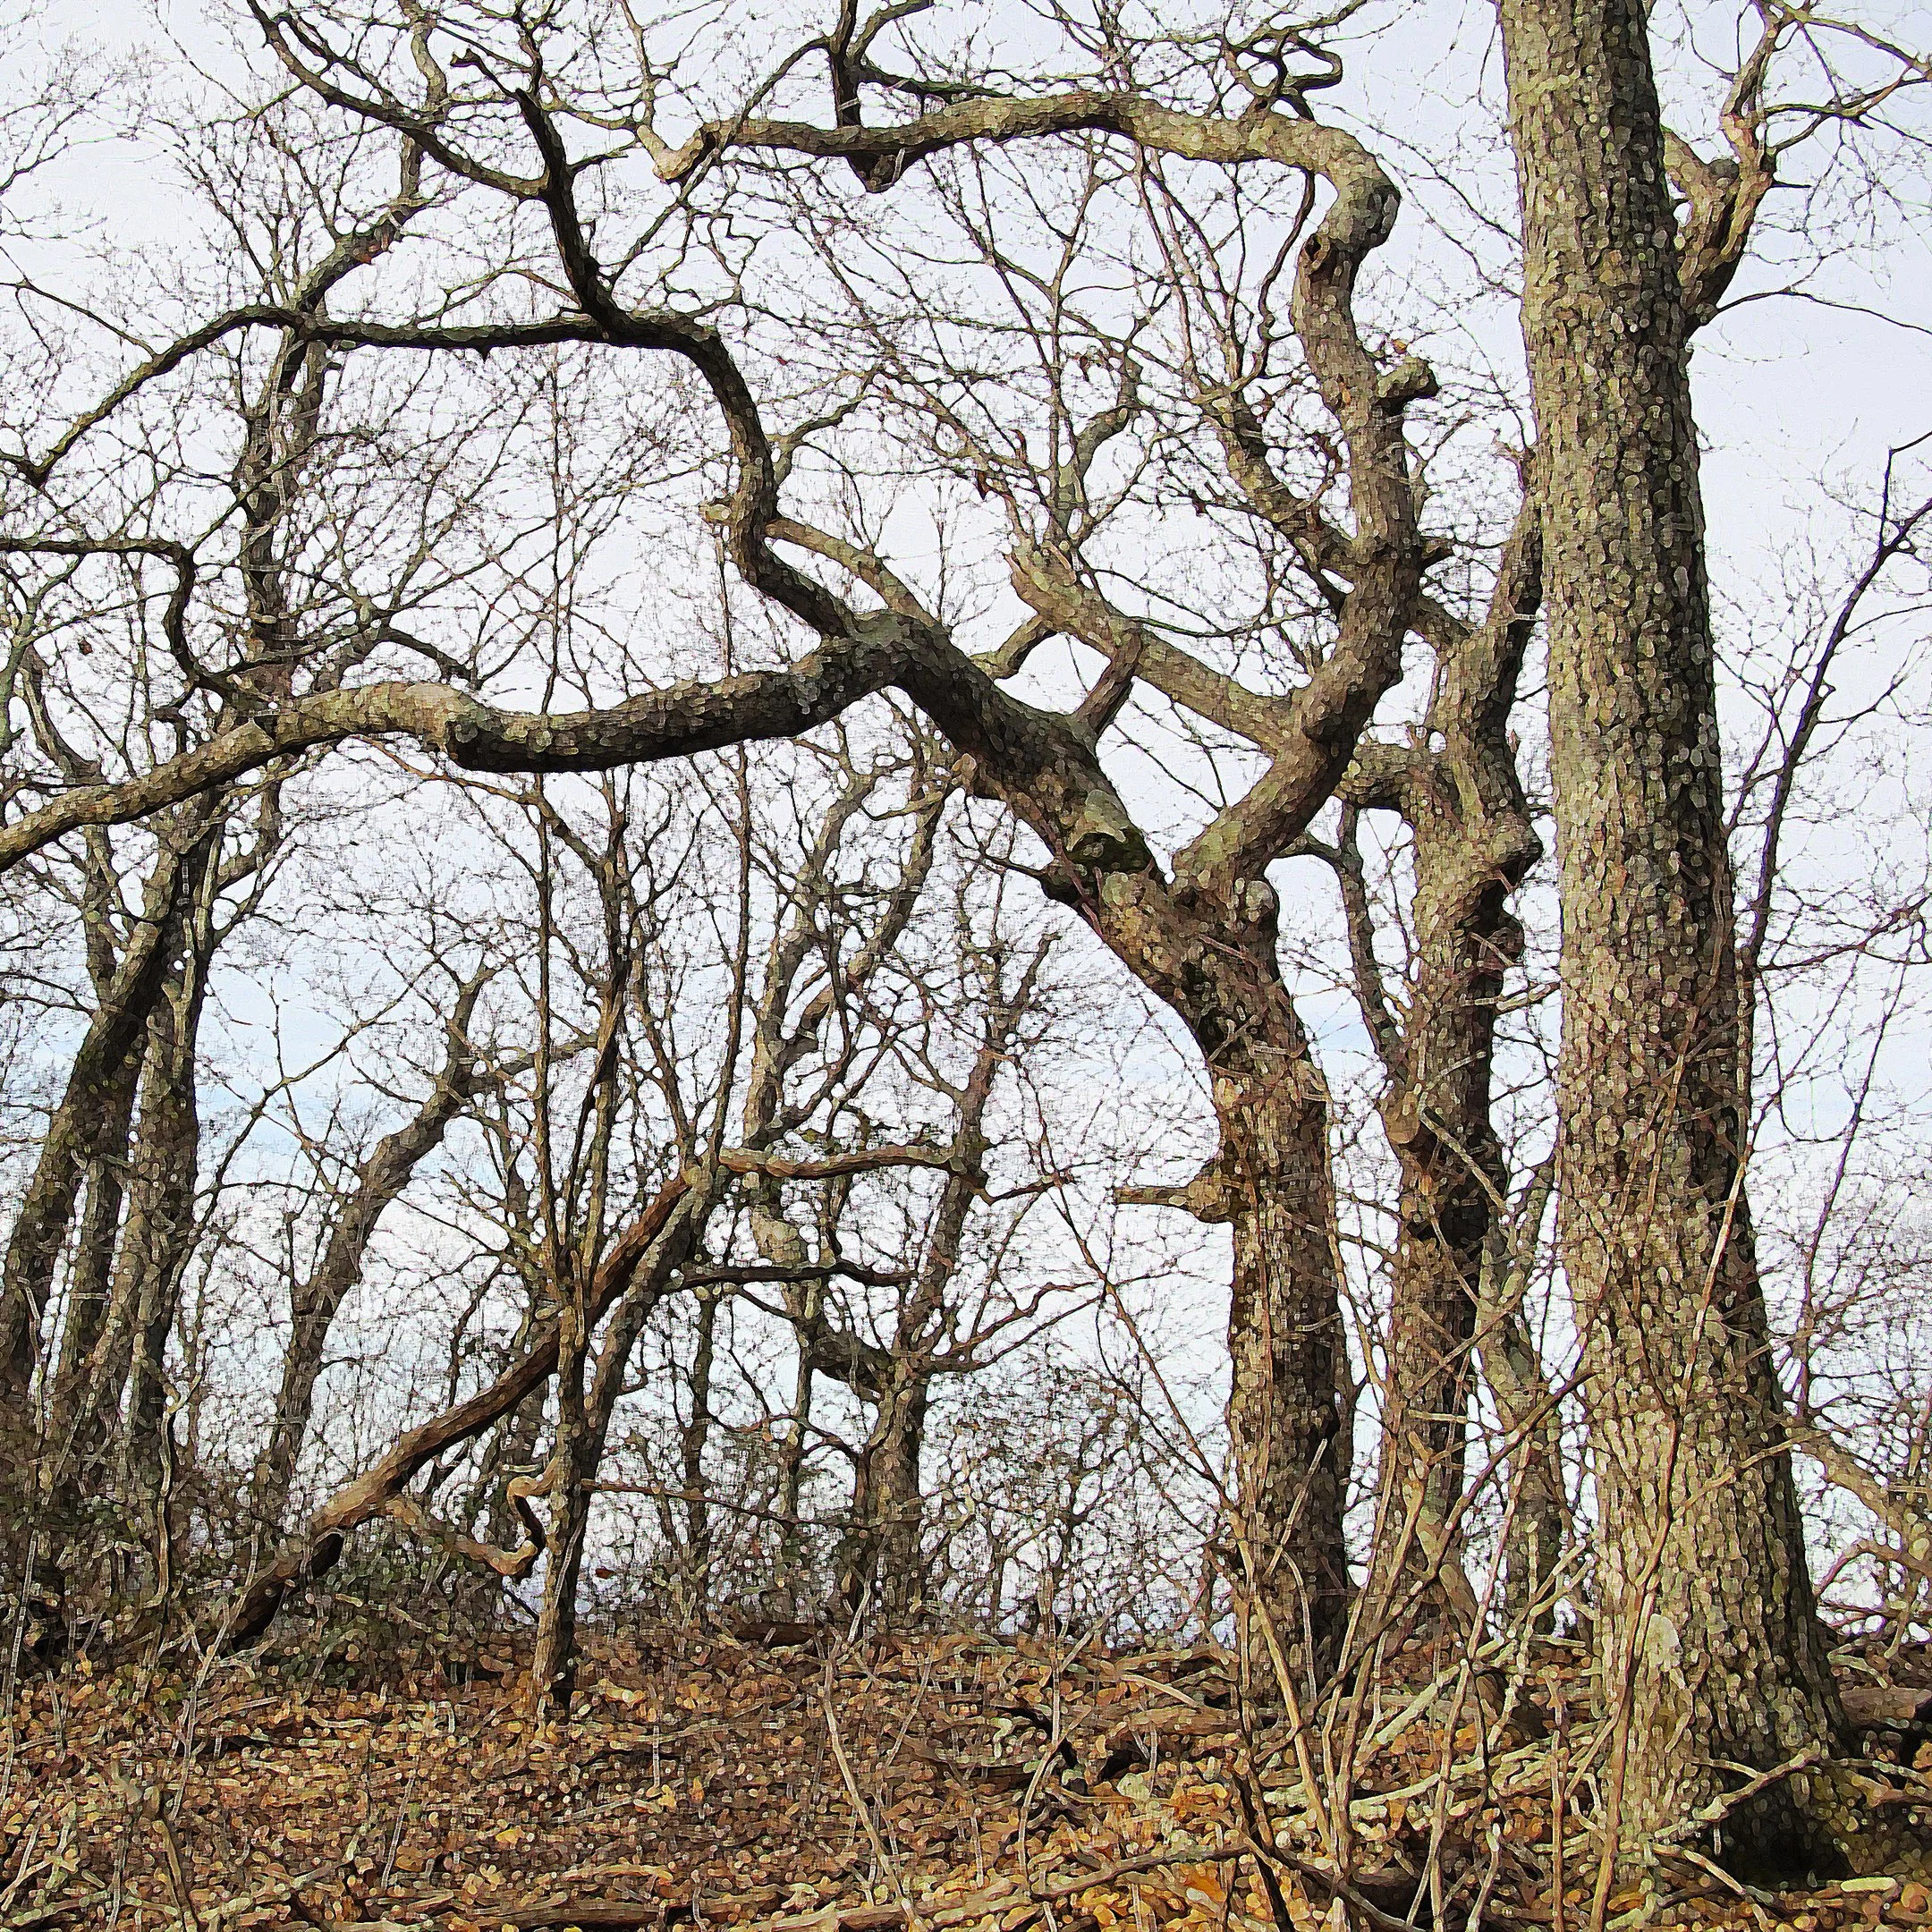
How would a tree in nature come to be shaped like the Arboretum’s Japanese hornbeam? It happens through a process of damage and recovery, as can be seen in these images showing trees affected by that very phenomenon:
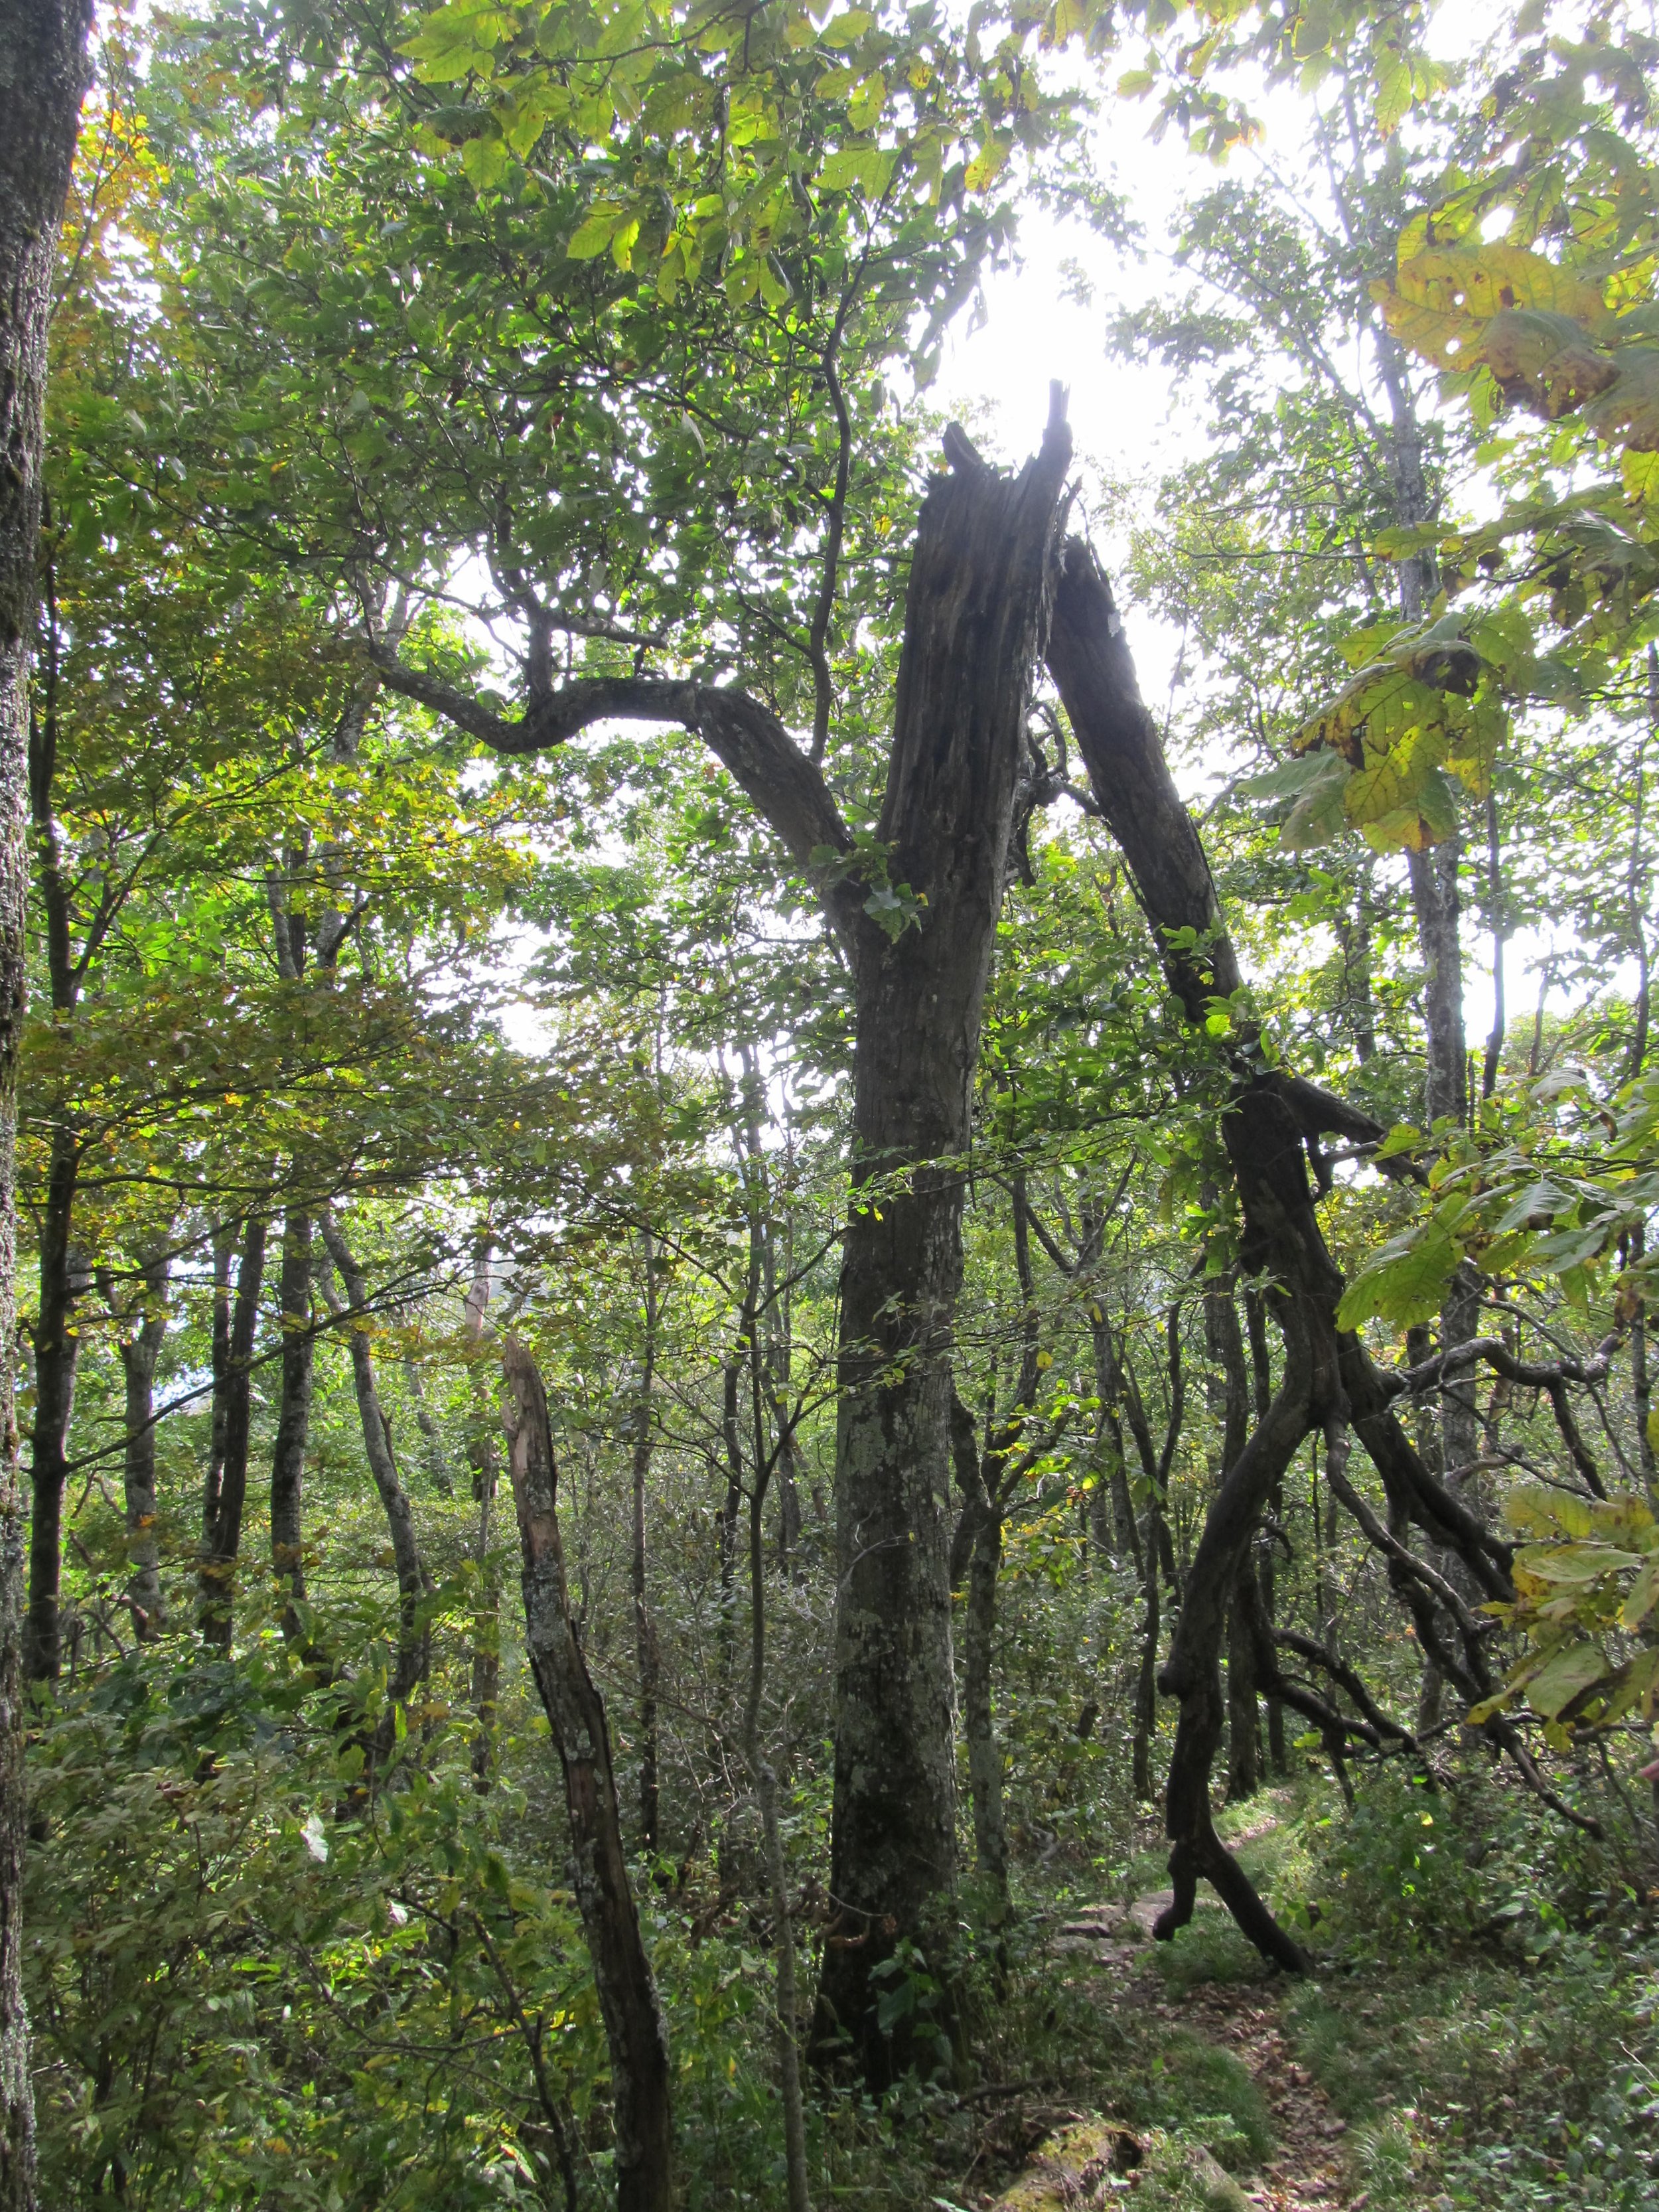
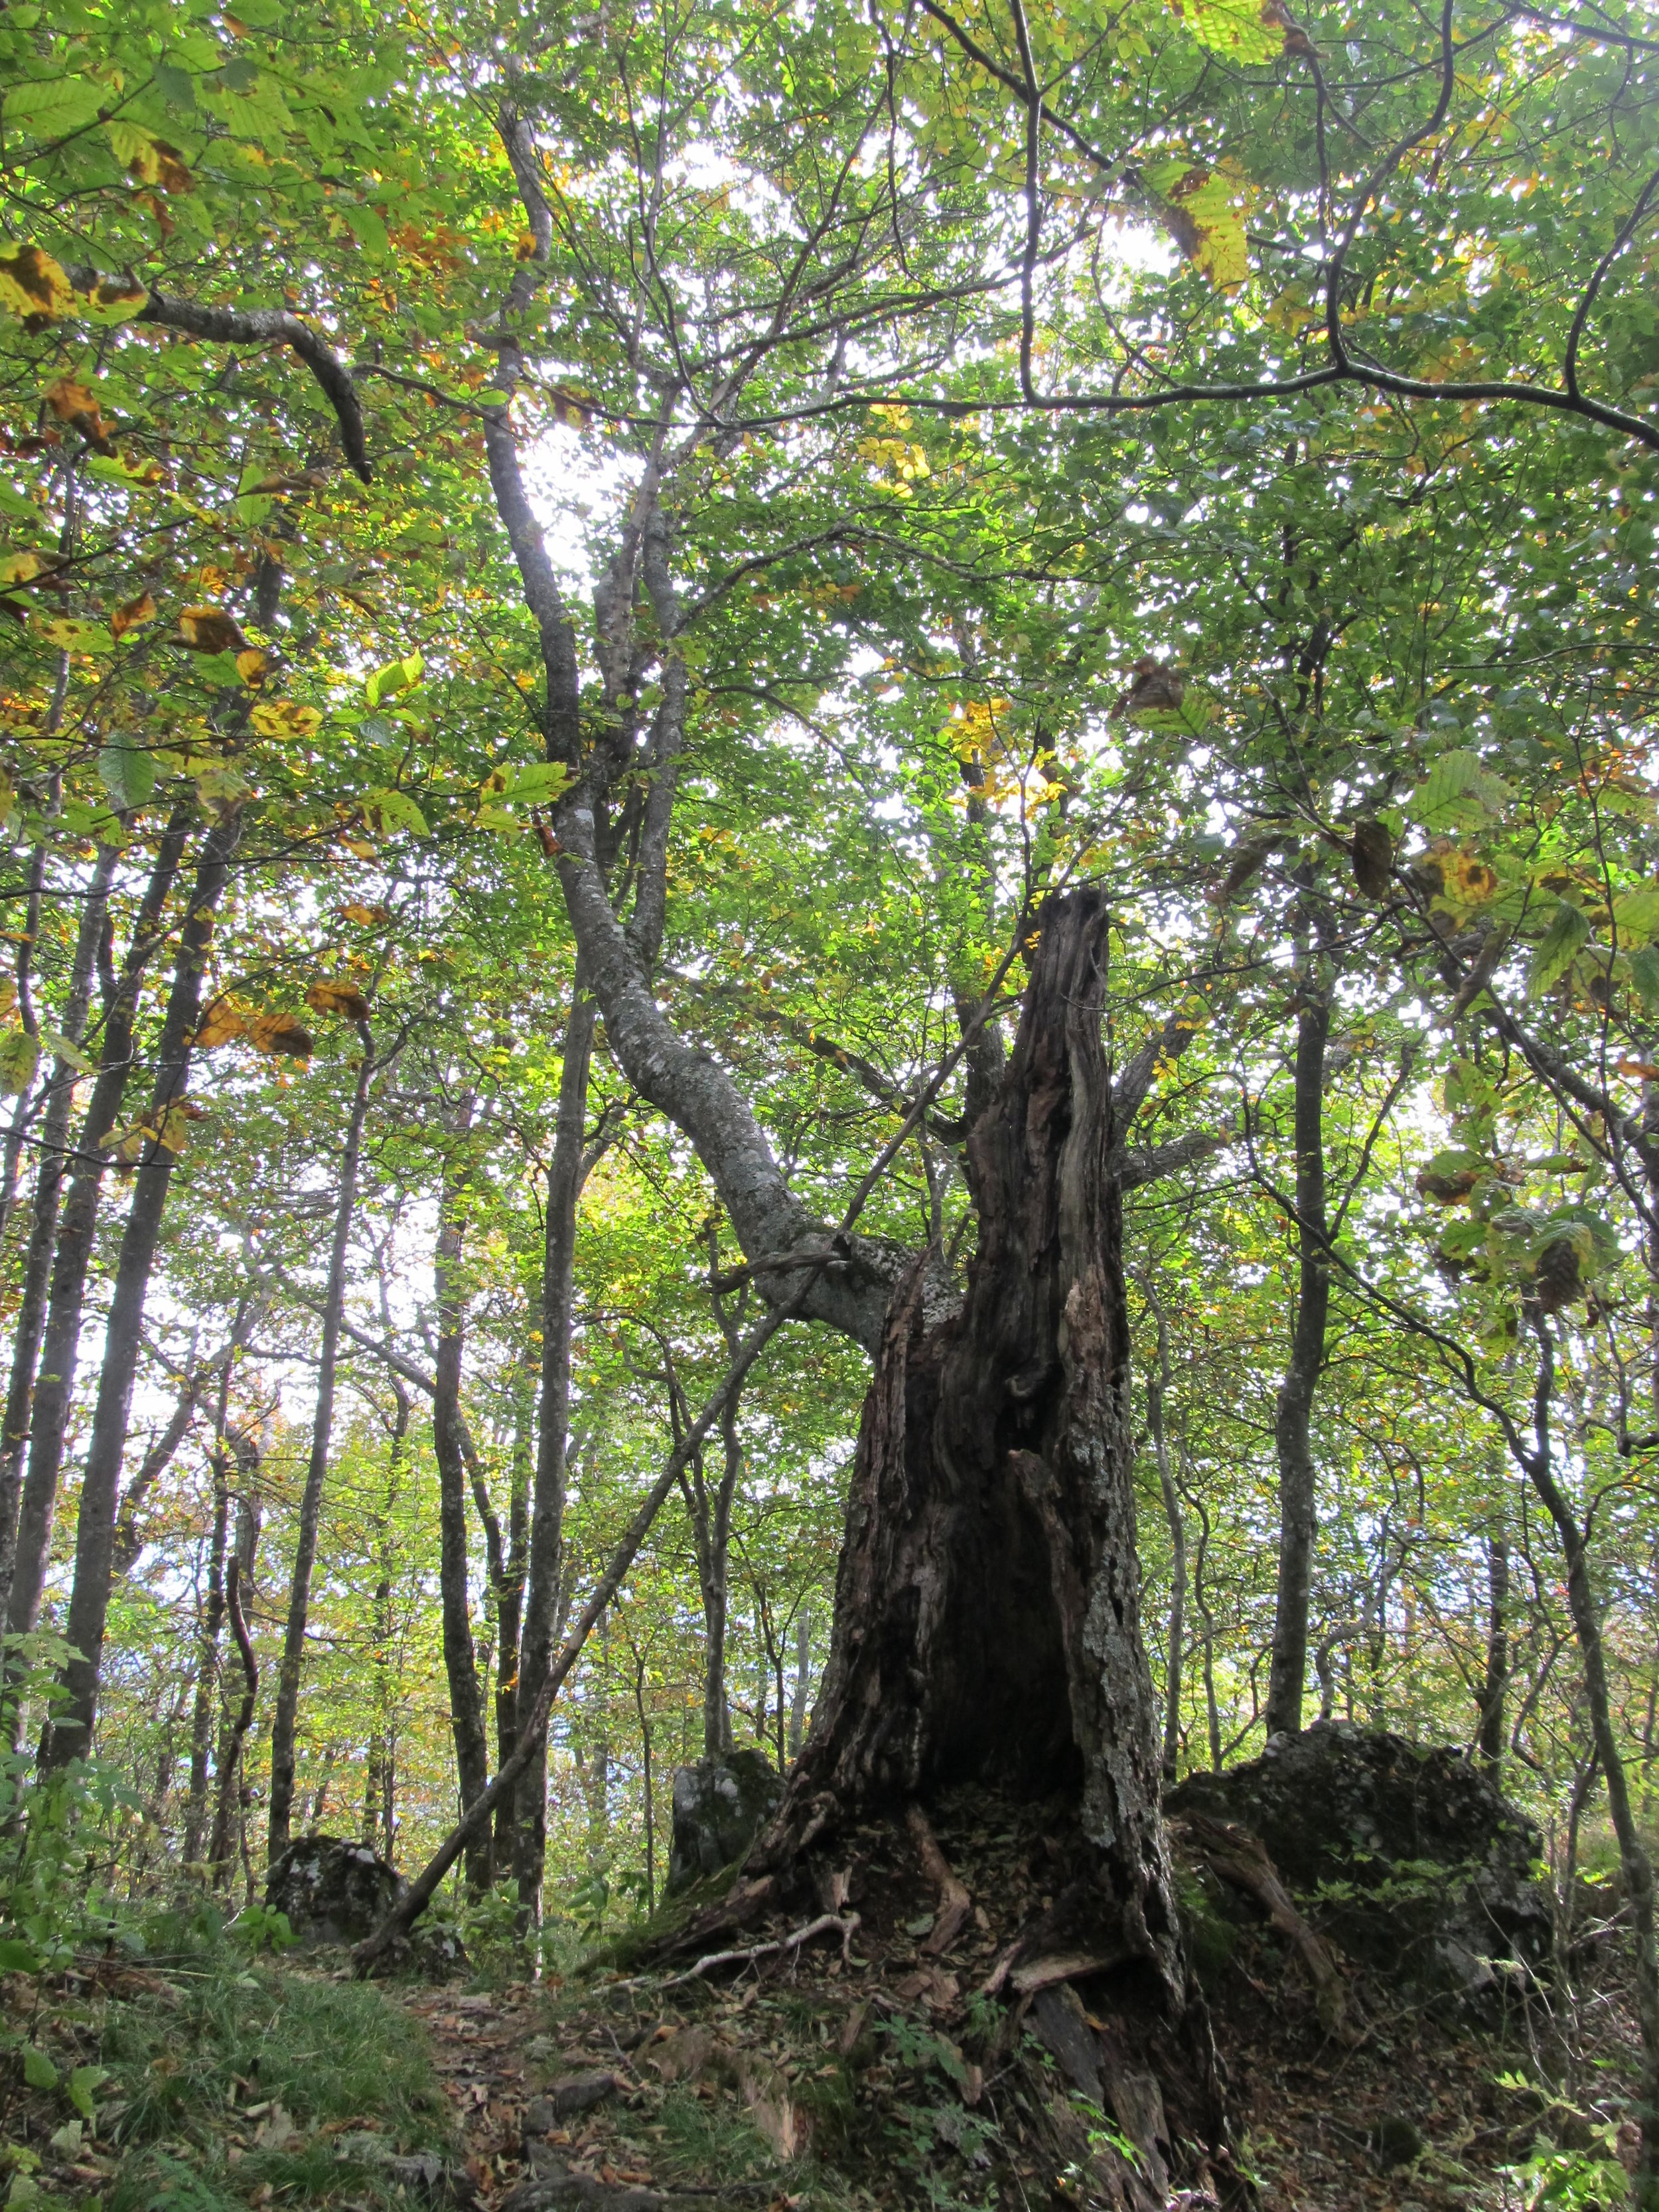
The Arboretum’s Japanese hornbeam bonsai is an artistic interpretation of this not-uncommon tree form. The result is a specimen with abundant visual interest and a compelling story to tell.
2006
2014
2019
2026