The Chase Grove

It must have looked suspicious. Picture a rest stop off an Interstate, a van parked by itself a little removed from any other vehicles. Two men stand outside the van, waiting expectantly, looking down the road and one of them now and then checks his watch. Finally a second van pulls up, right alongside the first. A man gets out of the second van and walks over to the two men waiting. There’s a tense conversation. Then the men open a sliding door on each van and swiftly set about transferring something large, bulky and heavy from the first van to the second. They close the doors and briefly speak a few more words before getting back in their respective vehicles and driving off.
The two men in the first van were Jim Doyle of Nature’s Way Nursery and Chase Rosade of Rosade Bonsai Studio, both from Pennsylvania. The man in the second van was me. It was 1997. The mysterious item transferred from Jim and Chase’s vehicle to mine was five foot long tray landscape planting in an unusual container that looked like a slab of stone. The drop-off took place in eastern Tennessee, a convenient meeting place for Jim and Chase heading south to some bonsai destination and me coming up from the Arboretum in Asheville. I was late, keeping the two of them hanging around an Interstate rest stop for about half an hour, and Chase was a little annoyed at me. That’s why the deal went down quickly. It really wasn’t sketchy at all but it was the only time a bonsai came to us in such fashion.
Chase Rosade stands pretty tall among the first generation of bonsai artists born in the United States. He was an early student of Yuji Yoshimura and was one of the first people in this country to successfully make a living doing bonsai. In an ongoing career spanning six decades, Chase has traveled all over the world, acquiring new bonsai friends everywhere he’s visited.
In July of 1996 Chase Rosade was one of the headliners at the International Bonsai Convention in Washington, DC. As part of that event he did a demonstration program, in which he planted thirteen dwarf hinoki falsecypress (Chamaecyparis obtusa ‘Nana Gracilis’) on a fabricated slab. Chase grew the trees from cuttings and the slab was something he designed and built himself. The landscape also included an understory of dwarf azaleas (Rhododendron ‘Chinzan’). After the demonstration, the planting was auctioned. The winner of the piece was a man from South Carolina who had flown to the convention in DC and wasn’t able to take his prize home with him at that time. He asked Chase to hold onto the big landscape until arrangements could be made to retrieve it. Time went by and the man from South Carolina never came for the landscape planting, so Chase suggested to the man that he might perhaps donate the piece to The North Carolina Arboretum. We were known to Chase from a visit he made to us the year before. That arrangement was acceptable to the South Carolina man and the donation was made, leading to the eventual roadside delivery.
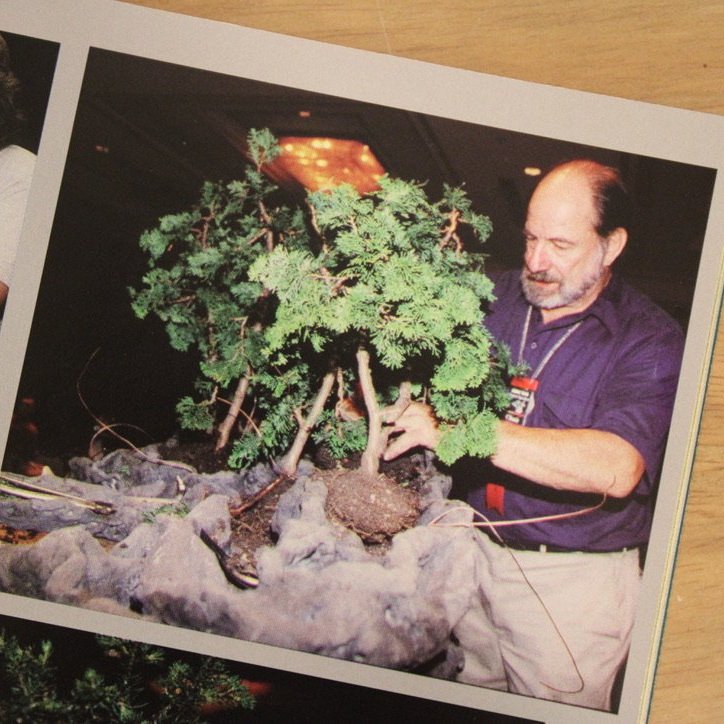
Photo from a bonsai magazine, showing Chase Rosade creating his unusual hinoki landscape planting at the 1996 International Bonsai Convention
Once back at the Arboretum, the new acquisition was promptly photo-documented:

1997

1997 - A view from above shows the planting pockets designed into the fabricated slab
The fabricated slab was large, but not as heavy as it might have been because it was hollow. Chase built it in a manner similar to the way mountains might be constructed for a model railroad display. There was a wooden armature covered in chicken wire to give the undulating slab its shape, on top of which was applied strips of fiberglass cloth that had been soaked in a slurry of cement. It worked liked paper maché, with fiberglass cloth in place of newspaper and a product called Ciment Fondue in place of paste. Two galvanized steel pipes ran lengthwise inside the slab, giving it structural strength. The whole package was clever and innovative, in addition to generating a good deal of visual interest. The planting was also large in scale, utilizing a tree species otherwise unrepresented in the Arboretum collection at the time, and was made by a well respected bonsai artist, all of which led to it becoming a popular piece.
Not surprisingly, the Chase Rosade landscape planting was on display at the opening of the Bonsai Exhibition Garden in October of 2005:

2006
The big hinoki forest with the azalea understory, planted on the unusual slab that looked like a piece of stone, would be on display in the garden every year for the next decade. This image from 2009 shows the azaleas coming into bloom:

2009
Take note of the small sign to the left of the planting in the above image. This distinctive bonsai landscape was given the poetic name The Chase Grove to honor its creator, but that’s not obvious to people who don’t know the backstory. “Chase” is not a common name. It is a common word, though, known to everyone, so the poetic title for this piece is open to interpretation.
Compare the previous image with this one, made the following year:

2010
After fourteen years of growth and development, The Chase Grove had become a little cramped and difficult to maintain. This necessitated the removal of four trees and numerous azaleas in order to open up the composition. This reorganization led to modifications in planting design, but I strove to remain true in spirit to Chase’s original scheme. For example, the main tree in the composition remained the same and was planted in the same general location. A noticeable change was placing one of the hinoki trees — a small one with a singular shape — in an offset position to the far right of the composition.
The following set of images depict The Chase Grove during different seasons in 2013:

2013

2013

2013
Bonsai trees, like their counterparts in nature, often take on added allure when seen in the rain:

2015
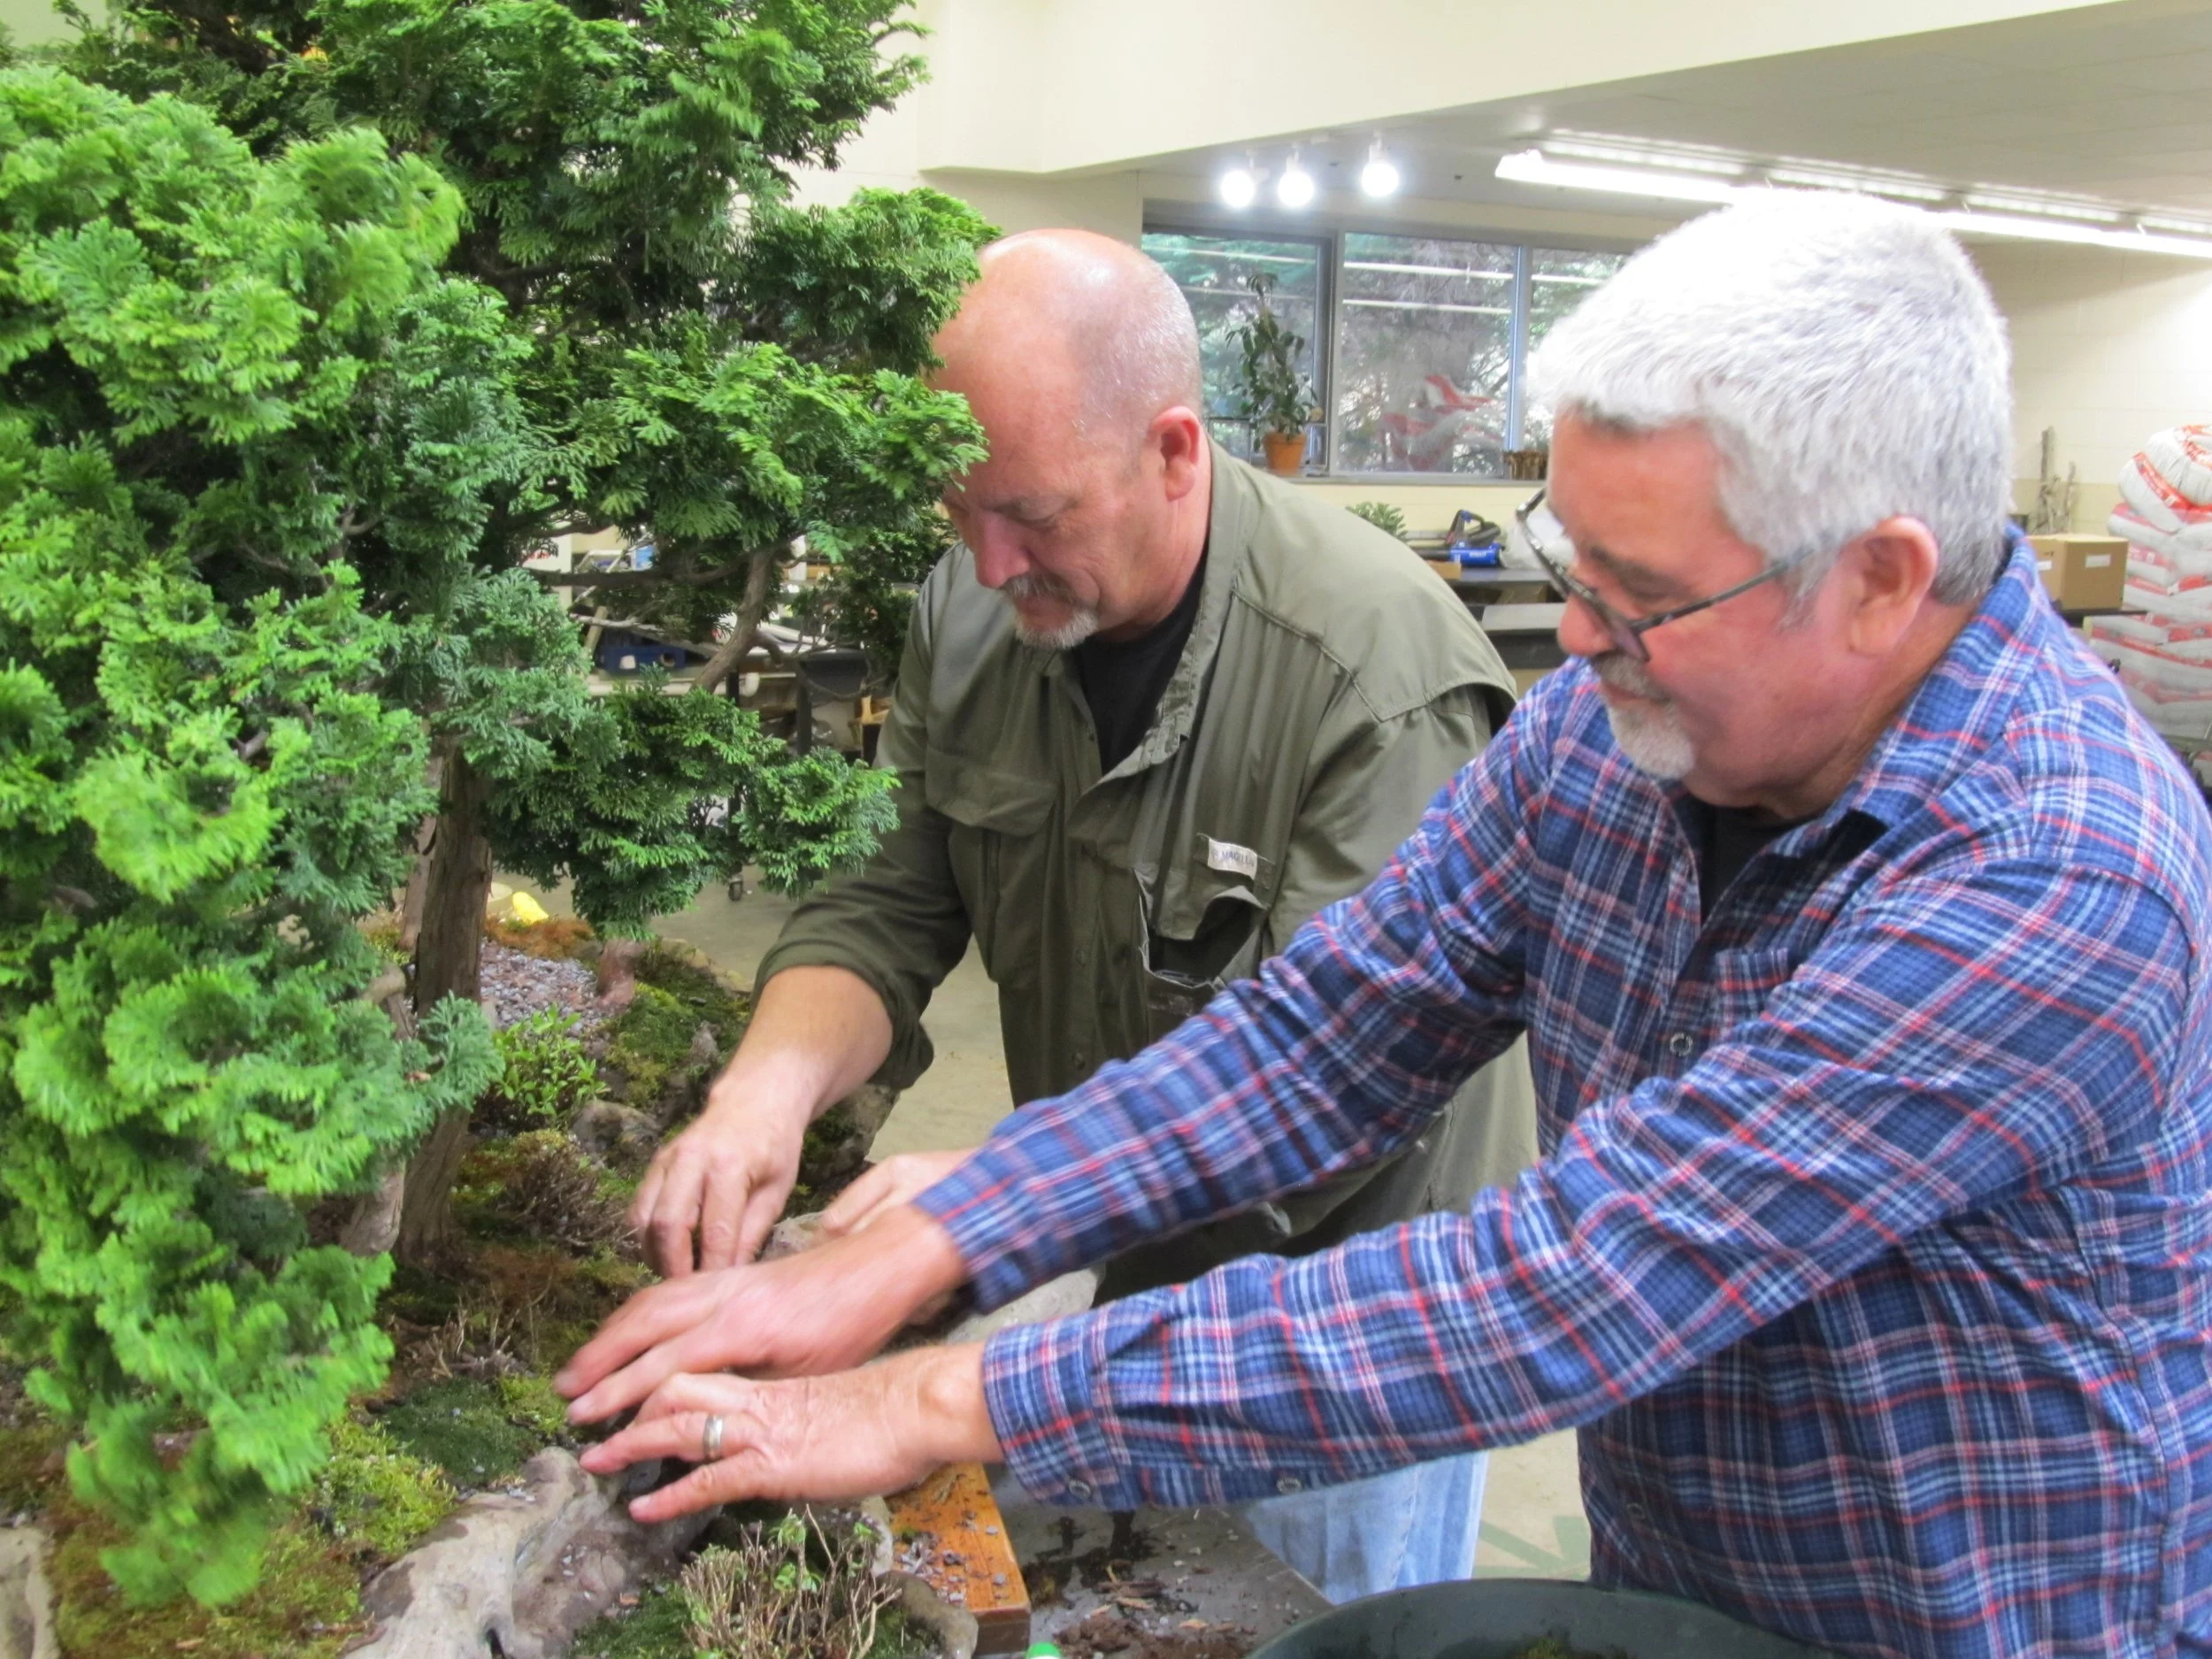
Repotting The Chase Grove is a big job that fortunately doesn’t need to be done all that often. It very much needed doing again in 2018 and I had plans to get it done that spring, but an accident left me without use of my right arm for a month or two. Fortunately, my South Carolina bonsai friends John Geanangel and Ken Duncan came to the rescue. They drove up to Asheville one day and took care of the work while I took pictures:

Ken Duncan (left) and John Geanangel lift a portion of The Chase Grove out of the slab planter.

The Grove’s trees, temporarily in a wheelbarrow.

A look at the empty fabricated slab.

The bottom of the slab, not seen since Chase made it, was showing signs of distress.

John and Ken work out a new composition.
Near completion of the task, John and Ken apply moss to the landscape.
John and Ken proposed to alter the design of the planting and I didn’t object. In addition to being friends who were generously helping me out at a tough time, they were also skilled bonsai artists whose work I respected, so I had no qualms about them doing what they thought best.
Here is what The Chase Grove looked like prior to John and Ken’s work session:

2018
This was the result of their redesign:

2018
My friends worked for many hours, but time did not allow for doing everything. Once my arm was back in service I gave the hinoki a thorough pruning and used one piece of wire to reposition an important branch of the main tree:

2018
I liked the new design but it didn’t last long. One of the three trees on the right side of the composition subsequently died and was removed. This left a total of six trees in the planting, with four grouped together on the left side of the composition and two on the right, which did not work so well. In response, I removed another of the trees from the right side and replanted the remaining right side tree to be closer to the group of four. That produced this result:

2021
This incarnation of The Chase Grove made it out on display in the bonsai garden later that same year:

2021
Another problem soon reared its head. After twenty six years of good use, the unique fabricated slab was falling apart and needed replacement. The wear and tear on the slab was apparent in 2018 when John and Ken did the repotting and redesign, especially when we were able to get a look at the bottom of the piece. I had done some repair work on it then, and had been doing minor patching all along, but holes and places where the cement was flaking off were now showing up everywhere:


It was going to take some time to come up with a replacement slab. Meanwhile, the plants in the arrangement needed to be removed and planted into alternative containers to be held for eventual reuse. The deconstruction of The Chase Grove took place in early 2023:

One of the hinoki falsecypress being transplanted into its own pot by volunteer Rebecca Ayres.

The main body of the composition being removed from the fabricated slab.

2023 - The Chase Grove deconstructed, with the battered old slab propped up on the wall alongside. Roots had grown into the bottom of the slab, causing severe damage to the slab when removed.
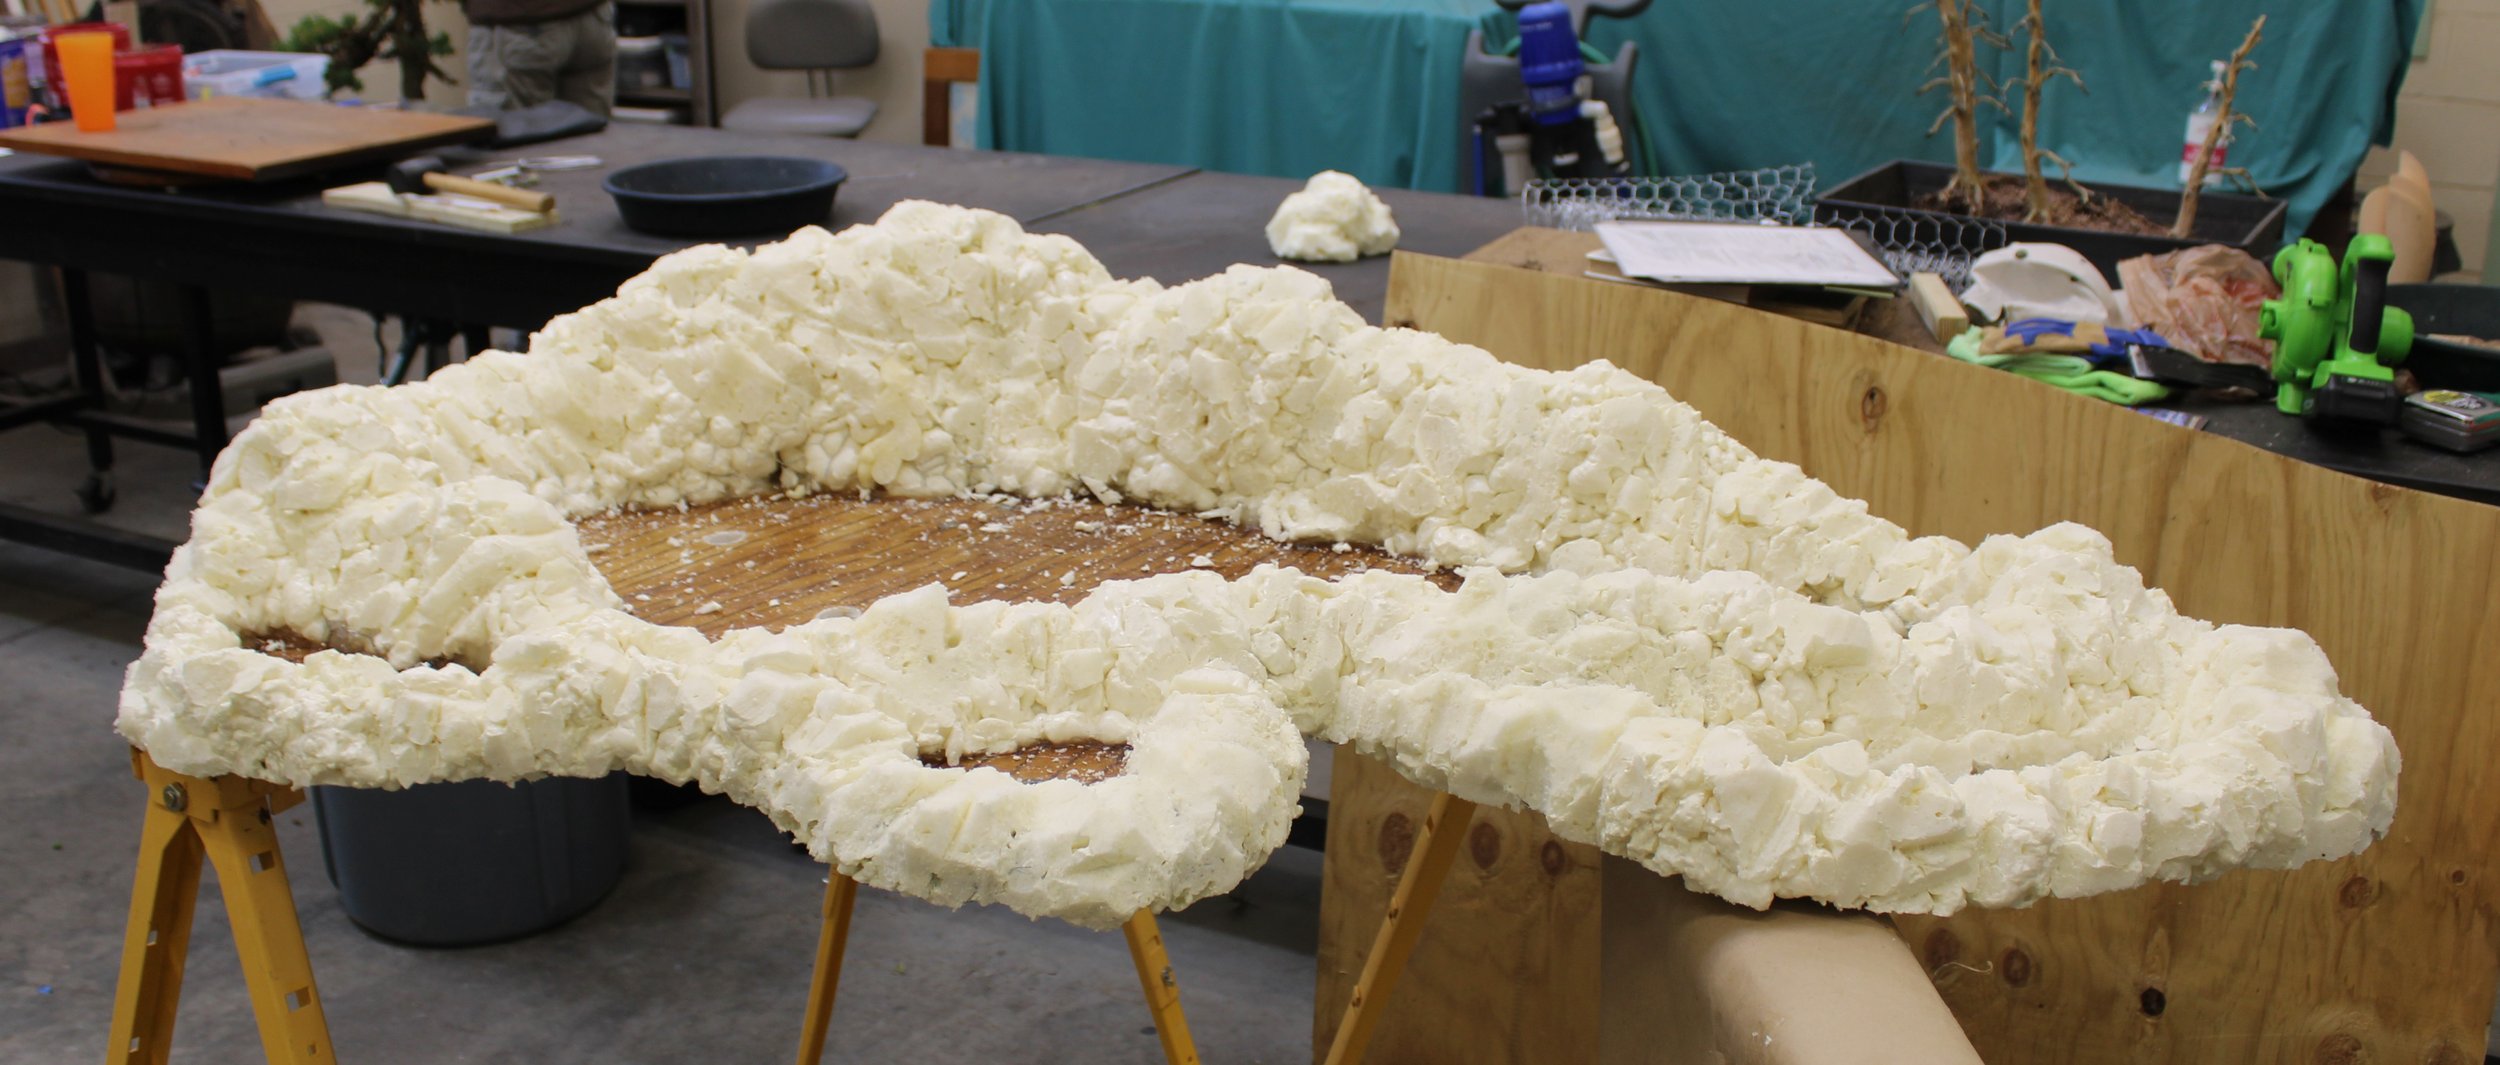
The project of building a replacement for the original slab began early in 2024. I had always admired the way Chase conceived the design of his slab and wanted to make the new one have a similar appearance. However, the way the original had eventually come undone sent me looking for ways to make the new one more durable. The following set of images illustrates how the process played out:

1) An outline of the original slab’s footprint was traced onto a 4’x8’ sheet of one inch thick pressure treated plywood. The contours of four planting areas were drawn on the wood. This was a modification of Chase’s original concept of having multiple smaller pockets for planting, made because the size of the trees no longer worked well with the smaller spaces. The footprint shape of the new slab was then cut out using a scroll saw. Having a solid base on the slab seemed desirable in lieu of the soft bottom of the original for durability purposes.

2) I called on Charlie Dunagan, my friend and frequent volunteer collaborator on construction projects, to come in and lend a hand. Here Charlie can be seen attaching 1”x4” pressure treated boards to the bottom of the plywood base to provide some lift, which will aid in drainage and make it easier to pick up the slab.

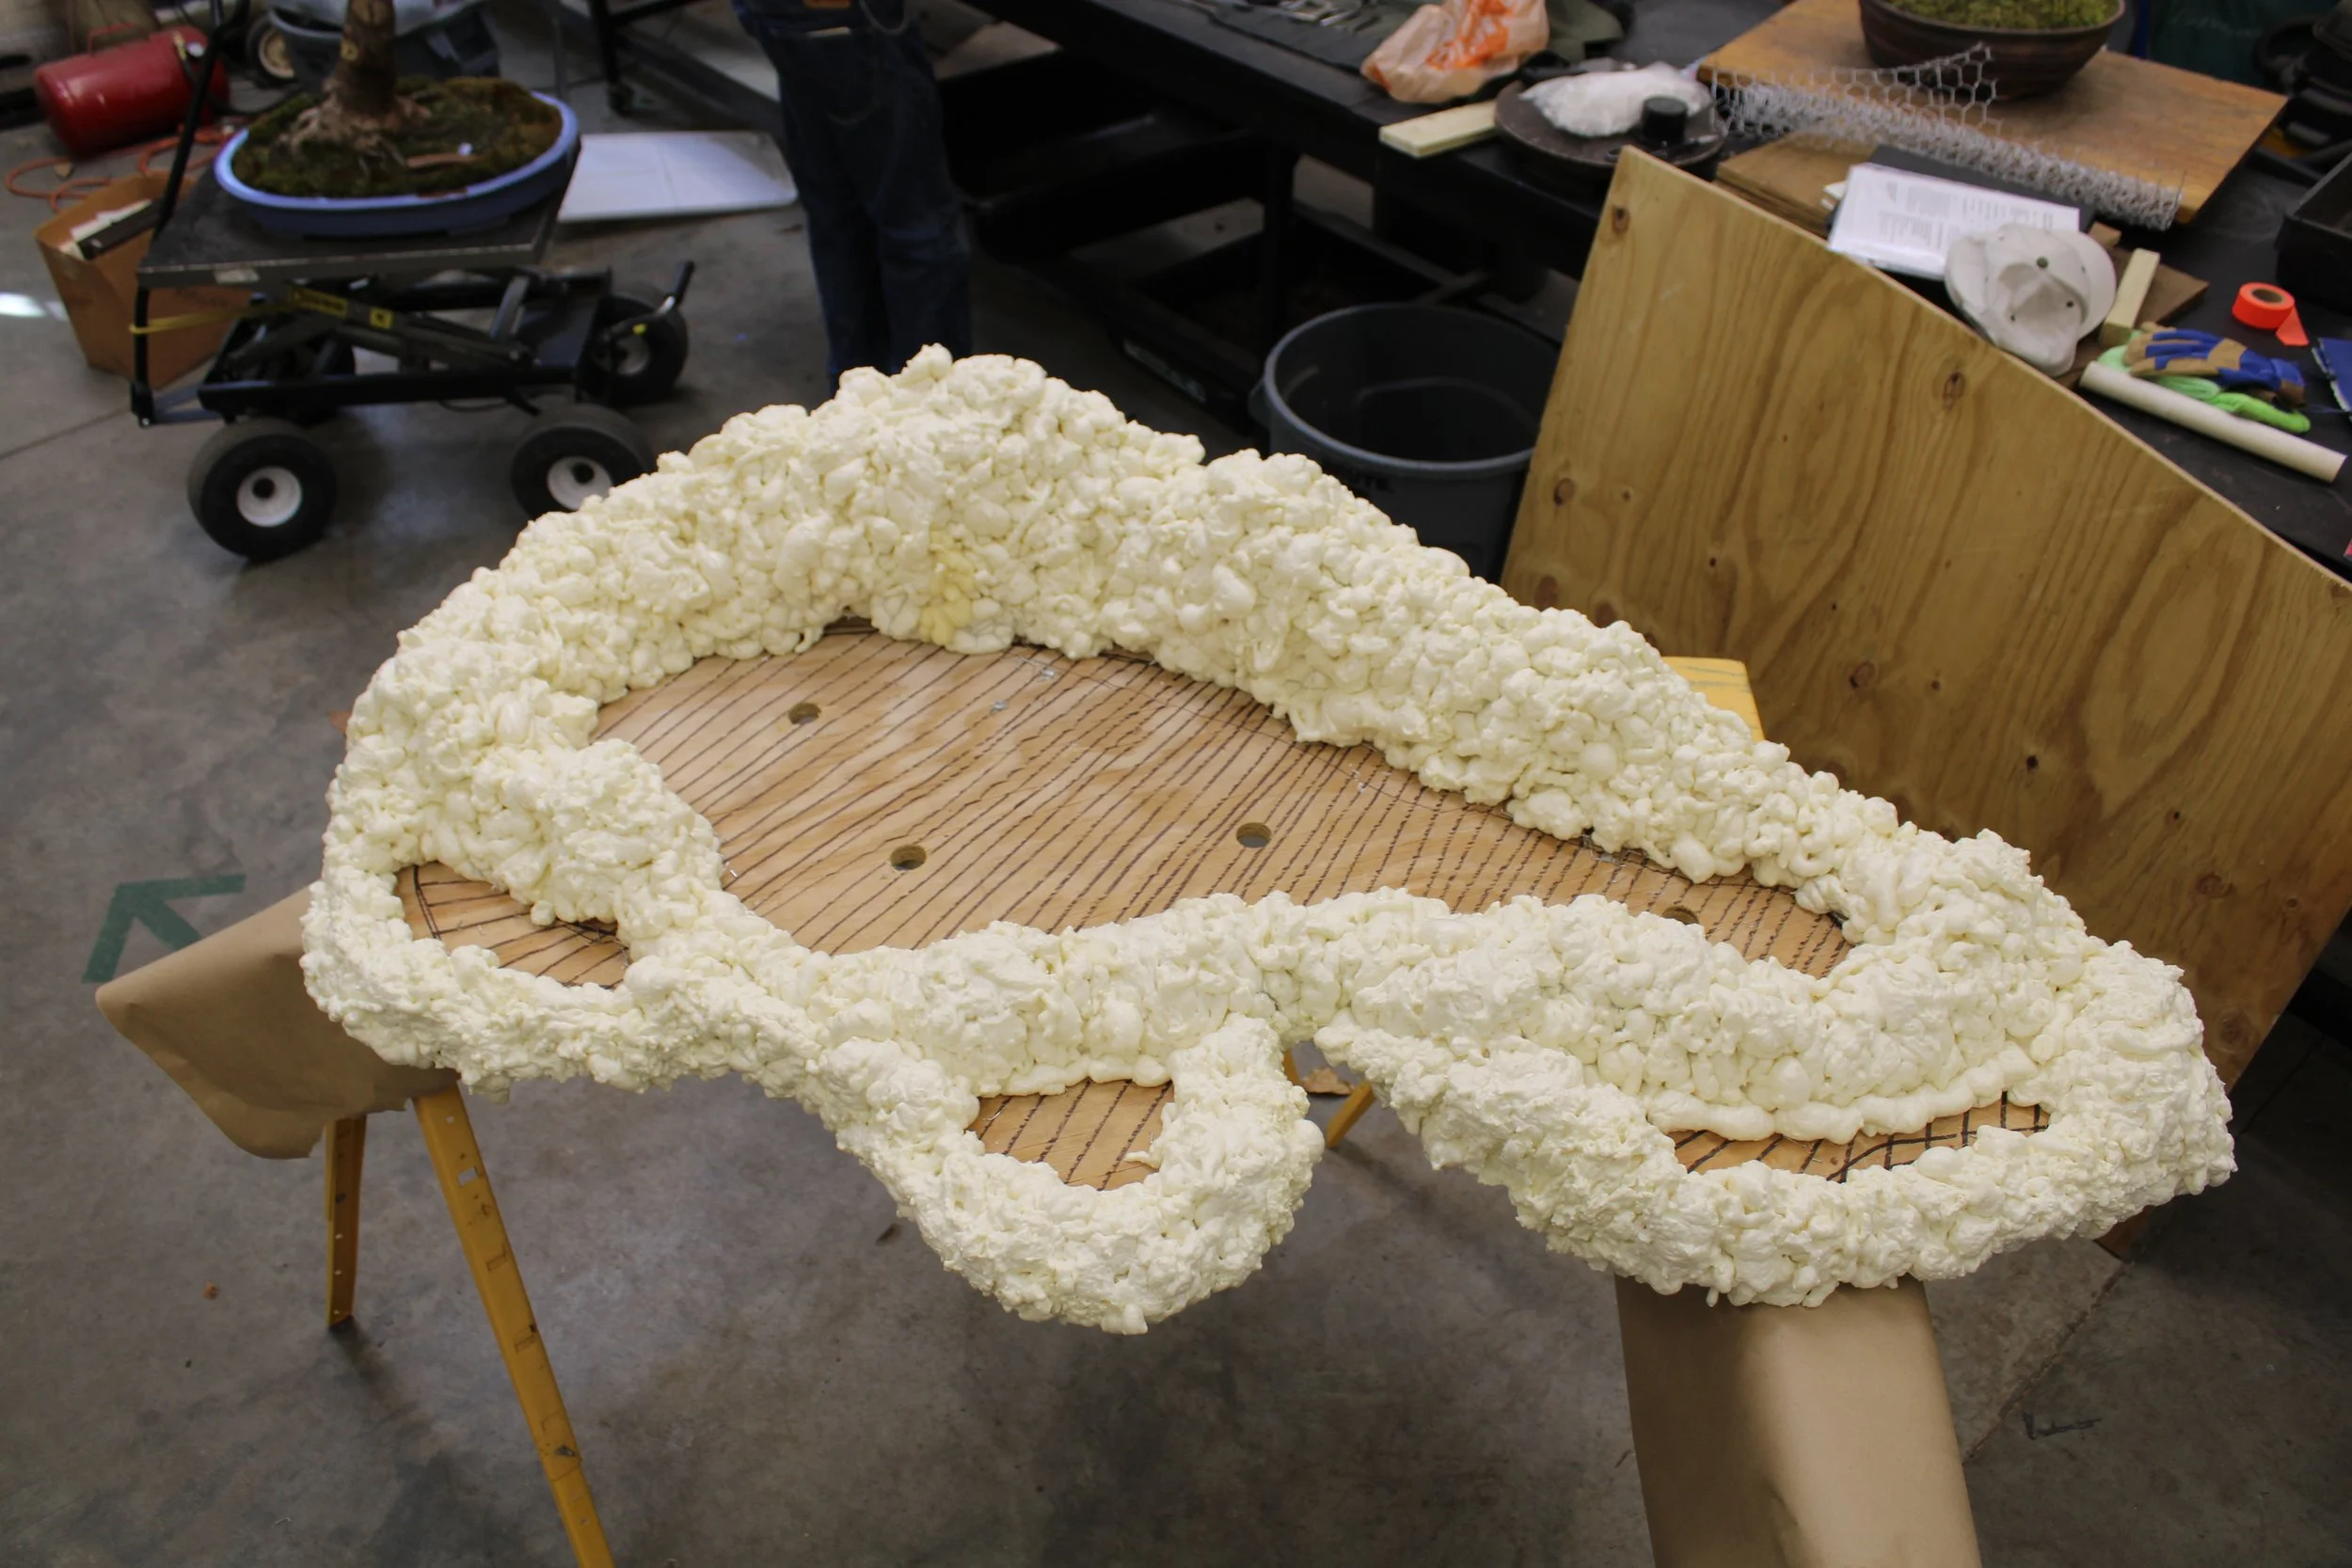
3) 2”x2” pressure treated posts of varying heights were affixed to the plywood base. Chicken wire was then molded over these posts to begin forming the main body of the slab. Holes were drilled into the base for drainage.

4) Once the chicken wire had been molded into an acceptable shape, spray foam insulation was used to fill the space delineated by the wire.
5) This was the appearance of the base once the foam insulation work was complete.

6) Pieces of PVC pipe were cut in 1” lengths and hammered into the drainage holes.

7) Silicone sealant was applied to the base, then spread into a thin layer with a plastic putty knife.

8) The foam insulation was carved with a knife to create a more rock-like appearance. Charlie was a geologist in his working life, so I think he really got into this part of the project.
9) The foam carving work completed.

10) A detail of the carving work.

11) Mixing the Ciment Fondue. This product sets up very quickly, which interfered with my efforts to photo-document the project. Once the cement was ready it had to be applied immediately and the whole business was messy. We wore plastic gloves and started out applying the cement with putty knives, but soon found hands to be the best applicators.

12) The first coat of cement was applied all around the base of the molded and carved foam, with the slab tilted up to keep gravity from pulling off the cement. This step was done twice — once on each side of the slab.

13) Once a layer of cement was applied, the slab was covered with plastic to slow drying time. If the drying time wasn’t slowed the cement would begin to crack. This fact was learned the hard way.

14) Once the concrete work was complete, the slab was blown off with compressed air to remove all loose debris.

15) The slab was then sprayed with an environmentally-friendly concrete sealant.

16) The new slab for The Chase Grove made ready for planting, with screens covering drainage holes and tie-down wires affixed to the plywood base by use of electrical staples.
Building the replacement slab for The Chase Grove took awhile and proved an interesting challenge. I suspect Charlie would have preferred a more studied approach, doing test runs of various parts of the process and that sort of thing, but I was in the usual “let’s find out” mode. That’s why Charlie and I work so well together — he uncomplainingly keeps his better ideas to himself and good-naturedly goes along as I fumble my way to the goal line. The end result of this slab construction project is good, but might not be good enough. Building a more durable version of Chase’s original resulted in an end product that is several times heavier than the original, and that’s a real issue when dealing with such a large piece.
Reconstruction of The Chase Grove took place in a live demonstration at the Arboretum, conducted on March 9, 2025. I called on Charlie to assist with the planting and he consented, reminding me that he had agreed to stay on “to the bitter end.” What follows is a pictorial account of the demonstration:

1) The plants from The Chase Grove did well during their hiatus. They had been potted up using composted pine bark as the medium, with no other components incorporated in the mix, and produced an abundance of new roots as if they liked to grow in nothing better.

2) All the necessary parts were set up and ready prior to the program.

3) As I learned from Father Doyle a long time ago, a good demonstration should always begin with a benediction.

4) The main tree gets placed first, and once more went back to its customary place in the arrangement.

5) “Roughing out” the composition involved placing the still-individually potted trees where I thought they were going to go and then eyeballing the result from the back of the room.

6) As the composition began to take shape, a gap to the rear of the main tree became evident. A shrub was placed in that spot in an attempt to fill the void.

7) The new composition at the end of the demonstration.
It is often the case following a bonsai demonstration that adjustments and modifications are made to the piece. Live demonstrations are not the ideal format for doing bonsai work, so later on, when the audience has gone home and the clock no longer matters, corrections can be more thoughtfully made. In this instance, the gap in the composition previously filled with a shrub was fitted out with another falsecypress tree. The tree used was the one previously removed during the corrective work done following the replanting in 2018, after the death of another tree necessitated some rearranging. If you want to think in anthropomorphic terms, it was a family reunion for trees in the grove.
Here are four views of The Chase Grove in its latest iteration:


A little time will now be needed for this landscape to settle in and fill out. It is not inconceivable that The Chase Grove will find its way back out to display in the bonsai garden sometime in the upcoming growing season, but time will tell about that.
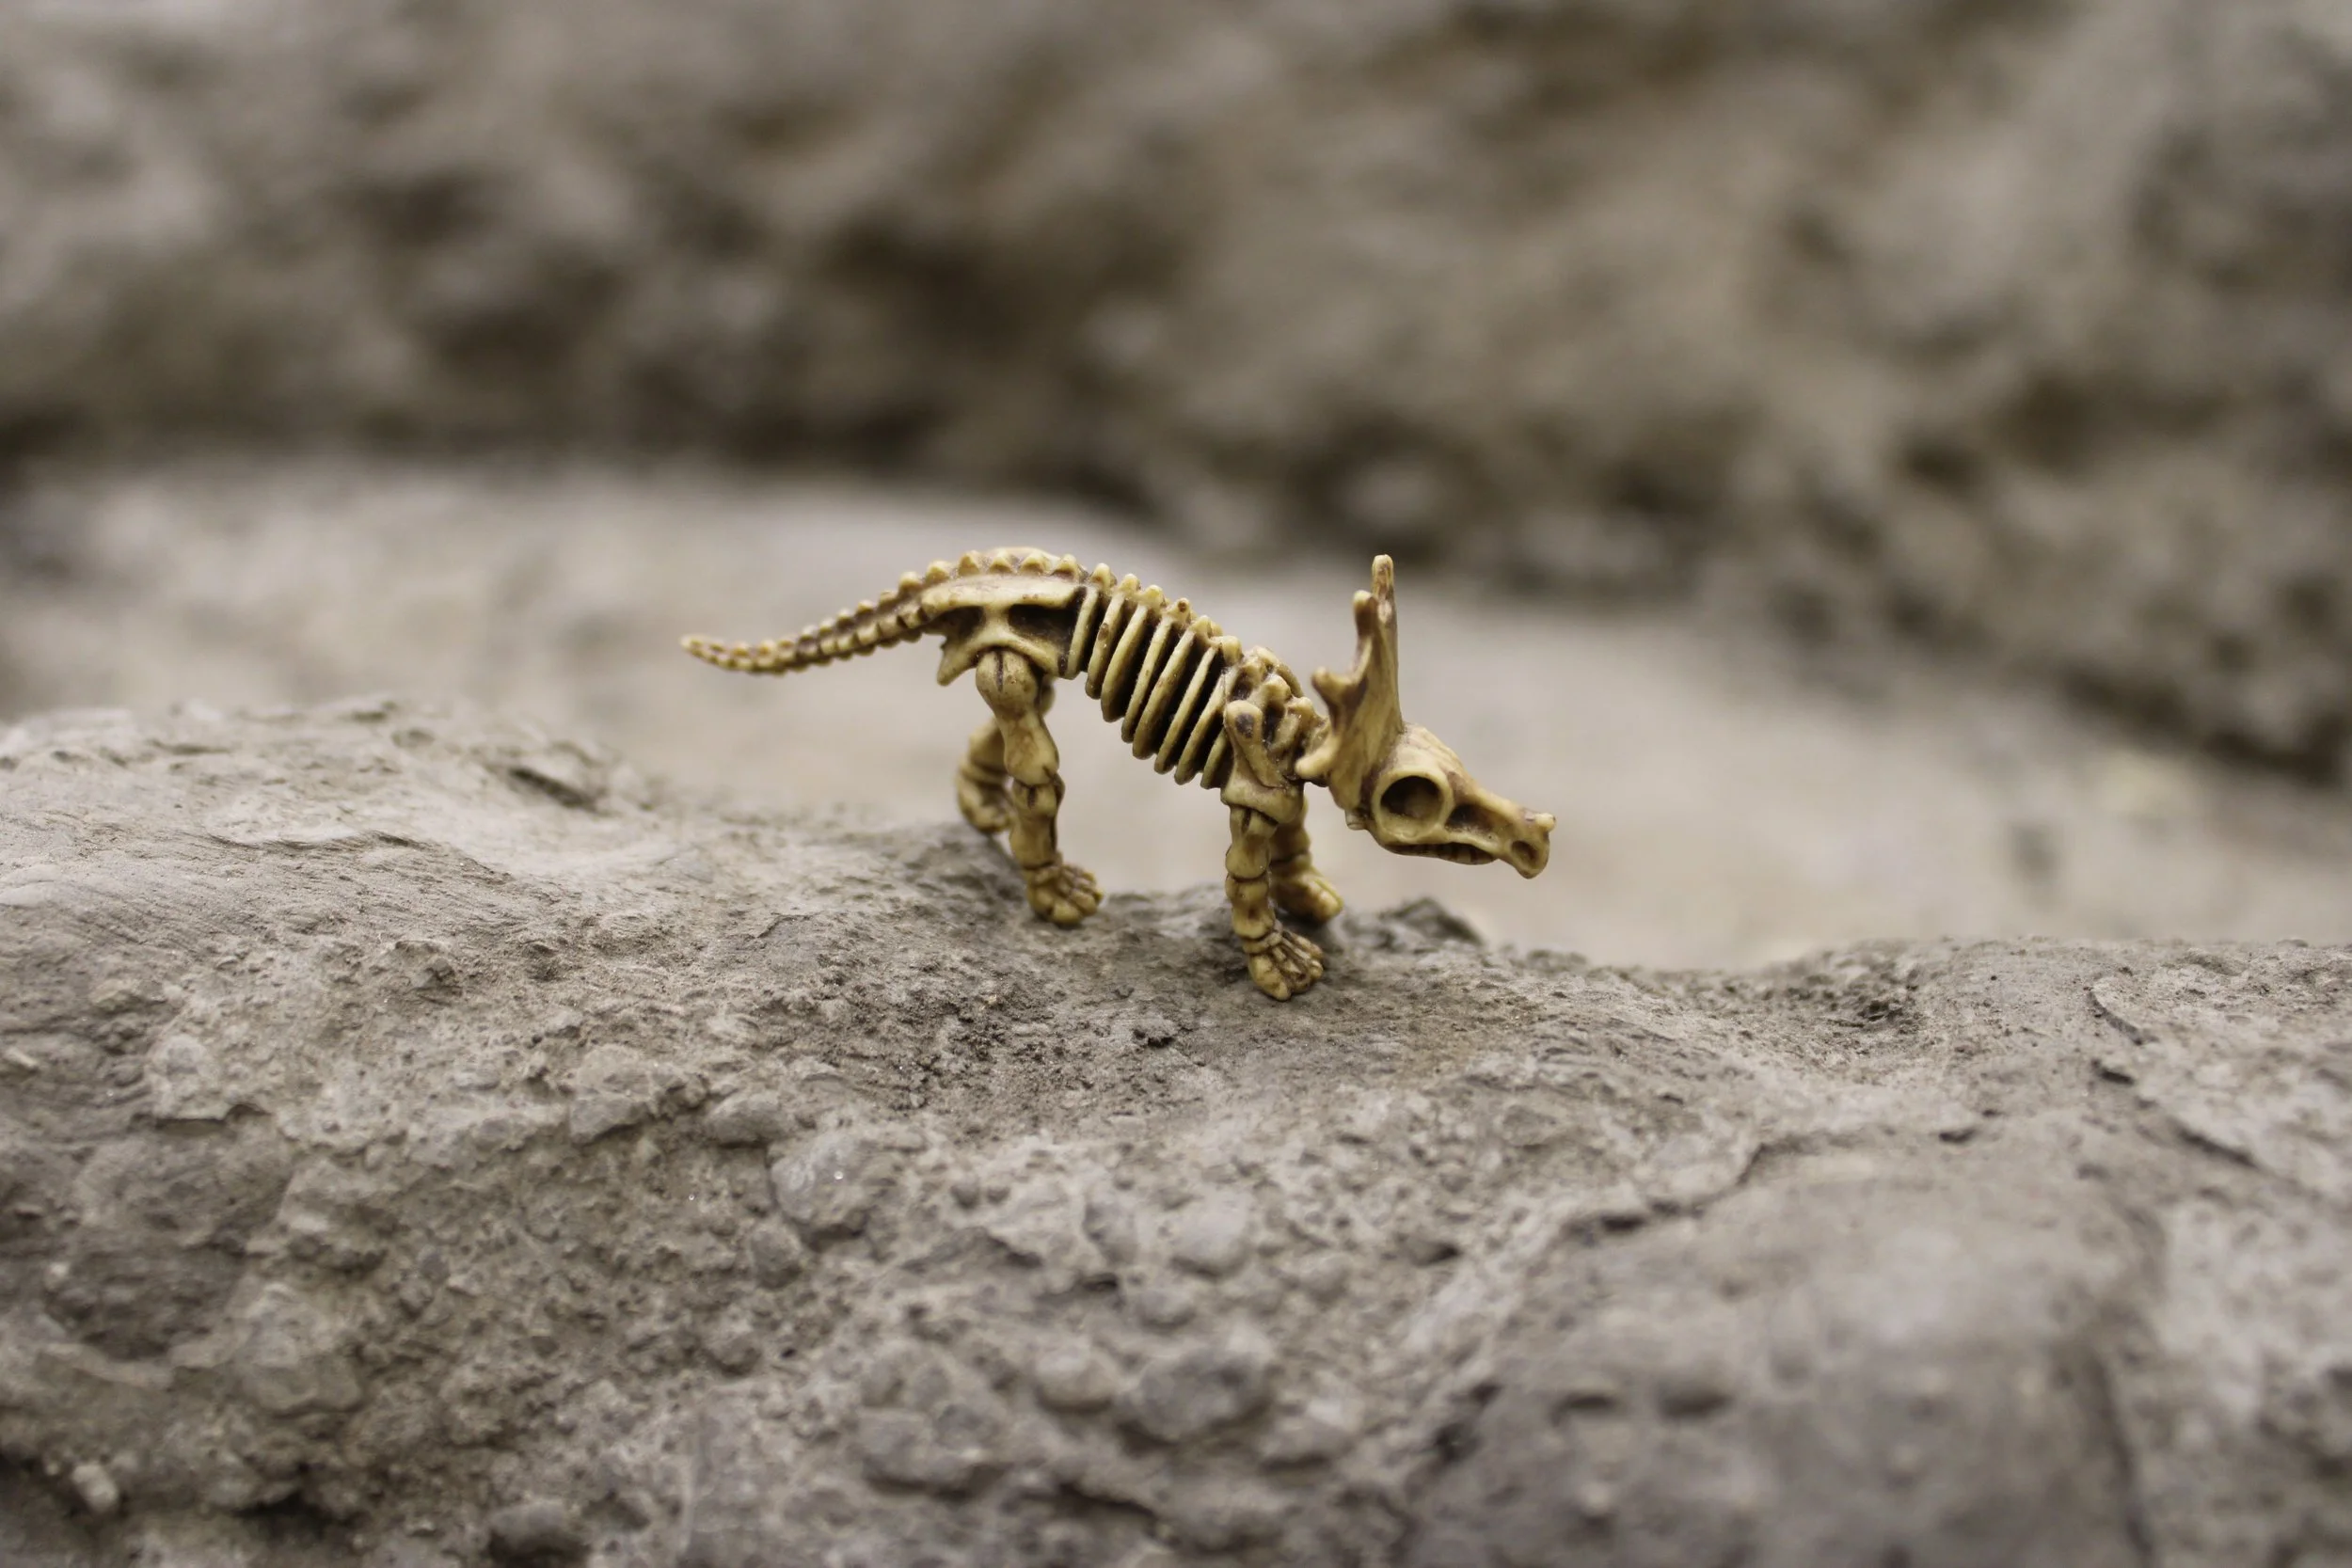
Oh, one last thing — when we were building the replacement slab, Charlie turned up with a little figurine he thought a perfect addition to the landscape. It was a tiny skeletal dinosaur of some sort and I laughed at the joke. When we recently did the demonstration together, Charlie once more turned up with his little friend, causing me to wonder if he was indeed joking. I doubt you’ll ever see the figurine in the planting. However, just to humor my helpful friend, here it is: