Midsummer Work on a Developing Tree

(Author's note: This entry follows up on the progress of a trident maple (Acer buergerianum) bonsai-in-training previously featured in year one of the Curator's Journal. It was the third article presented in year one, and features a video showing the collection of this specimen from an in-ground growing bed.)
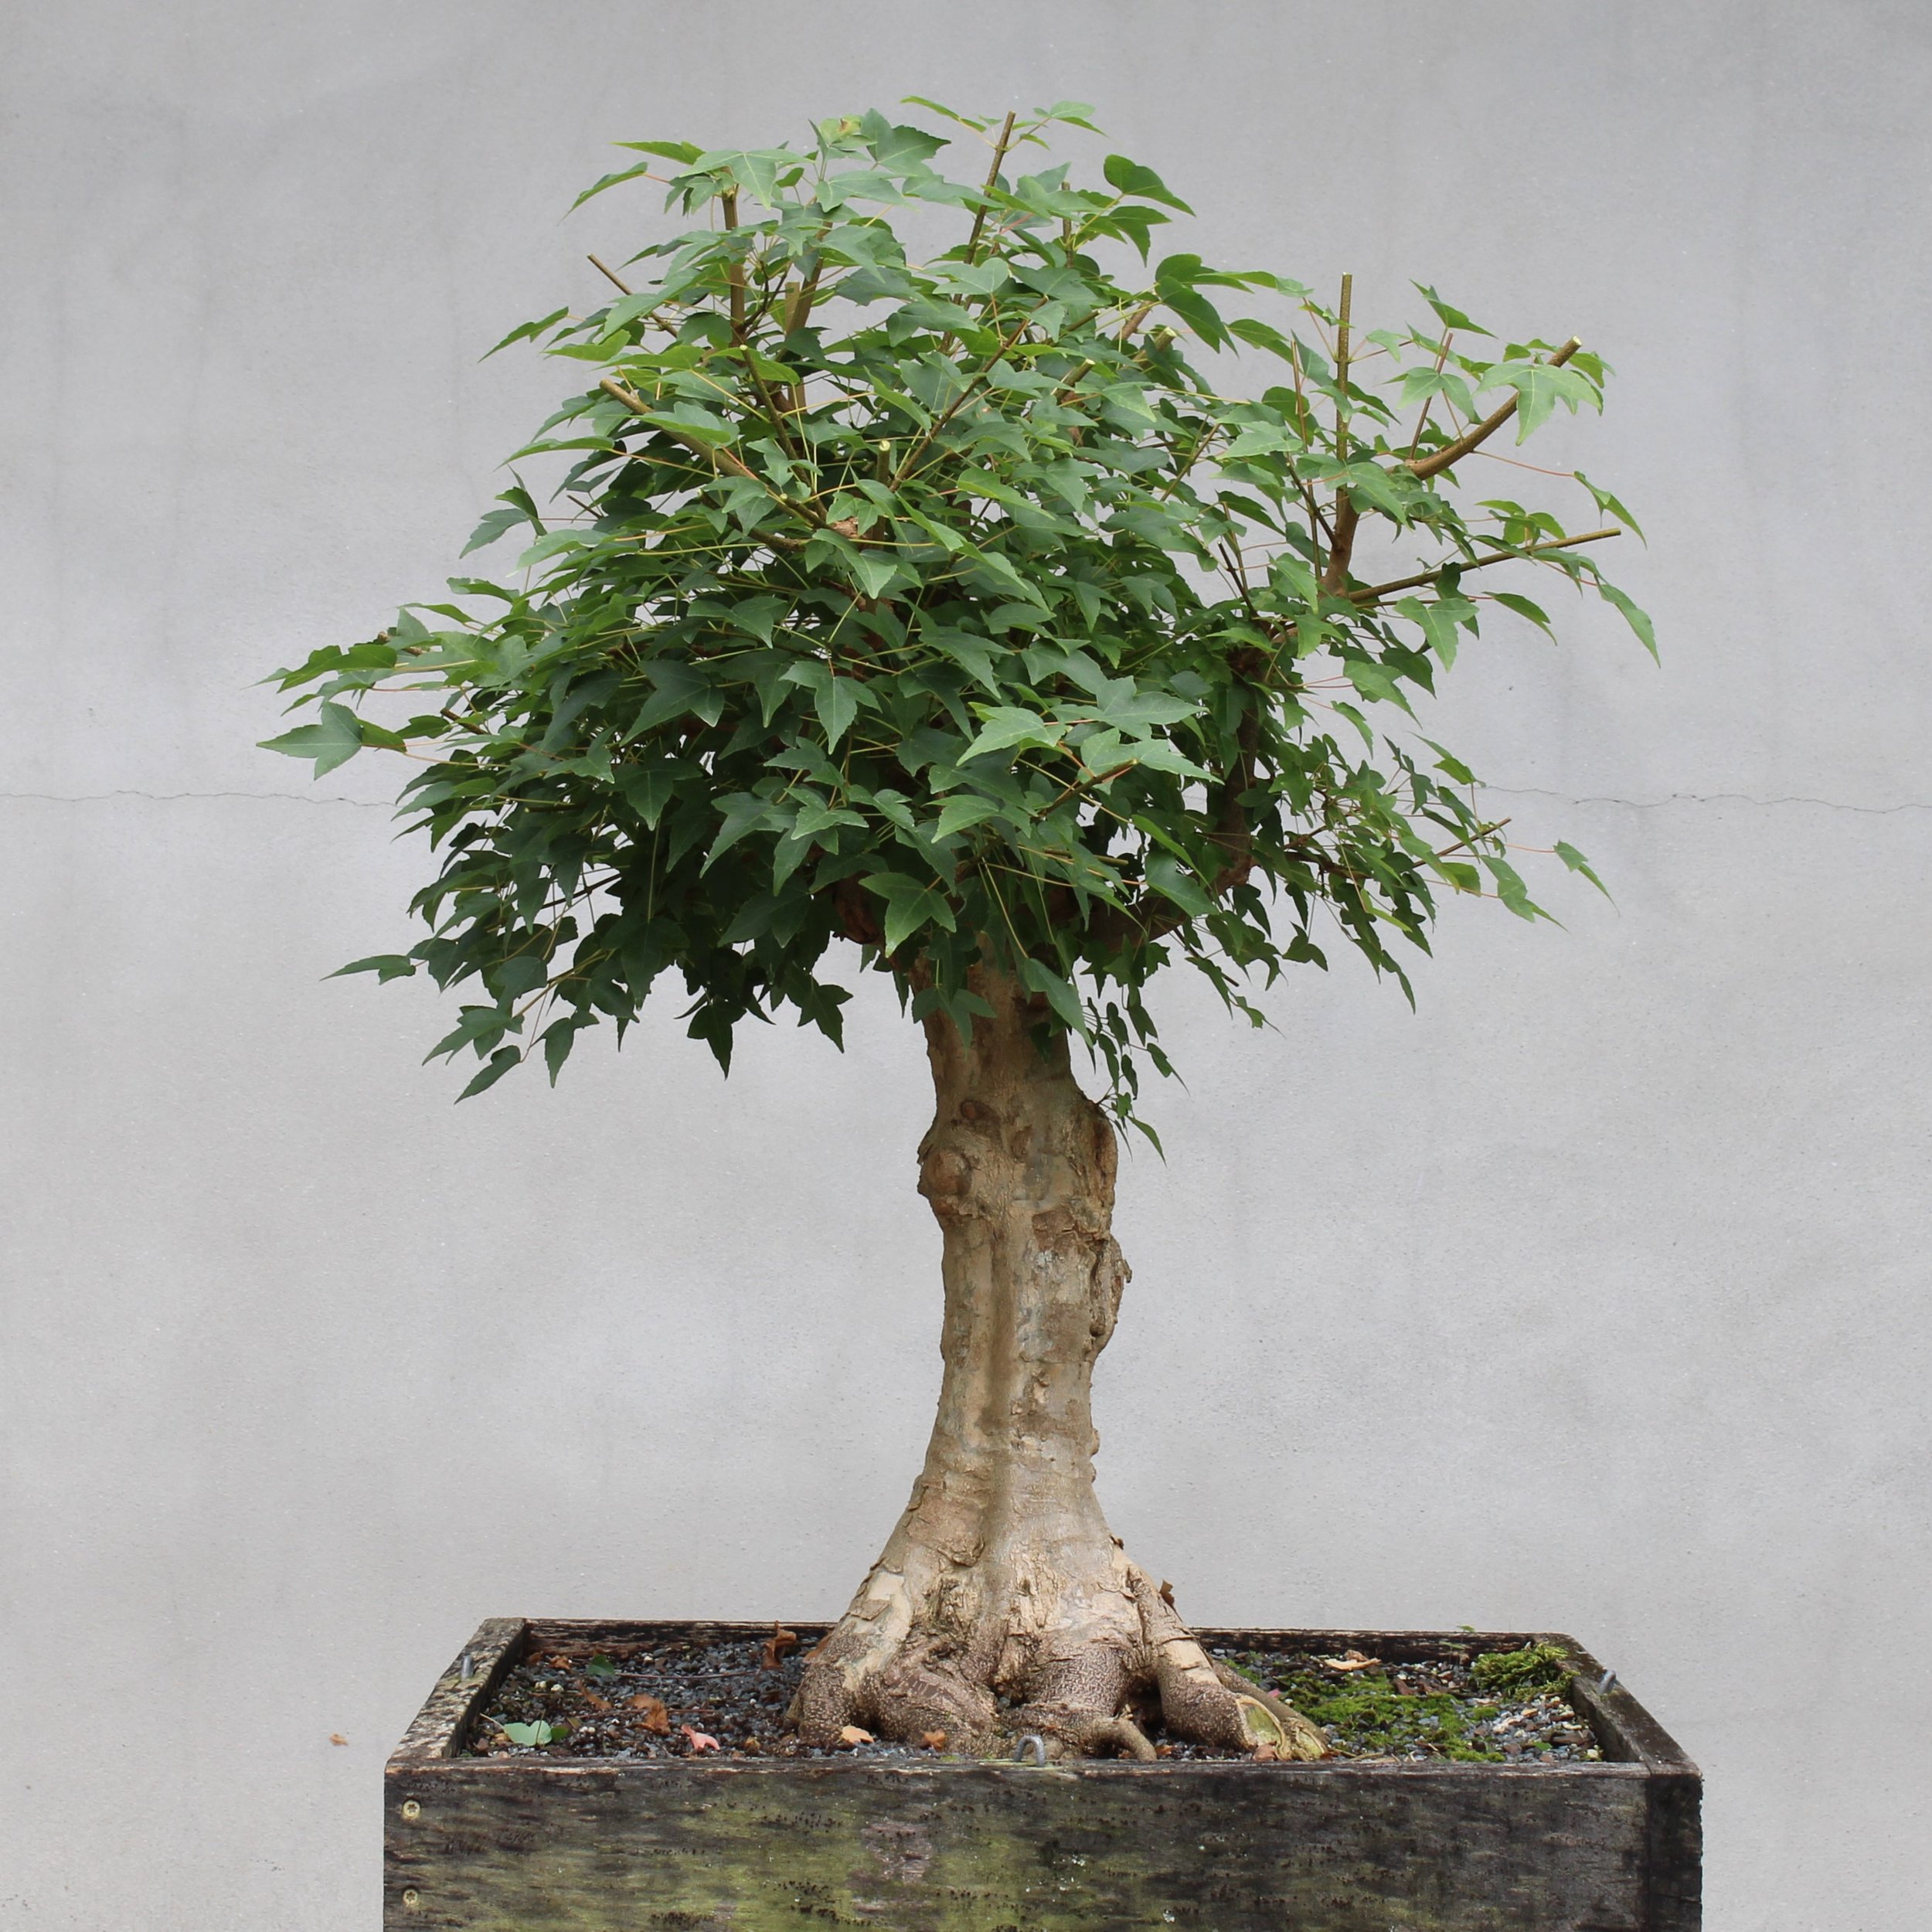
This is the starting point of today’s developmental work session (click on either image for larger view):


Question: Where do you begin on something that looks like this? How do you know what to cut off?
Answer: You don't know starting out what needs to be removed, just that the plant is growing robustly and a lot of it needs to come off. Approaching the tree you should have some knowledge of its recent history. This specimen received a thorough pruning at the end of winter, before the growing season began, but not since. Growth started sometime in April so this abundance of stems and foliage represents more than three months of unrestrained growth. But before that happened, the structure of the tree was redefined so you know that structural core is still there, hidden under a lot of rank new growth. That means everything you're likely to be cutting now is green, not yet lignified, and that gives you a place to start. As for how much to remove, you don't necessarily need to know that at this point. You set the tree up somewhere you have room to work, on a stand that can be raised or lowered, or on a turntable if you have one. If not, you set up the tree somewhere you can walk all around it. You want to be able to see the tree that way — from all around it, three-hundred-sixty degrees. That's the way you want to work, too. Trim here, then move; trim in a different place, then move again. Keep working around it, cutting back as you go. A lot has to come off, so you take off a lot, but you take off less than you think you can get away with. This part of the process is just gross removal to open up the view and let you look in. Doing this also helps get you into a pruning frame of mind, while you become familiar again with the work that's been done on the tree before. At this early stage of the process what you get looks a little like a lollipop tree a child might draw.
Effects of initial pruning (click on any image for larger view):


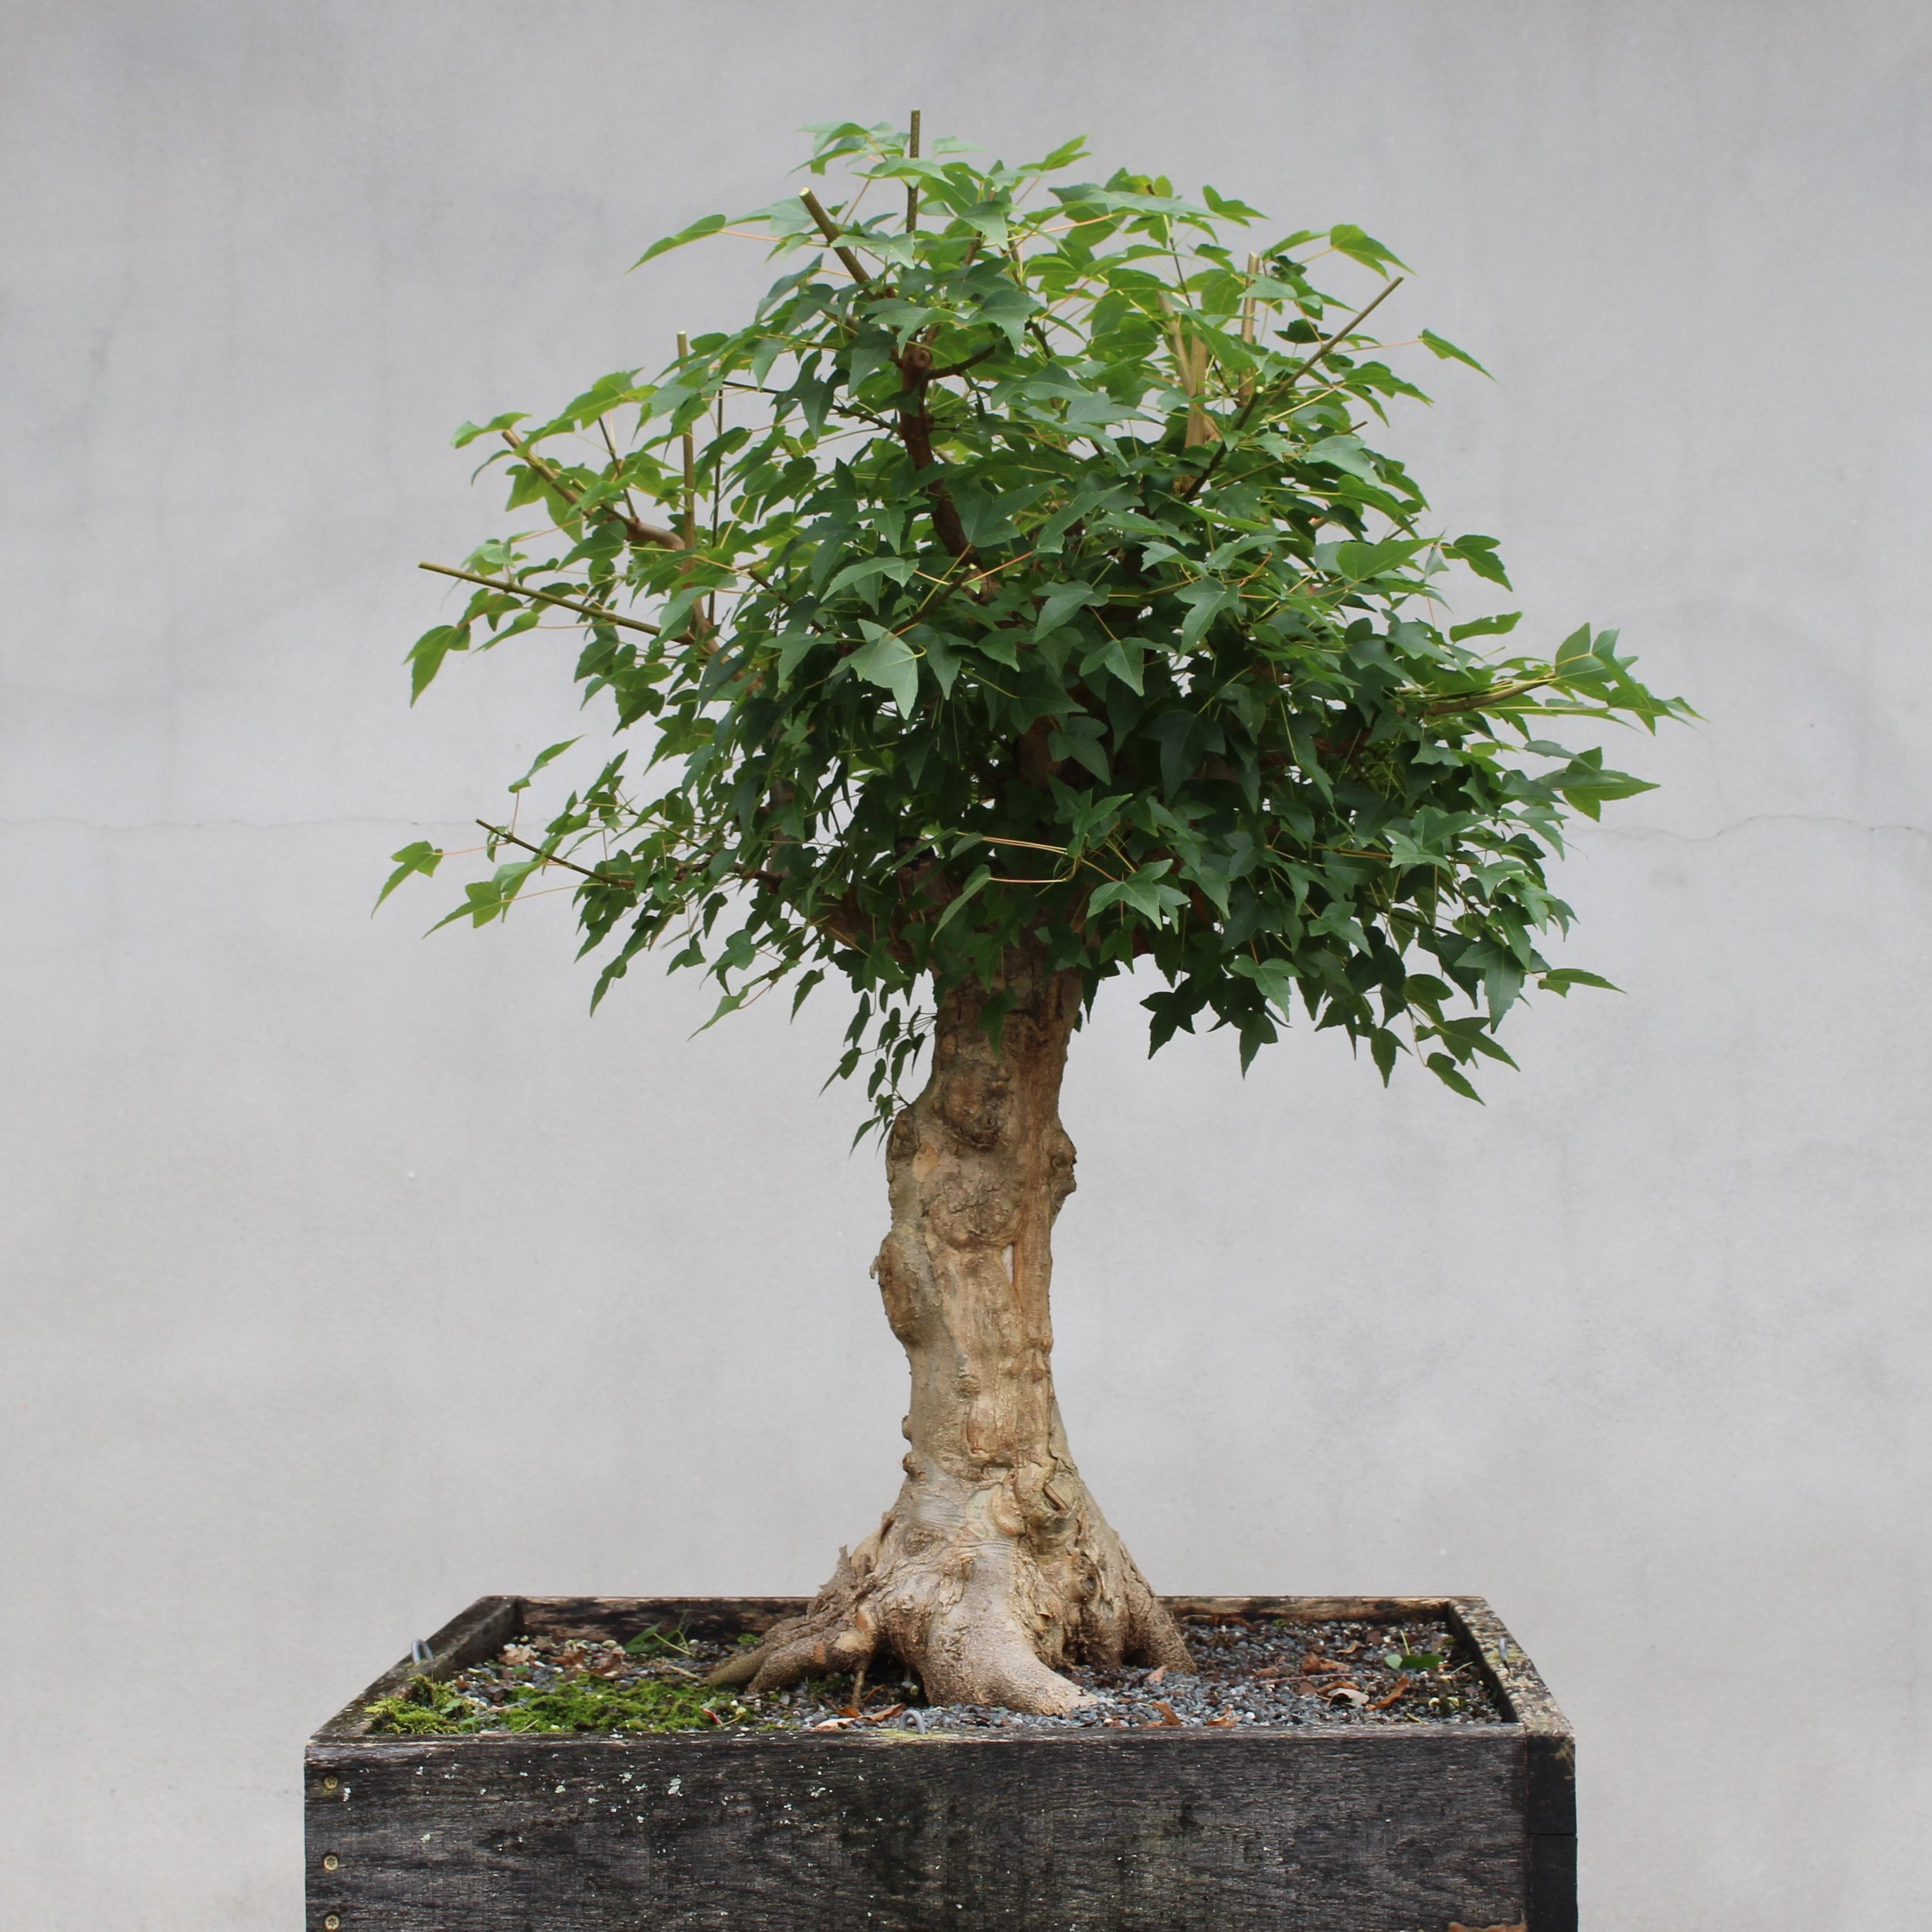
Question: Where is the front on this tree?
Answer: This tree does not have a front. It's way too early to be thinking about that, because this isn't even a bonsai yet. It all works better if you forget about it being a bonsai and think instead about shaping a tree. After you've made the first pass around the plant you're pruning, pushing back on all the rank growth, you keep on going. You keep working all over the entire crown of the tree, but now you begin looking more closely at how it is put together. The initial pruning that is done at the very end of winter sets up the period when the tree initiates spring growth and new shoots pop out all over the place. The pruning is what prompts that response on the part of the plant and it's what you want to see. Not all of those new shoots turn up in a useful place, however. That is what you are looking for now as you work your way around and around the tree — the extra stuff, the multiple shoots emerging from the same general area, the shoots that go straight down, or those that aim back toward the interior of the tree, or those that come out of the crooks and crotches of existing branches. All of these unwanted, excess bits of new growth need to be removed, and just eliminating them will open up the crown of the tree considerably.

Question: But how do you know you don't need them? How do you know certain shoots are good and others are undesirable?
Answer: Sorting out what is desirable from what is undesirable comes down largely to experience. Starting out in bonsai you learn some general guidelines, which are often referred to as "rules." It is better to think of them as guidelines, though, because they are meant to guide you as you are learning, and not meant to be laws that must always be closely followed. You lean on them when you are starting out and they help keep you steady, like training wheels on a bicycle. After a while of following them, the guidelines become ingrained in your thinking and then you can move more efficiently through the decision-making process. Sometime after that you might have occasion to question some of those guidelines, because you come across a situation where you think going outside of them a little bit might be advantageous. Or maybe one day you're feeling frisky and you decide to intentionally go against the guidelines just to see what happens. If you follow this impulsive course, most often the result will be unsatisfactory and then you will better understand why the guidelines exist. Every now and then, however, you might try something different and find the result pleasing. All this comes under the heading of learning. You first learn by following a proven example, then you learn by testing the example through experimentation. You learn by doing, again and again and again, and trying different things as you go. All of that adds up to experience. Experience guides you through the phase of the process where you eliminate unnecessary parts, and it becomes almost automatic.
After the second phase of pruning (click on any image for larger view):


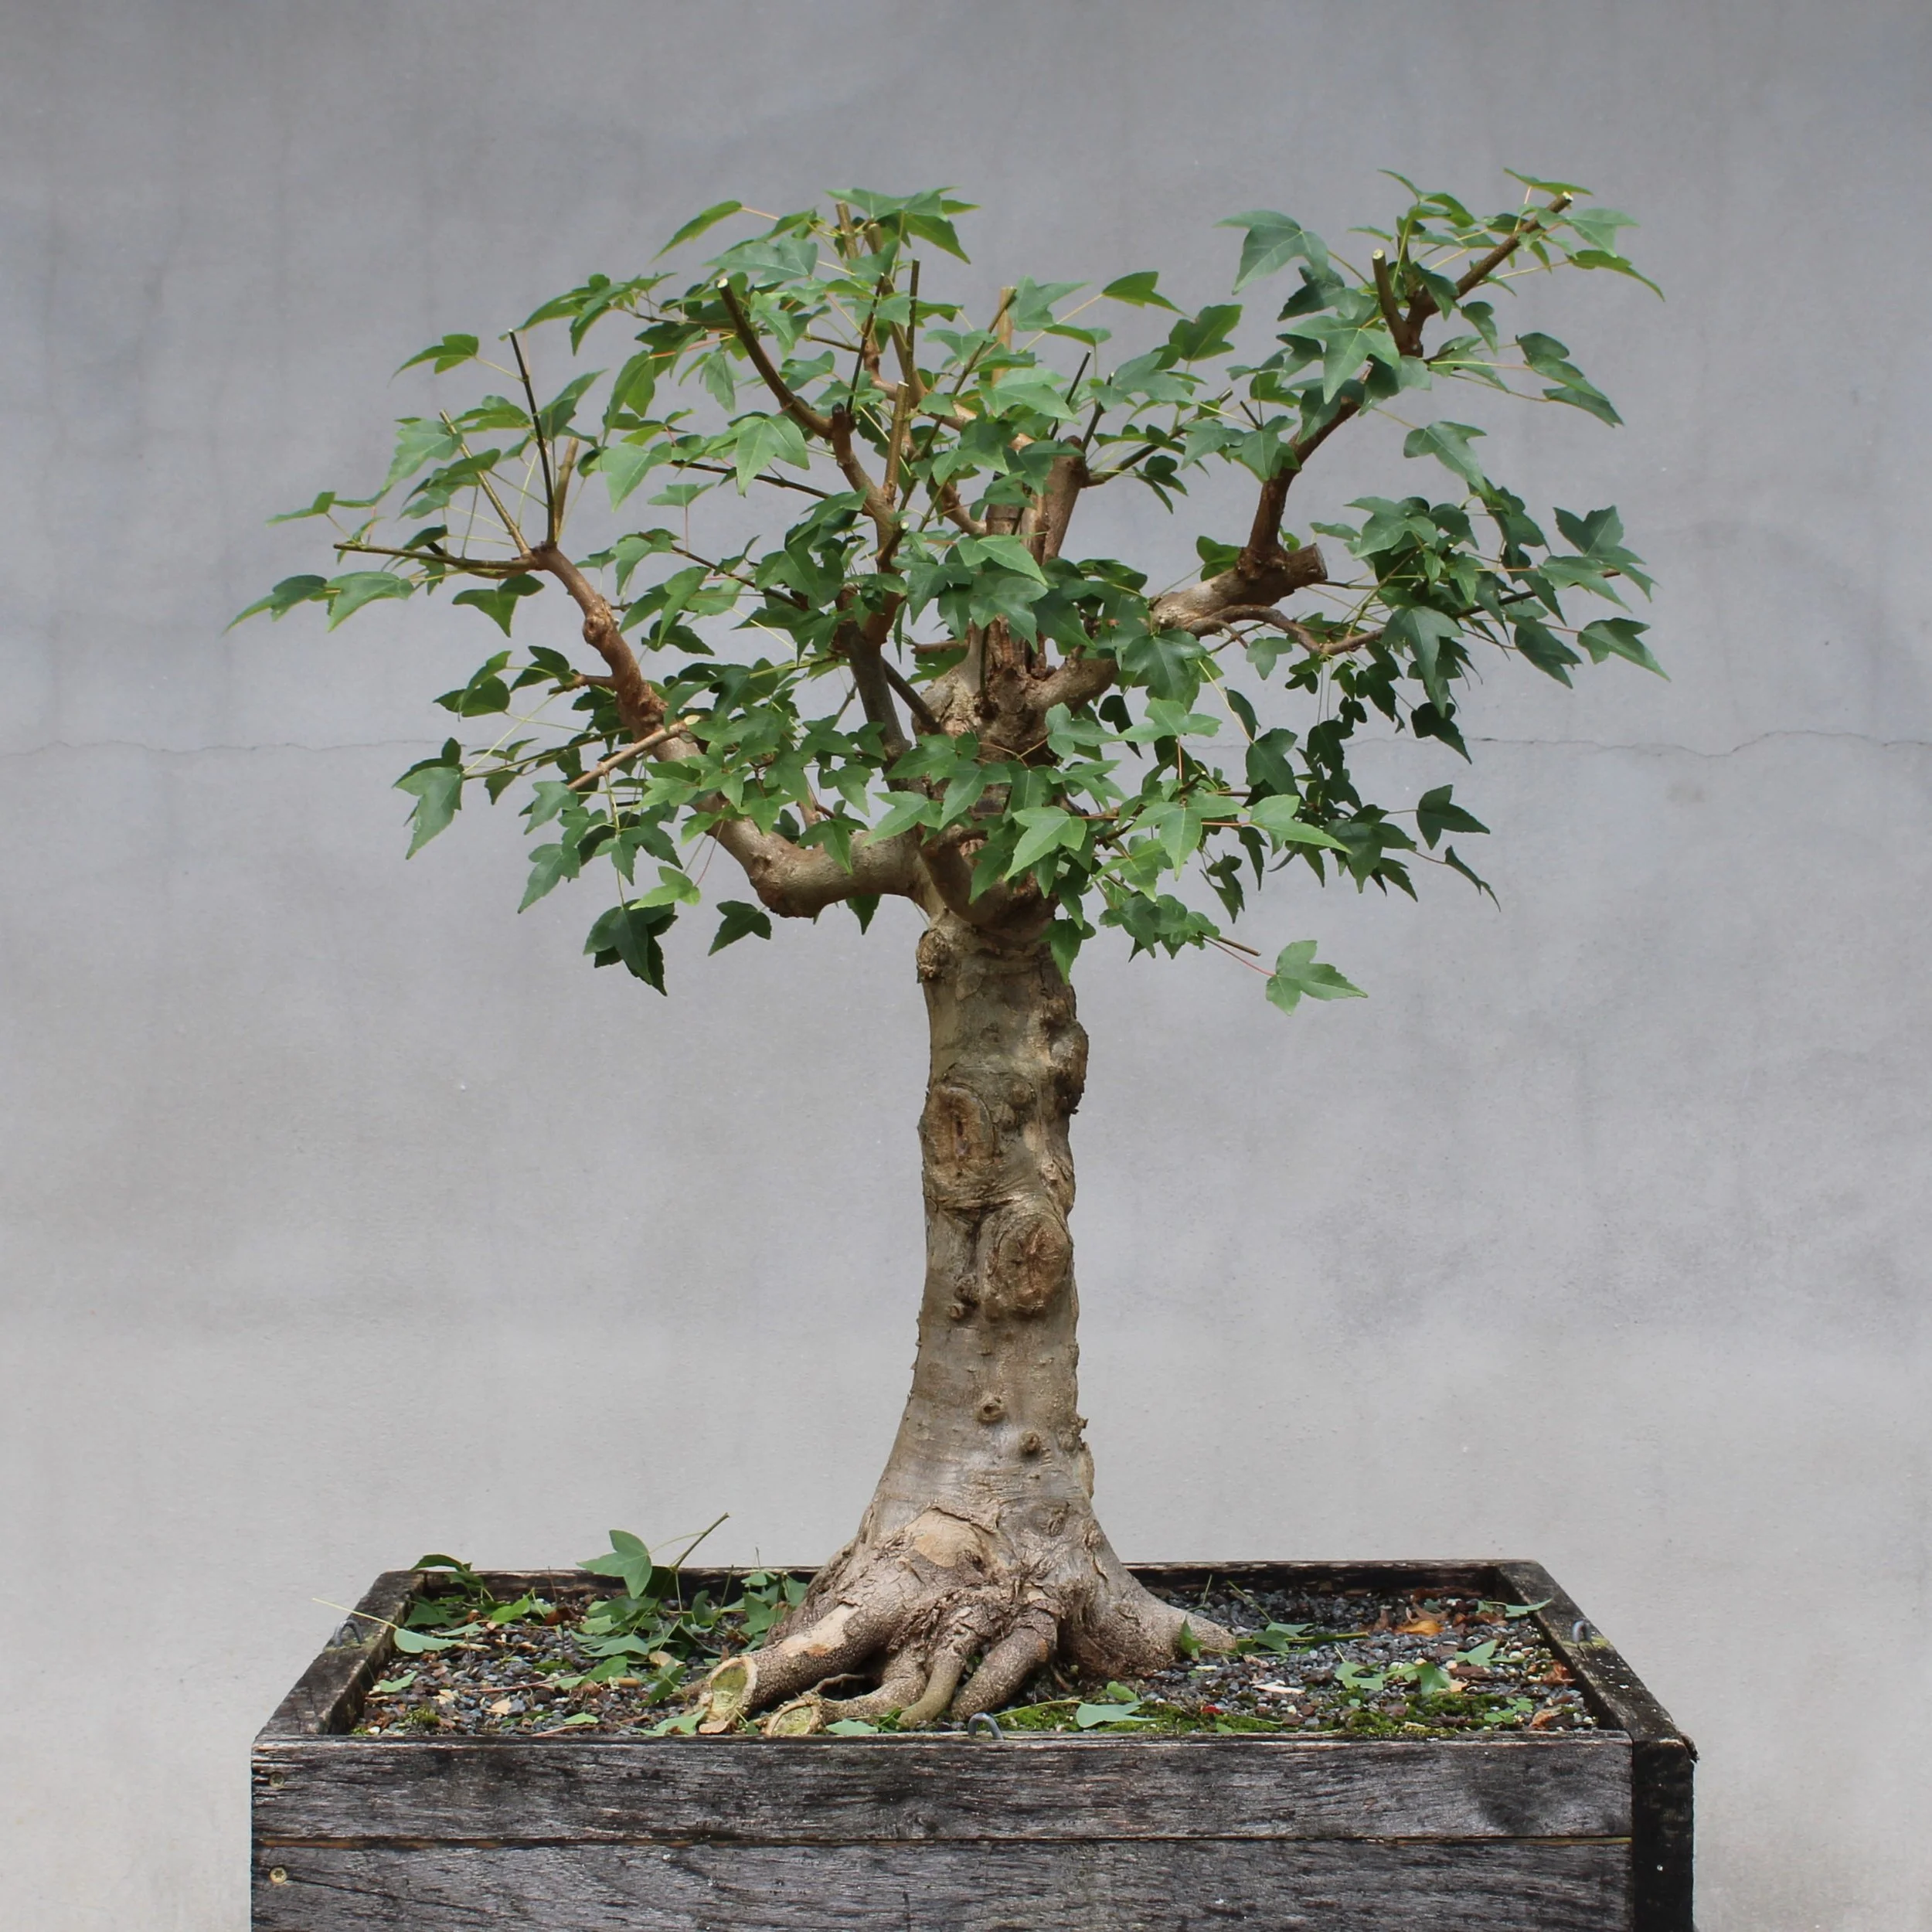

Question: Once you have shortened all the branches and then gone back through the tree and eliminated excess shoots, is the work done?
Answer: No. Remember that the initial shortening of branches was approximate, and that all the branches were left a little longer than you thought they probably needed to be. And when picking through the new shoots, deciding which to keep and which to remove, not all the decisions are automatic. There are situations where the best option is not immediately apparent and these should be passed over for the time being. After this second round of pruning work the canopy mass is greatly simplified and it is much easier to see the structure of the tree. Now comes the phase of the operation where design and creativity come into play.
Question: How do creativity and design factor in at this point?
Answer: It is said that the devil is in the details, but the angels are in there too. How long should each branch be at this point? If you are shortening a branch, is there a place to which you can cut it back and have a secondary branch take over as the continuation of the branch line? What shape do you ultimately want the branch to have? What direction do you want it to go? How does any given branch relate to the other branches around it? And don't forget those places where you passed over a decision that wasn't immediately obvious. Now you revisit each one and make your choices.
Question: But how do you make the choices? Do you have a certain design in mind when you start?
Answer: No. You are not constructing a building. There is no blueprint or step-by-step set of instructions. Here is how it goes, as straightforwardly as I can put it: You work around and around the tree, holistically, treating the tree as a three-dimensional object. You focus in on one part of the tree and prune away what your experience tells you is unnecessary. You keep stepping back from your work to see the effect of the choices you are making. You work incrementally, a little bit here and a little bit there, feeling your way as you go. You do your work in increments and the tree is built in increments. No bonsai is created in a day. This particular maple has been years in the making and the session it goes through today is just another step along a path, another increment working off the increments that preceded it and setting up the increments that will follow. You know how it goes because you've done this before many times, and you have come to recognize the pattern. You have your experience to draw upon. One element of your experience comes from understanding the basic guidelines of bonsai design that you've learned through repetition and expanded upon through experimentation. After you have shaped a thousand little trees you develop a sense of what works best from a mechanical standpoint. But layered on top of that is your own personal sense of design — what you think looks good. Your idea about what looks good can only be based upon how much looking you've done and what you've been looking at. This is another element of experience and you can think of it in terms of visual input. If your visual input is primarily other bonsai trees, then your sense of design will be strongly influenced by that. But if your visual input comes from looking at something else, actual trees in nature for example, then your design sensibilities will be different. Then as you are working on the little tree you are thinking of big trees as you know them and drawing on that experience. Then the countless hours you've spent looking at trees and studying them in all their particulars, and the mental notes you've made over the years about certain features that have impact — the arresting movement of a prominent branch, say, or the rugged character of a tree that has sustained heavy damage but then recovered and struggled on to survive — all come into play, all have influence on how you go about making decisions. If it goes very well you get to a point where your hands are moving but no conscious thought is behind the action. The mind remembers what the eyes have seen and the hands move in accordance. You look at the little tree you are shaping and you see what it has to offer. You work with it, using mechanical techniques learned through study, run through the filter of personal experience, and you strive to invest your work with what you know about the nature of trees. You put all that together and try to find a shape that looks good. But always the particular tree you are shaping is its own living entity and offers its own individual set of possibilities, and you work with it.
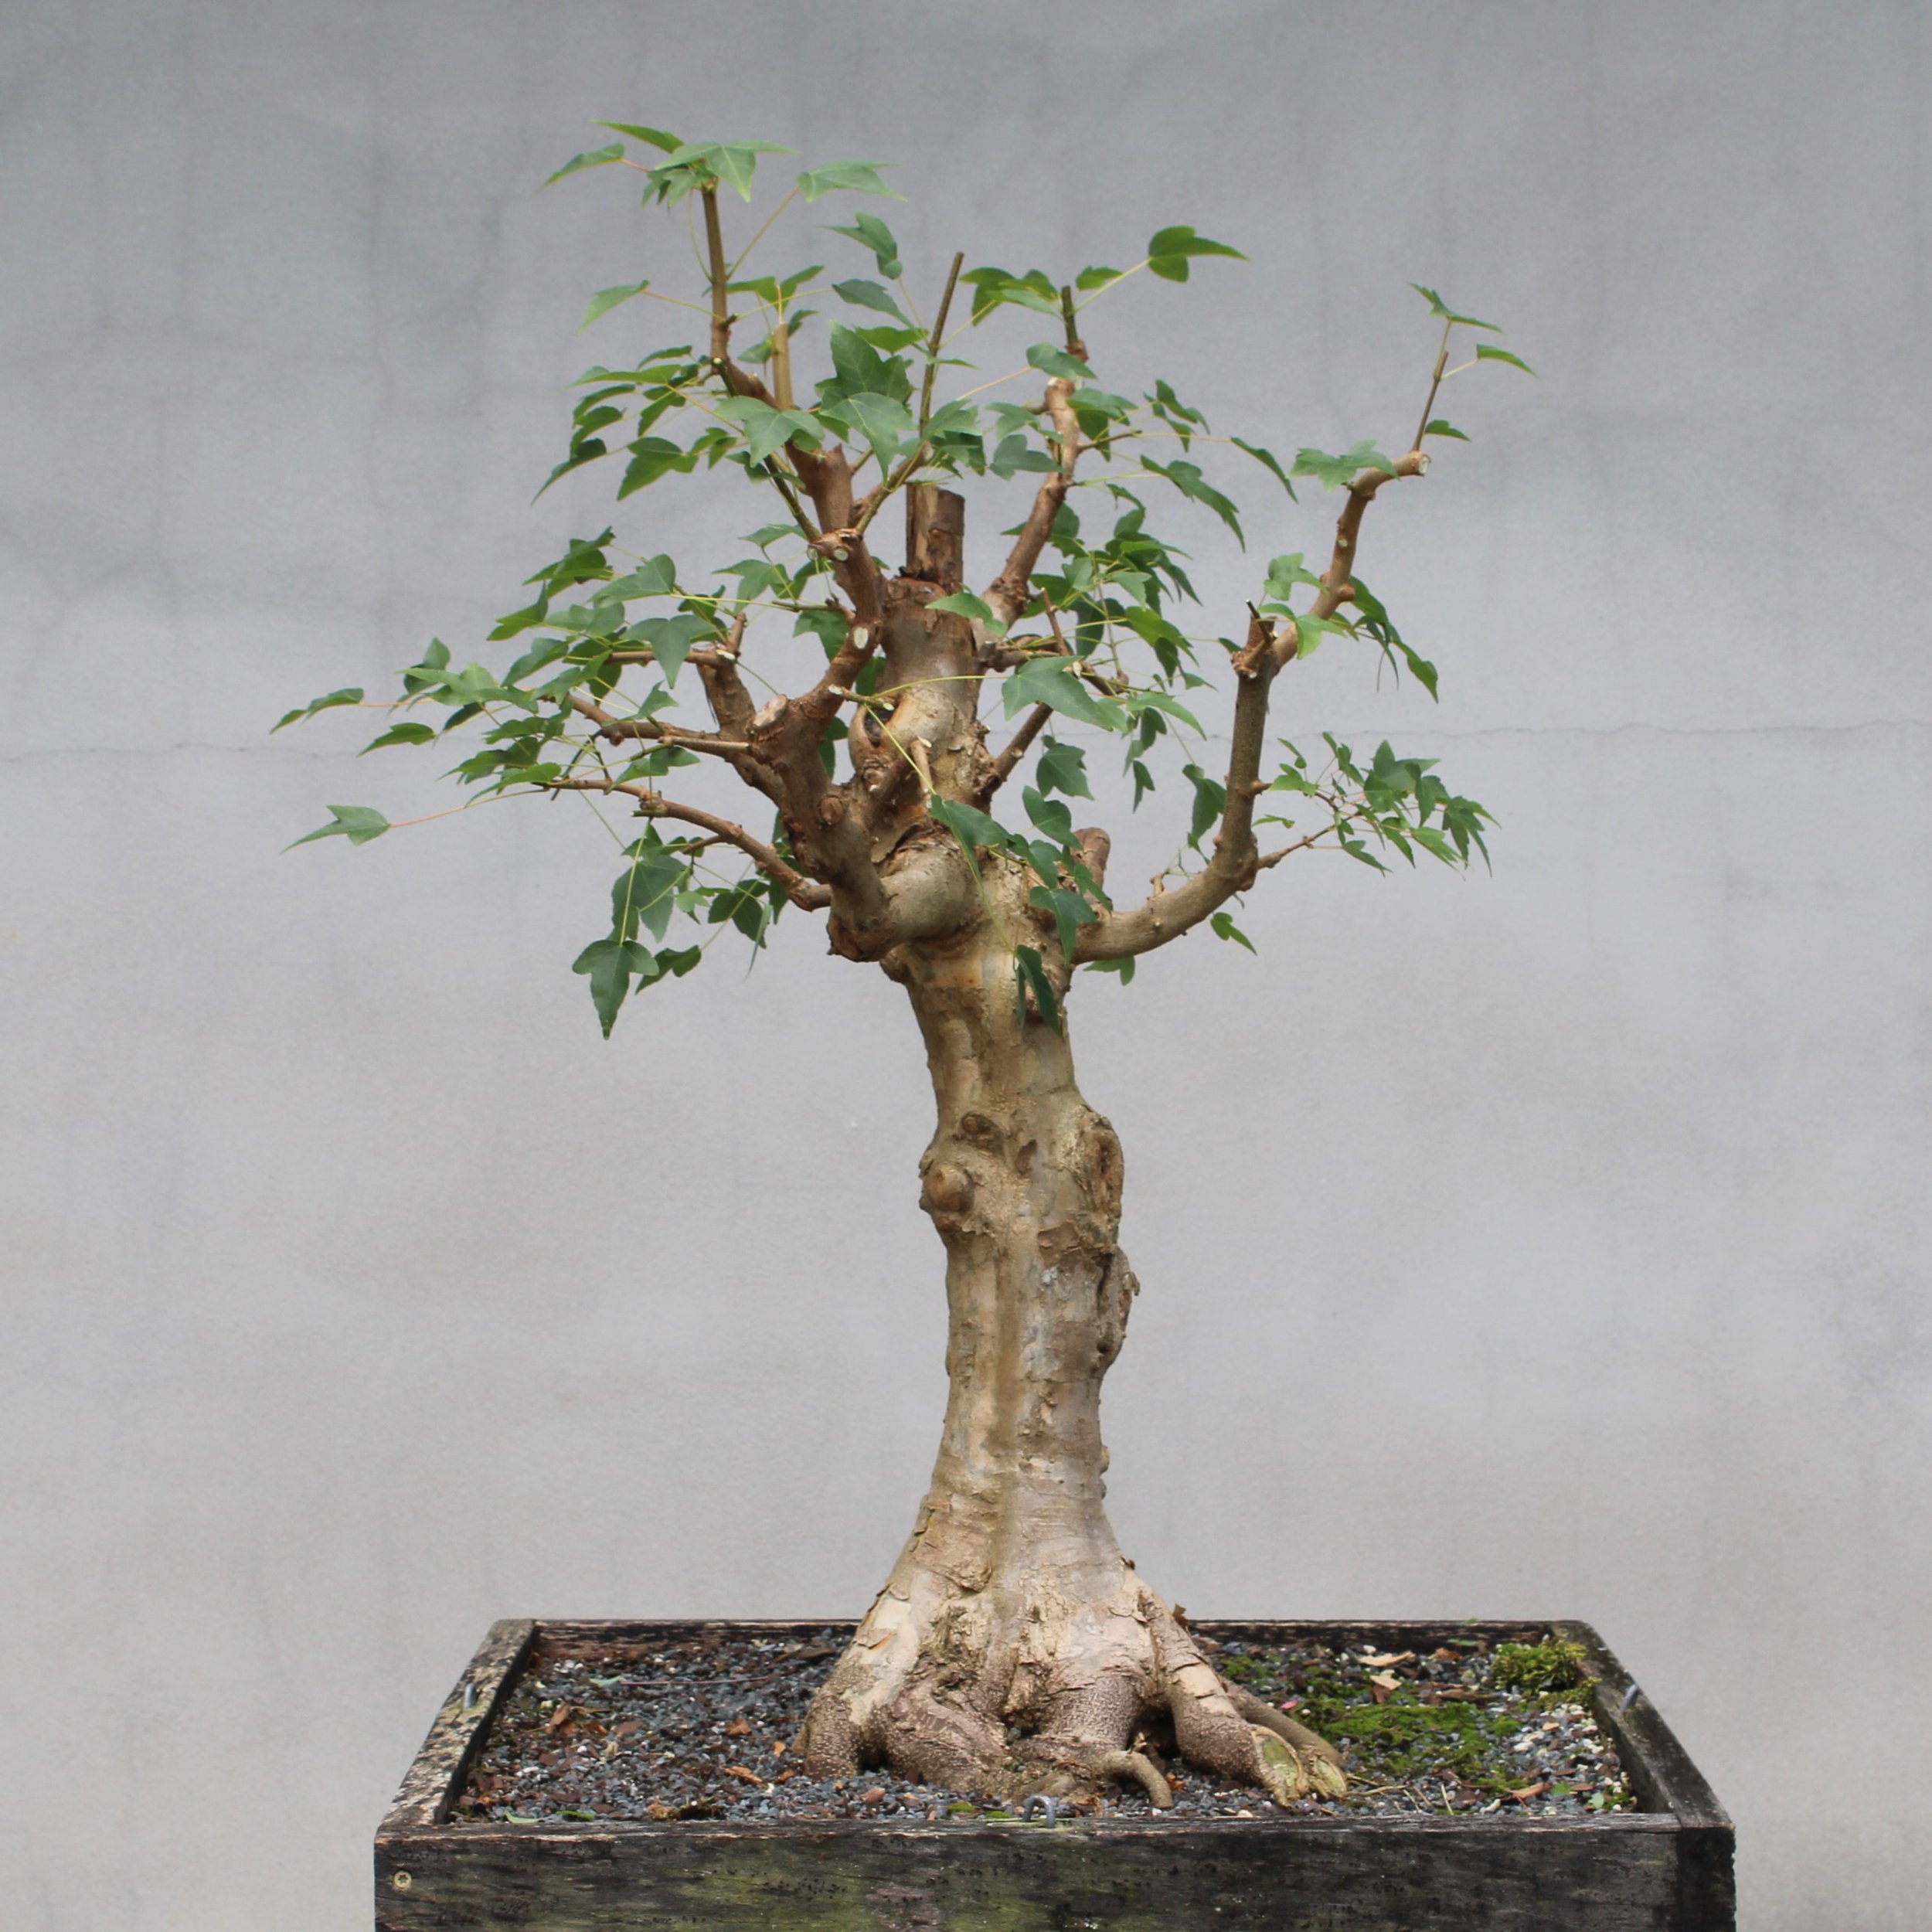
Final iteration of branch structure for this session (click on any image for larger view):


Before and after pictures of how a certain part of the branch structure was refined:


Attention was also paid to the base of the tree. Seen from one direction, it looks agreeable enough and there is nothing particular that needs to be done:

Seen from the opposite direction, the base of the tree has an ungainly appearance. Now is the time to make any possible adjustments, as they will require removal of surface roots and the wounds will take some time to cover over:

After corrective adjustment:

Here is what the design session accomplished, in a side-by-side glance:


Today’s results of working with the tree to produce a naturalistic branching structure in the crown (click on any image for full view):


