Black Pine Progression - Part 2

For easy reference, here is a reprint of the last picture from the previous entry, taken at the time in November of 2008 when our subject black pine was sent in a new direction:

The next available image of this bonsai is from May of 2010, a year and a half later, and presents it out on display in the bonsai garden:

The tree at this point shows good health and has filled out nicely in its new design. The top has filled out well and greater definition can be seen in all the branching, particularly in the lowest branch on the left side. As mentioned in regard to a previous image, the fact that this tree was on display in the garden means I felt generally positive about its appearance. One detail to notice is the container in which the tree is planted. It is not the same one the pine was in from the beginning, but a better quality version of the same style of pot. This style again reflects the example of classical or neoclassical Japanese bonsai, and if you were to look through the same books and magazines I was absorbing at the time as instructional references, you would see all the black pine bonsai potted in similar containers. Similar in style, but top of the line in quality. Perhaps the same style pot is still preferred for this species, but I cannot say because I no longer look to that example for guidance and haven't for a long while.
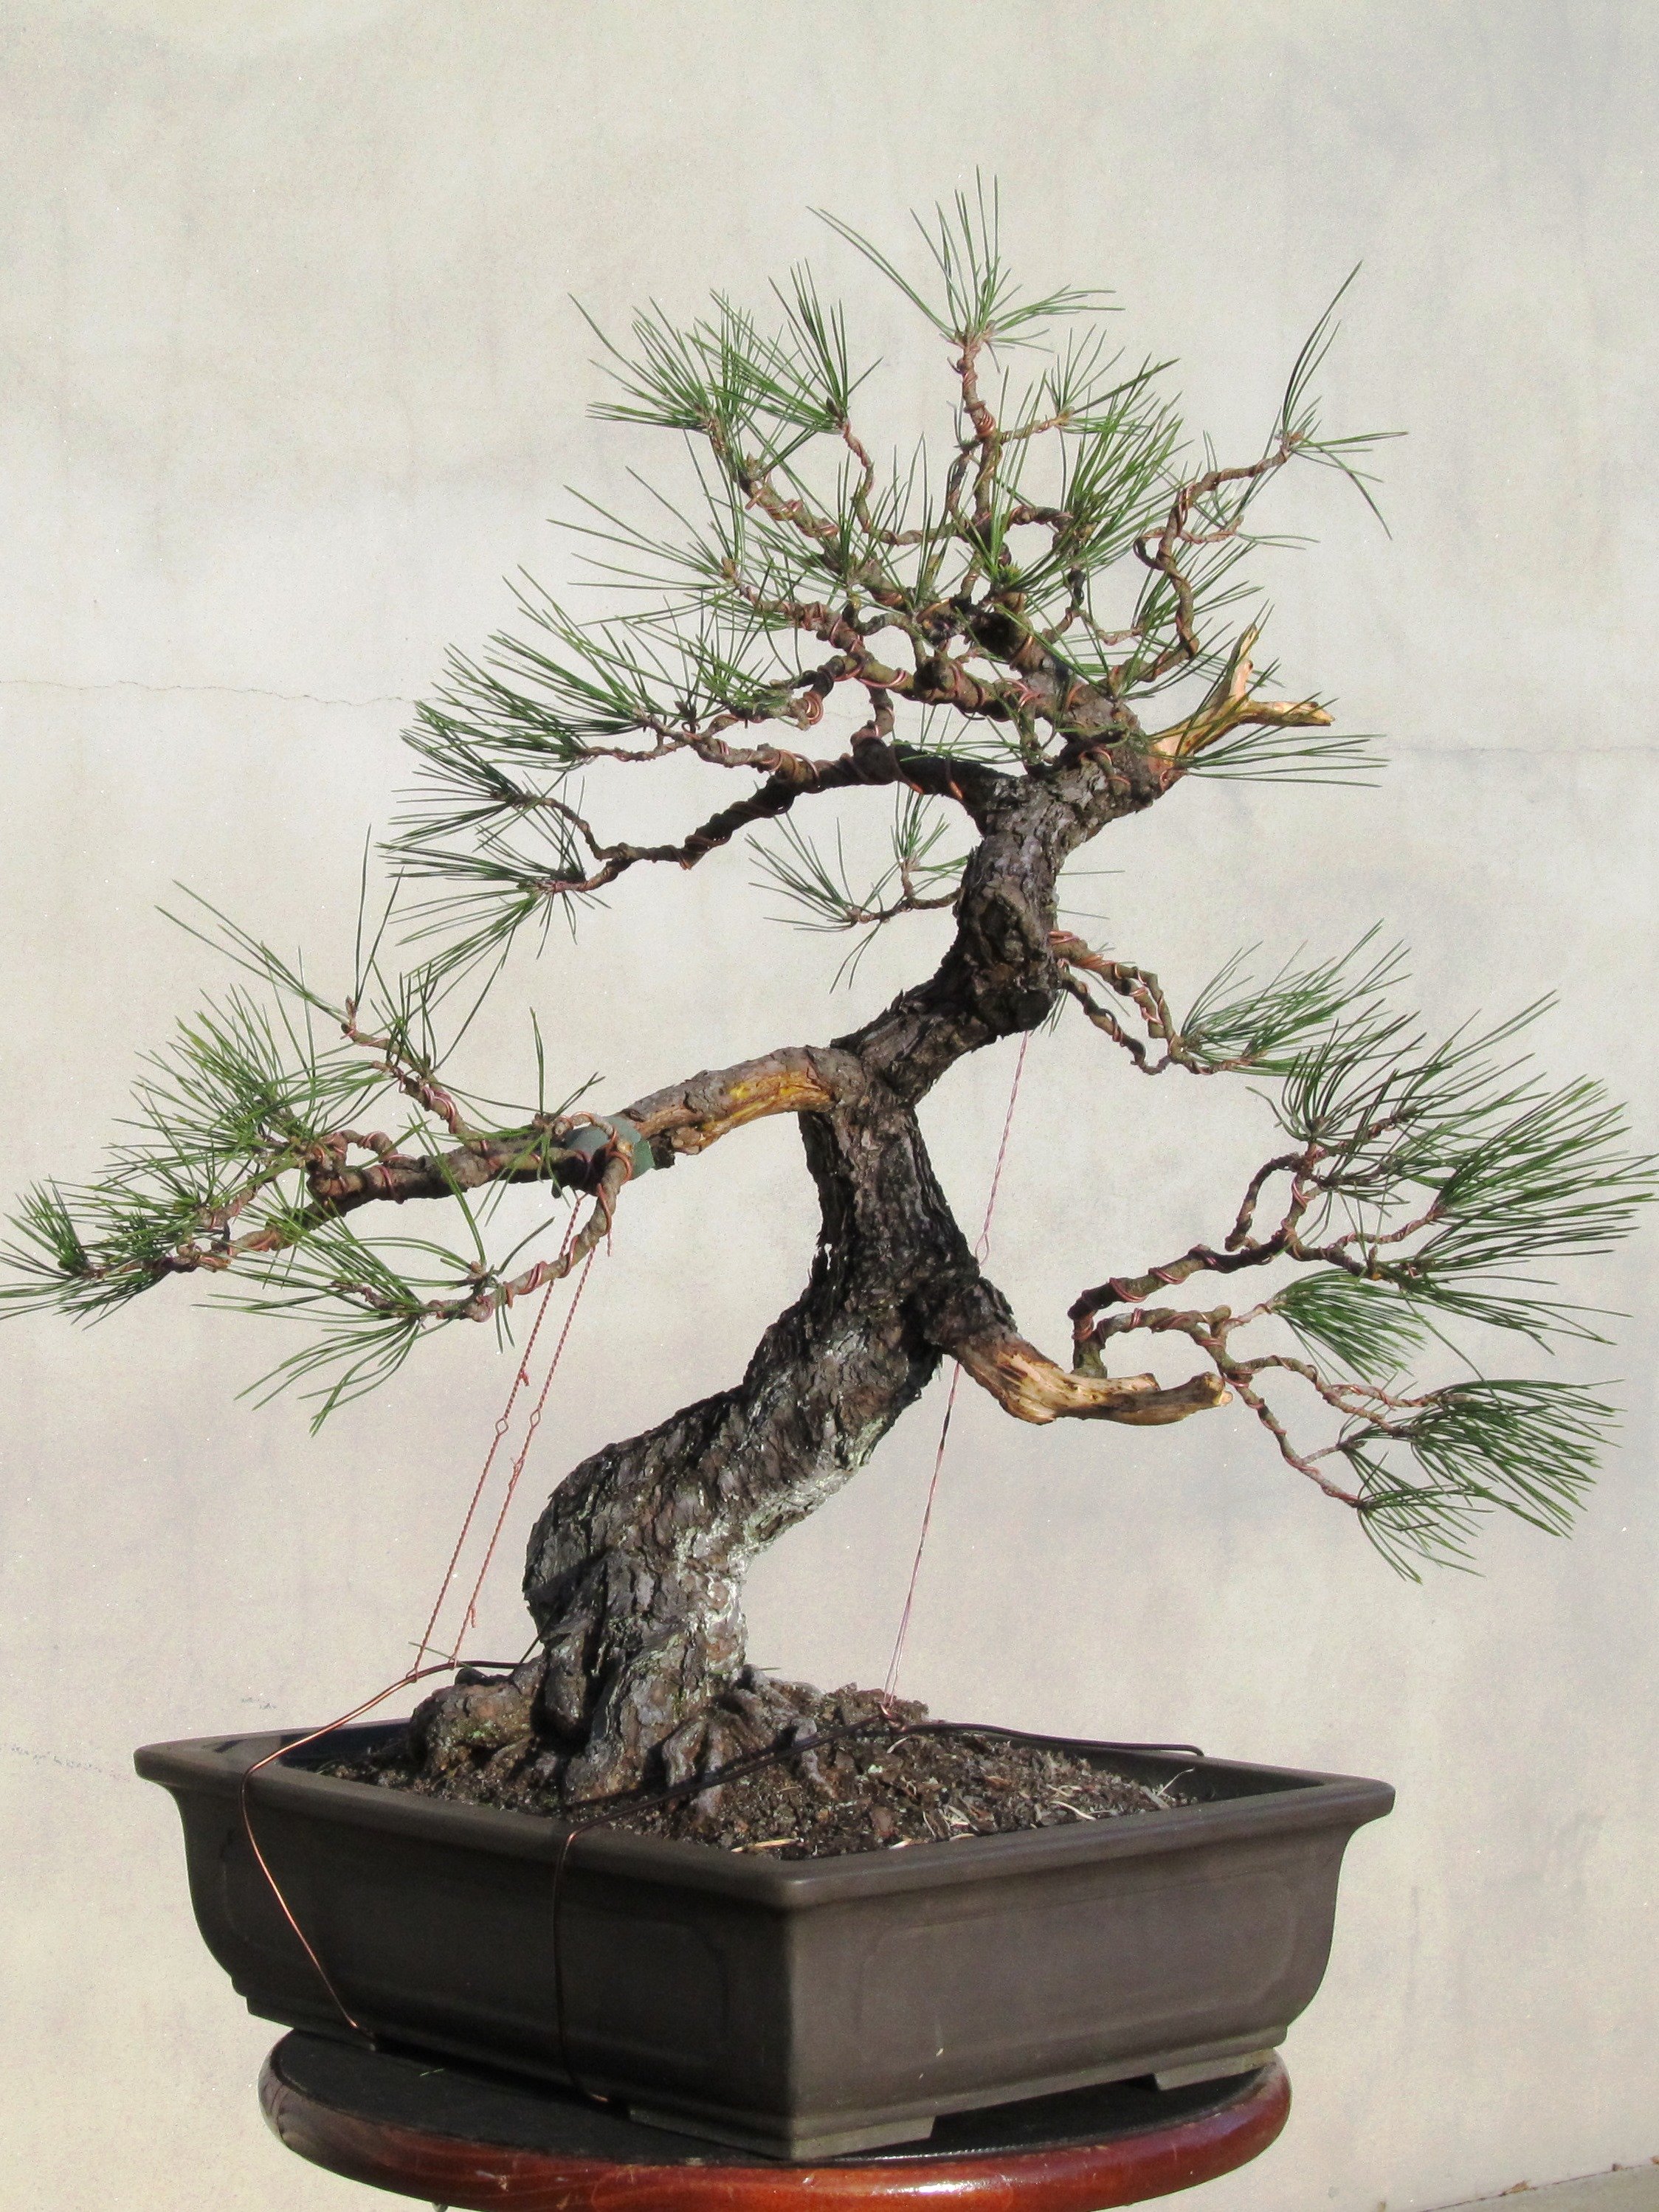
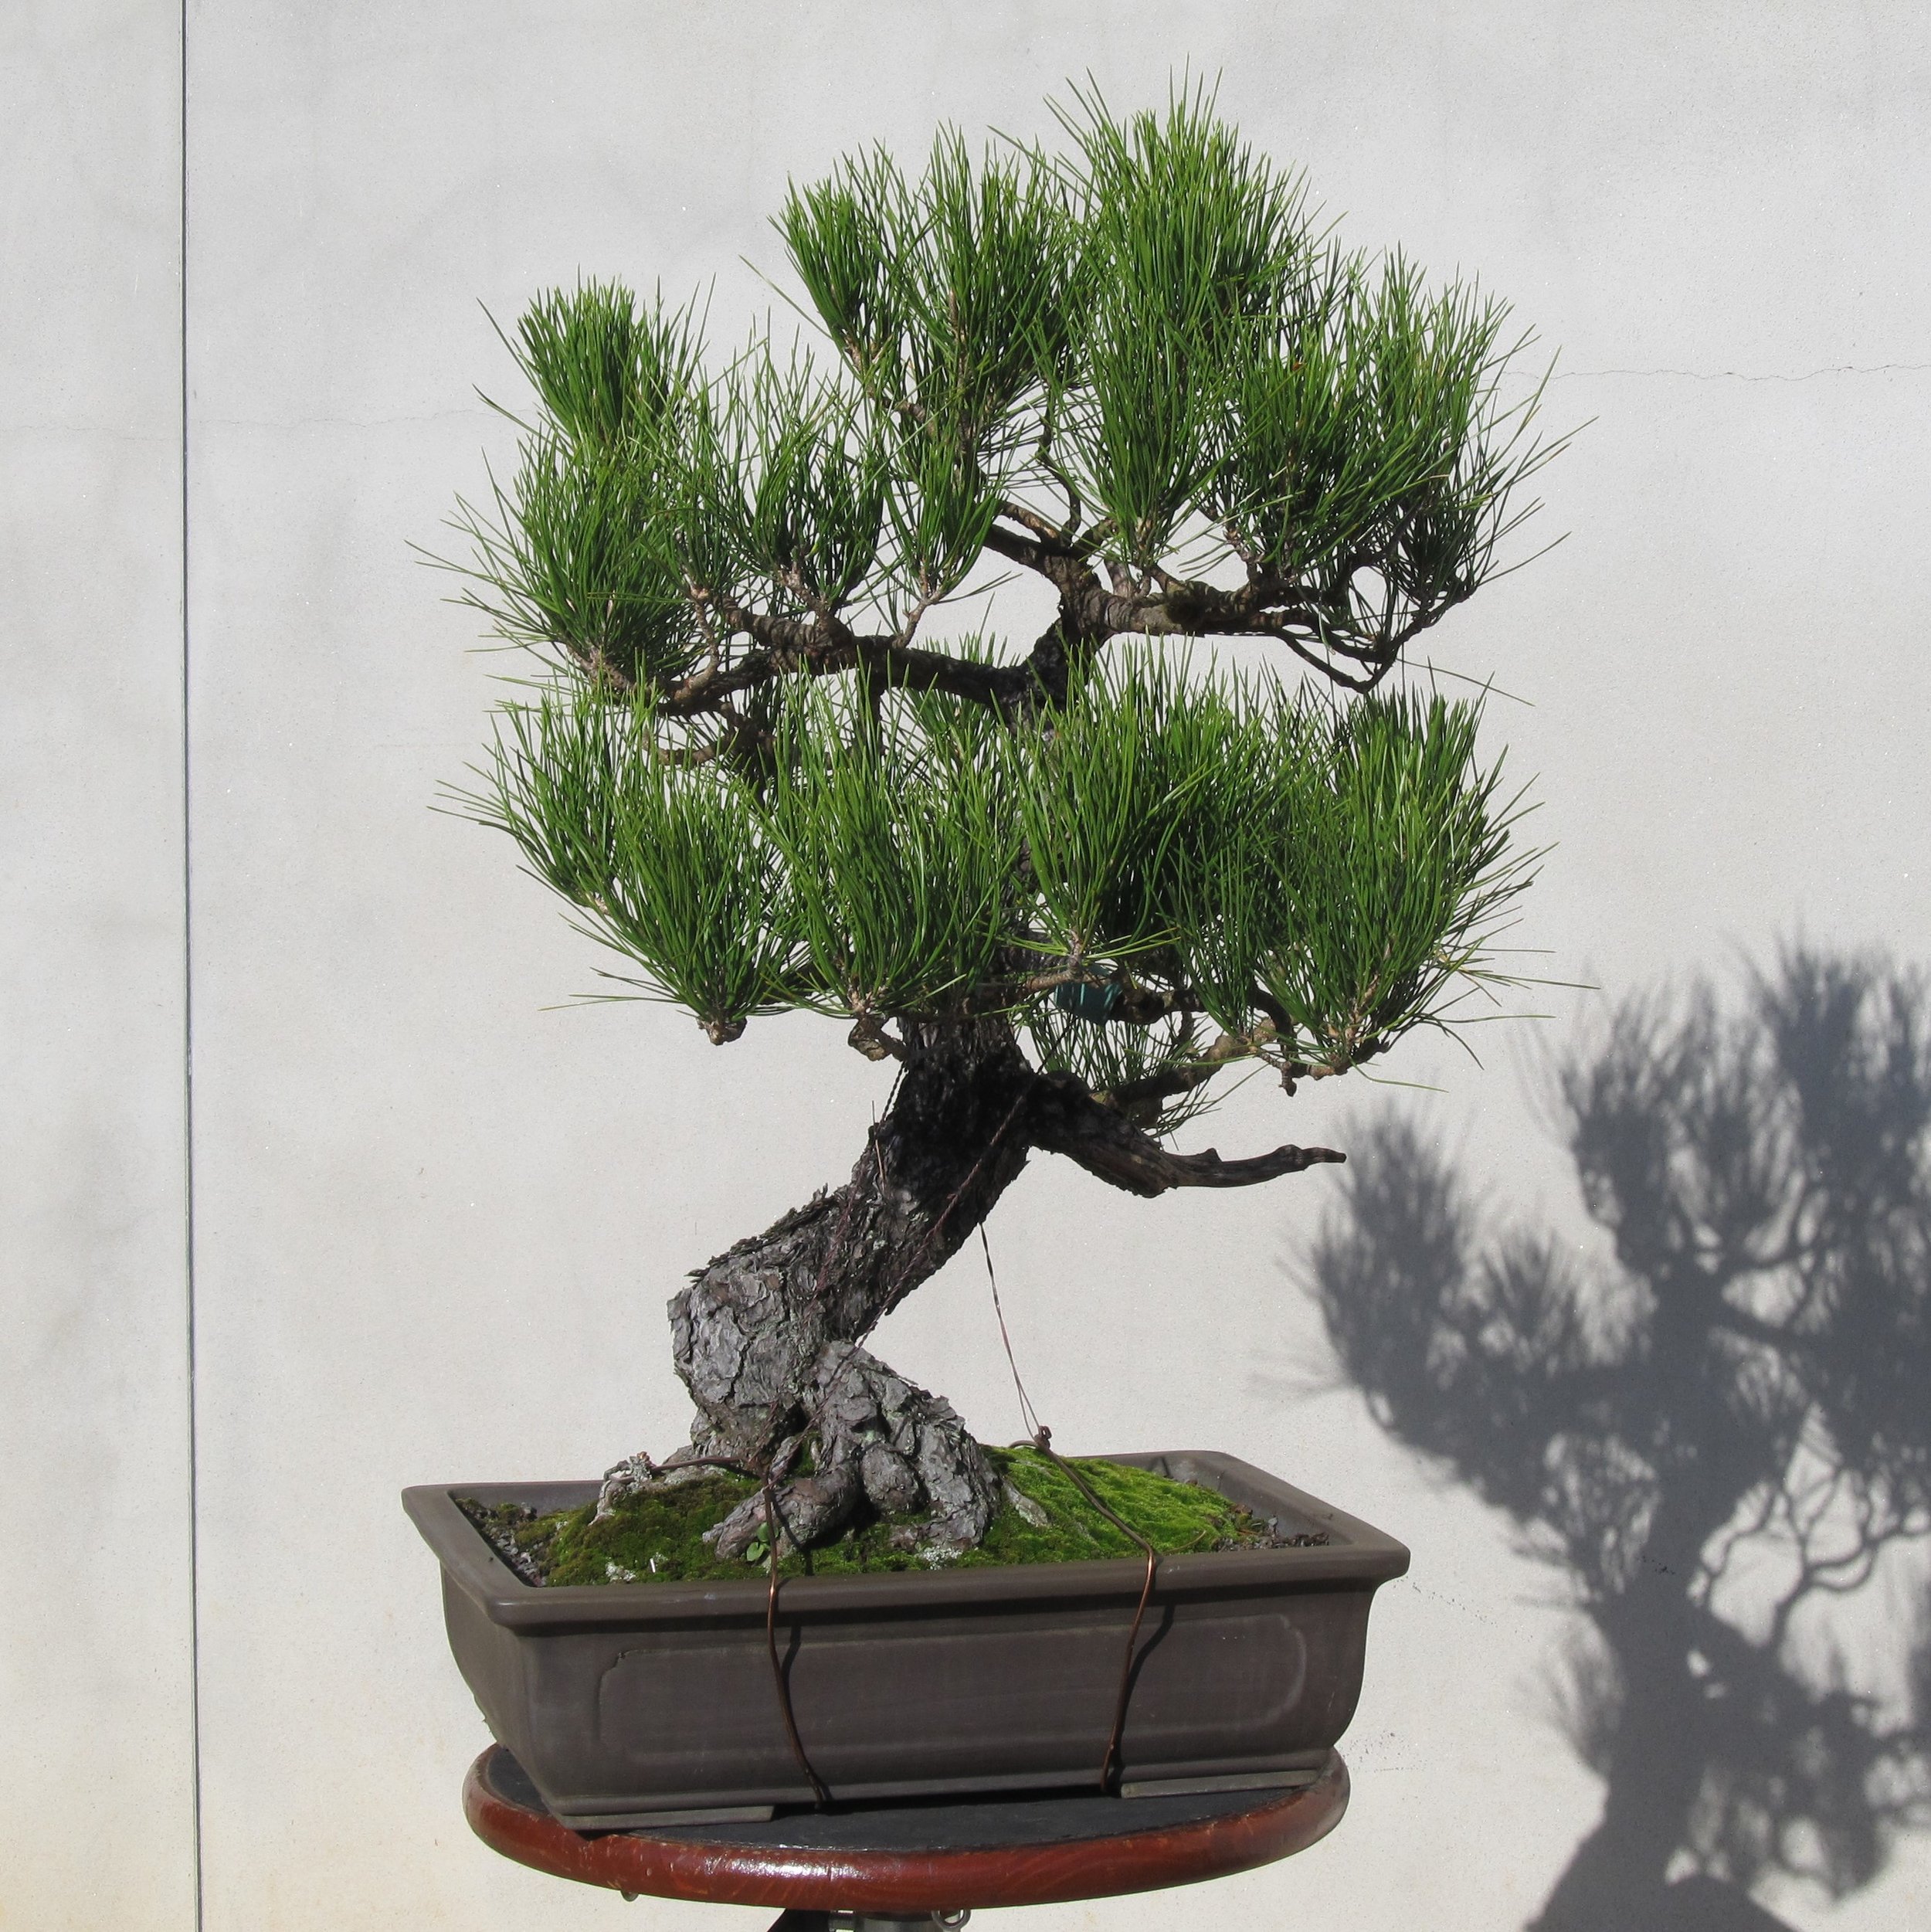
Here is what the tree looked like in May of 2013:

It might seem that very little change has occurred in three years, but there are a few differences to note when comparing the two photos. The 2013 tree is leaning slightly more to the left and its position in the pot relative to the viewer has been rotated clockwise by about five minutes or maybe a little less. The effect of the foliage seems a little less full in the more recent image, but this is due to the tree having been recently worked on prior to the picture being taken. Old foliage has been removed and the branches were thinned out, wired, and, as is typically done, spread out and arranged more horizontally for training purposes. The intention in doing this is to open up the canopy to allow more light and air into the interior, and to counteract the tendency of the branches to grow upward. This is standard work to be done on a pine bonsai just about every year, unless it is truly an old tree that has been trained for a long time, which this one is not. I would expect the 2013 version to have a little more detail in its branching than the 2010 iteration, but the growth rate of this species being what it is and the annual training work already described having just been done, it doesn't show much in the photograph.
Notice that the 2013 picture was not made in the bonsai garden. I cannot say for certain whether or not this specimen was placed on display in the garden later that year, but at some point around this time I stopped showing it. Dissatisfaction was once again creeping in. The tree looked better to me now than it did when it was trying to be classical, that's for sure, but there was still much room for improvement. The zigzag appearance of the trunk was still a distraction, and the silhouette of the crown was still too tall and pointy in its nature. The overall look of the tree was still more of youth than age, and there was a general wanting of greater character in its overall appearance. It was time to push the tree further along the path of design development.
There is another gap here in the photo record for this black pine. I have no images to show from 2014 and 2015, and this is regrettable because significant changes were in the offing. Ideas were taking shape, chances were about to be taken, and the tree was going to change dramatically once again. It would have been good to have some documentation of its appearance right before that happened. I made up for it in 2016, however, taking a great many pictures as big moves were made.
Here is one batch made in January of 2016, after an annual design session resulted in a substantial alteration:


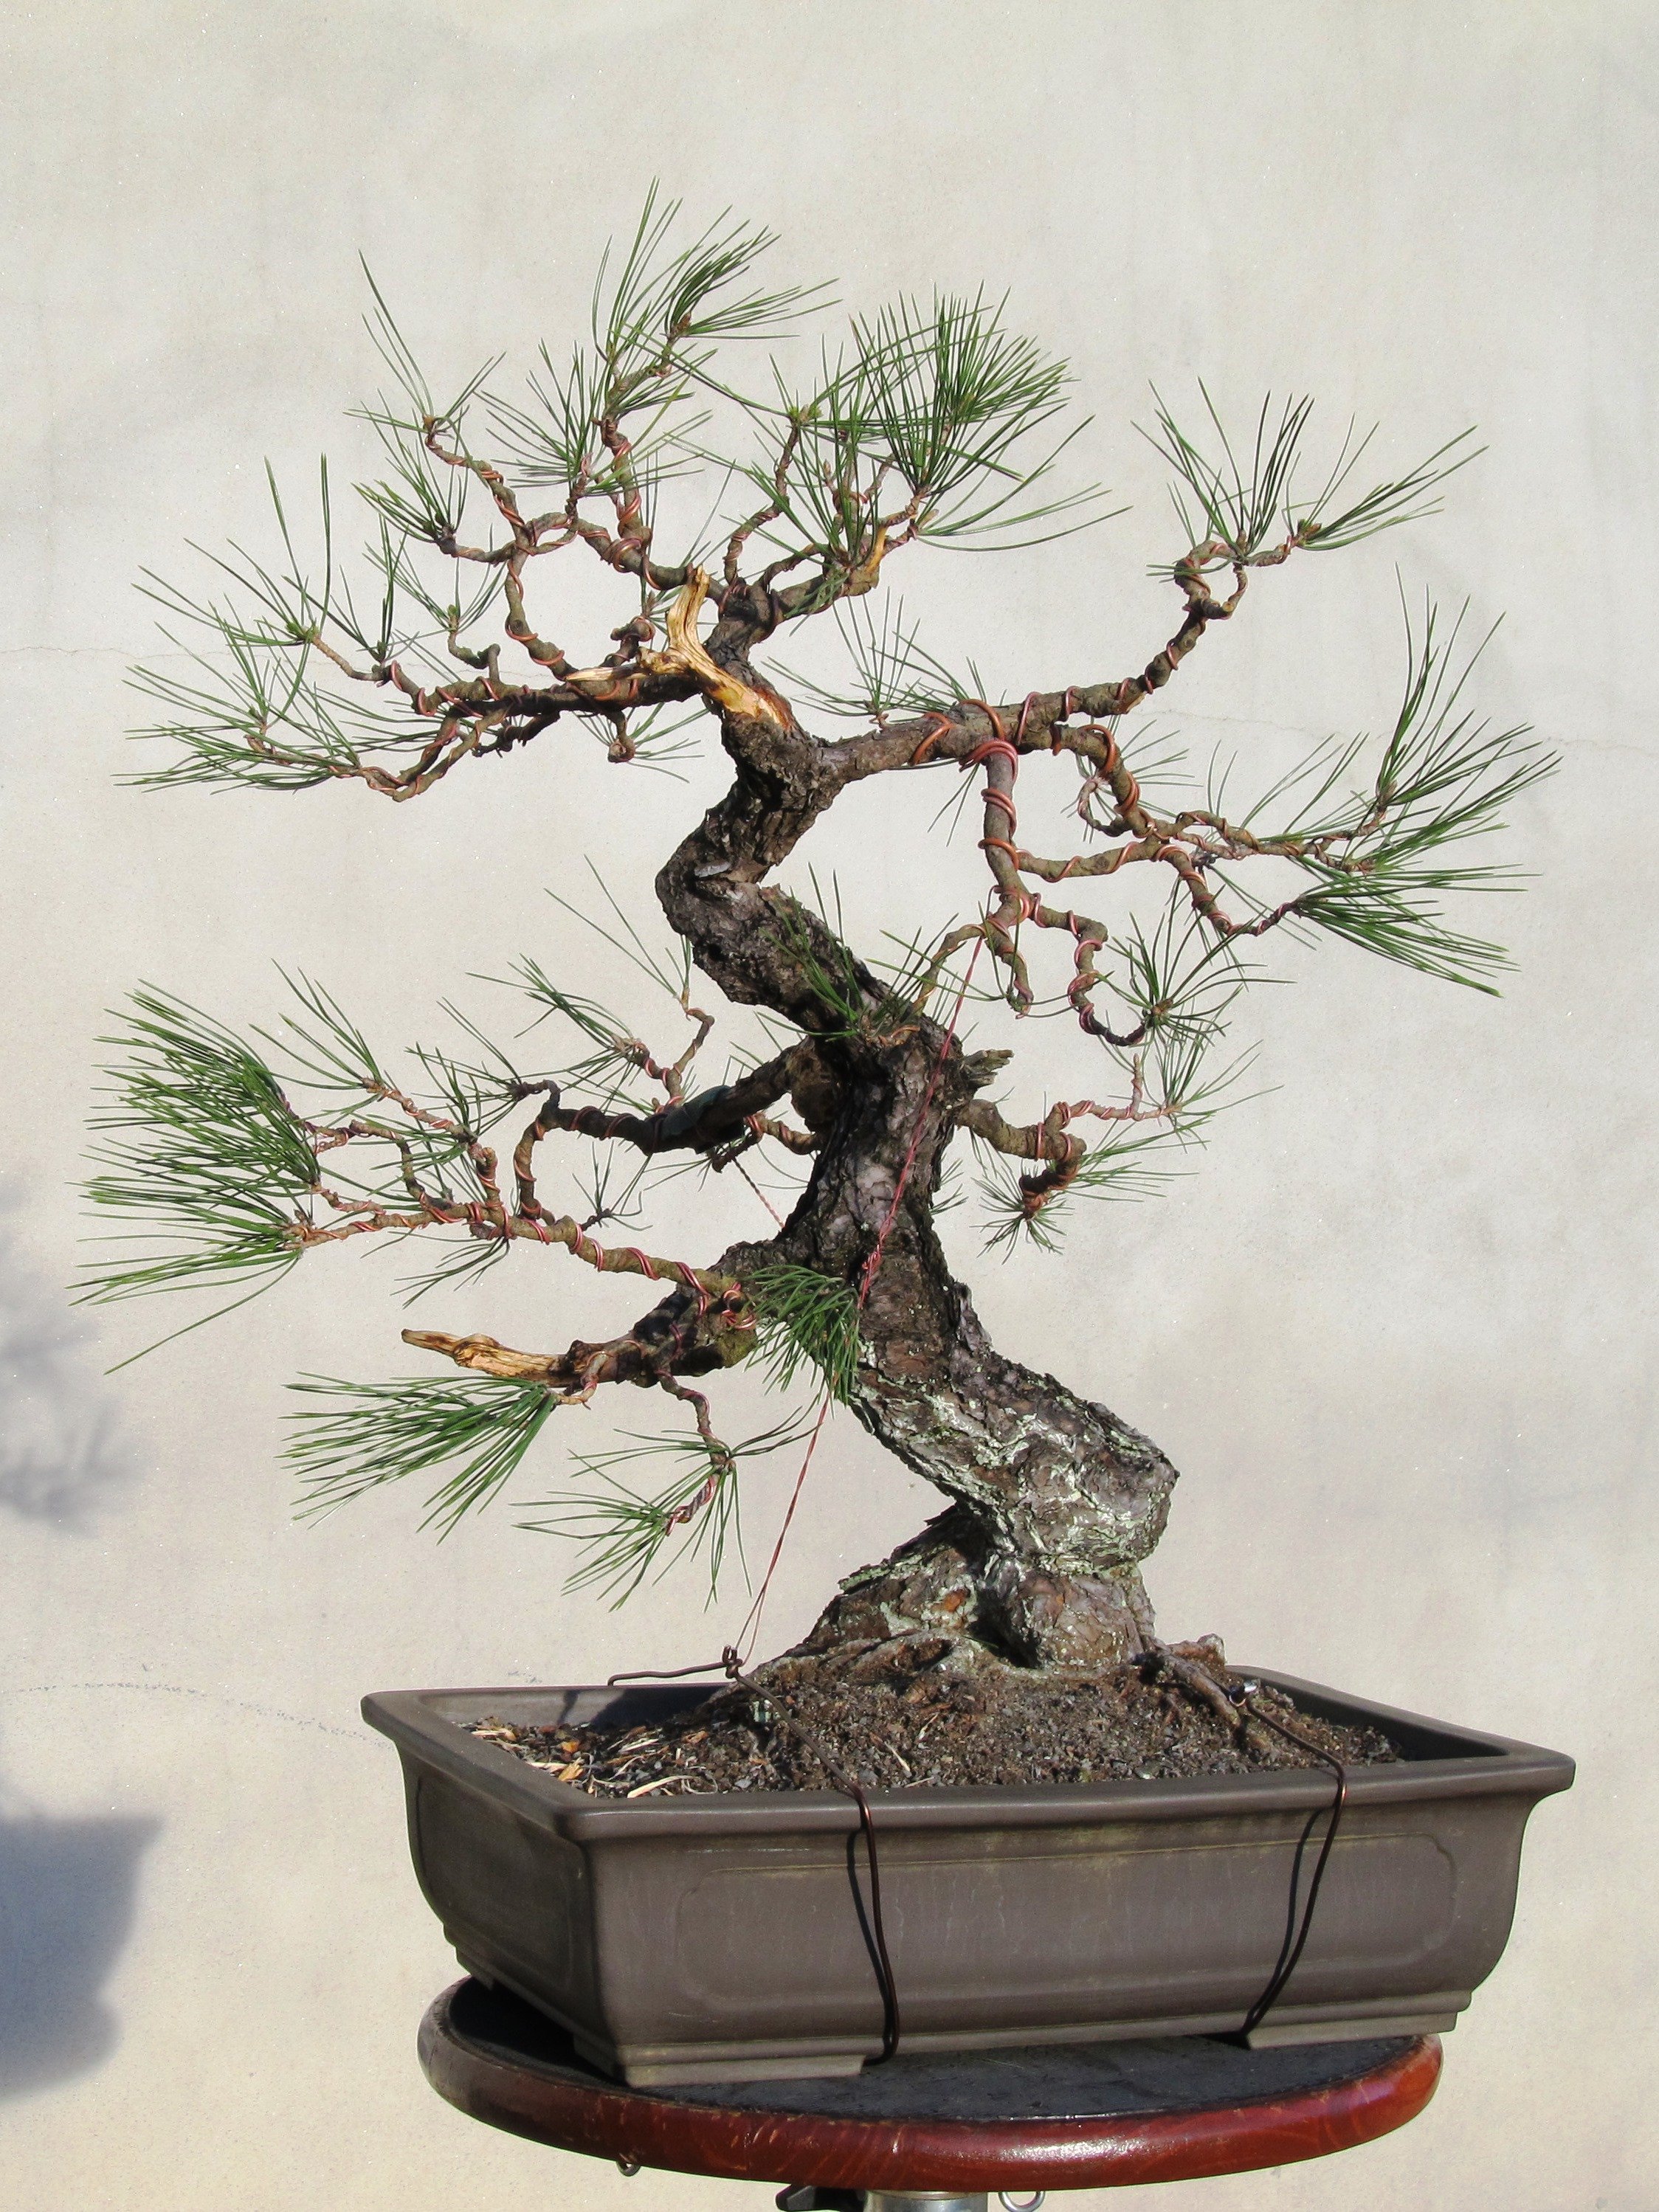
The above sequence shows the tree from six different angles, a reflection of a greater awareness on my part that bonsai is a three-dimensional art form. That description of bonsai might sound like a common sense statement of fact, but observation reveals a great many bonsai practitioners do not think that way and I did not myself think that way for a long time starting out. The first four pictures show the tree rotating clockwise, starting from what was always thought of as its front view and progressing in quarter turns. The last two show a couple of angles I thought might be alternate frontal views. One advantage to documenting the tree in this "in-the-round" format is to reveal features that are not visible when the tree is depicted in only a one- or two-dimensional way.
One of several aesthetic challenges presented by this specimen was a hefty, rigid branch that stuck straight out from what was thought of as the back of the tree. It is interesting to consider whether the presence of this branch contributed to the decision to show the opposite view as the front of the bonsai, thereby hiding the offending member, or whether that branch only gradually became a problem because it occurred on what was thought of as the back side of the bonsai. The branch was therefore neglected in its development because only its effect, and not its shape, was visible from the front. In any case, I cannot show you a picture of that branch in profile prior to this time because I never photographed it that way. In fact, I can't show you any picture of this bonsai from prior to 2016 that shows any side of it other than that which was thought of as the front, and the front never substantially changed. This bonsai was thought of as being essentially one dimensional, as though it were flat like a picture. All work done on it was then conducted accordingly, the only concern being how it looked when seen from one particular perspective.
Here are a couple of detail pictures showing the branch in question after an effort was made to address its shortcomings:

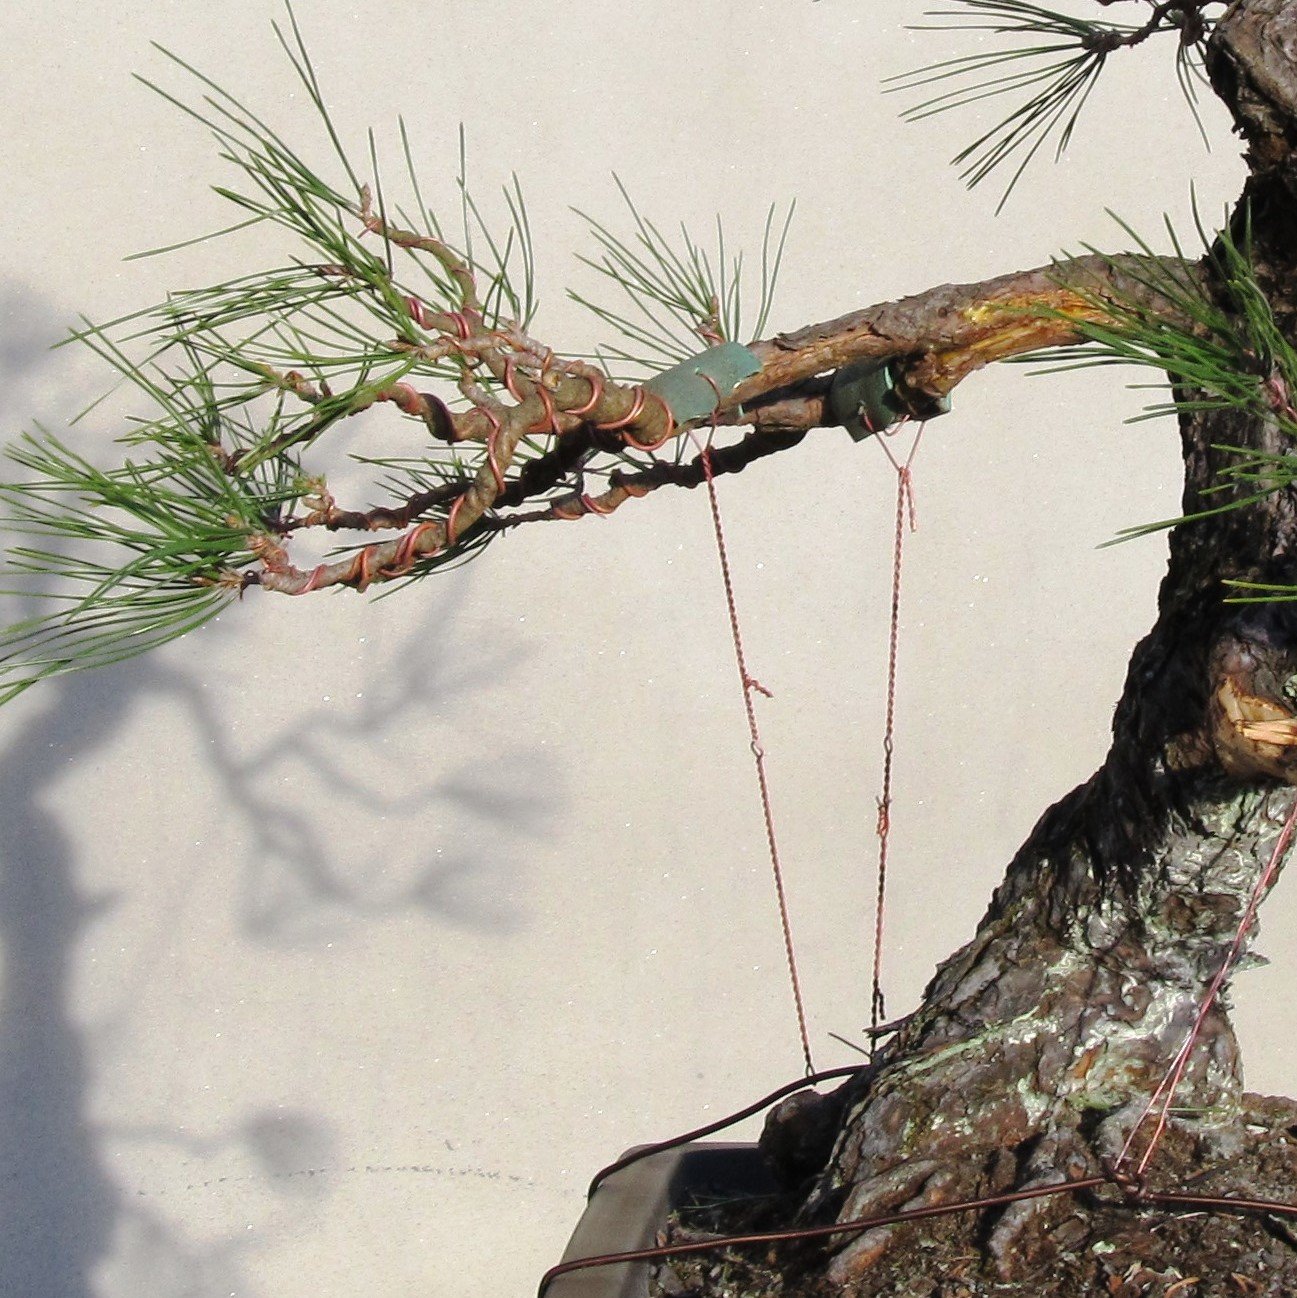
The branch jutted straight out horizontally and was not flexible. In order to move it, it was split lengthwise using a tool called, appropriately enough, a branch splitter. This was another technique I read about somewhere and decided to try out. The purpose of doing this is to facilitate bending a stout branch without breaking it. The split went clear through the branch, lengthwise and parallel to the ground, for a distance of about 2.5 inches. Force was then exerted in a downward direction by use of a couple of guy wires that were attached to heavier wires wrapped around the pot. Small rubber pads cut from an old water hose were used to protect the branches from the wire biting in as a result of the pressure exerted on it. A turnbuckle was used to slowly ratchet up the pressure by shortening the wire one twist at a time. This was done slowly and carefully. I pulled the branch downward as much as I dared and then left it for a week or so before pulling it downward a bit more. These two wires remained in place for two years before being replaced by new ones. The resulting movement introduced to the branch was not great, but it was significant. The branch had no movement before and now it had some. More was to come.
These two pictures show the affected area from opposite angles:
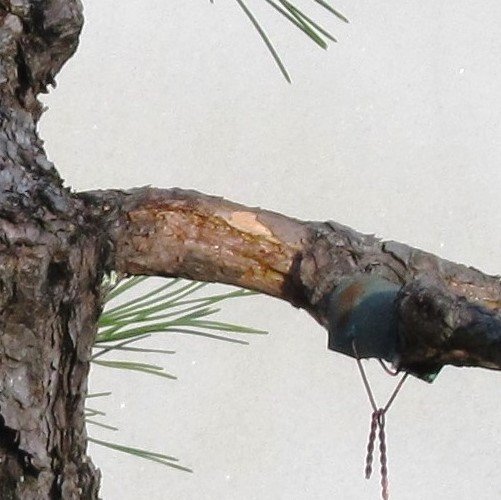

Other important work was accomplished in this same design session. The too-pointy apex of the crown was finally and firmly addressed by removing what had been the uppermost quarter of the trunk line, a stub of it left to remain as indication of a traumatic event in both the suggested and definitive story of the tree. Other branches in the vicinity were then reformed with wire to fill in the resulting void. This move simultaneously truncated the offending zigzag line and shortened the overall height of the tree while also rounding off the apex.
Here are two comparative detail shots showing the affected zone (also note the different effect of the previously described work on the stout back branch when seen from this perspective):

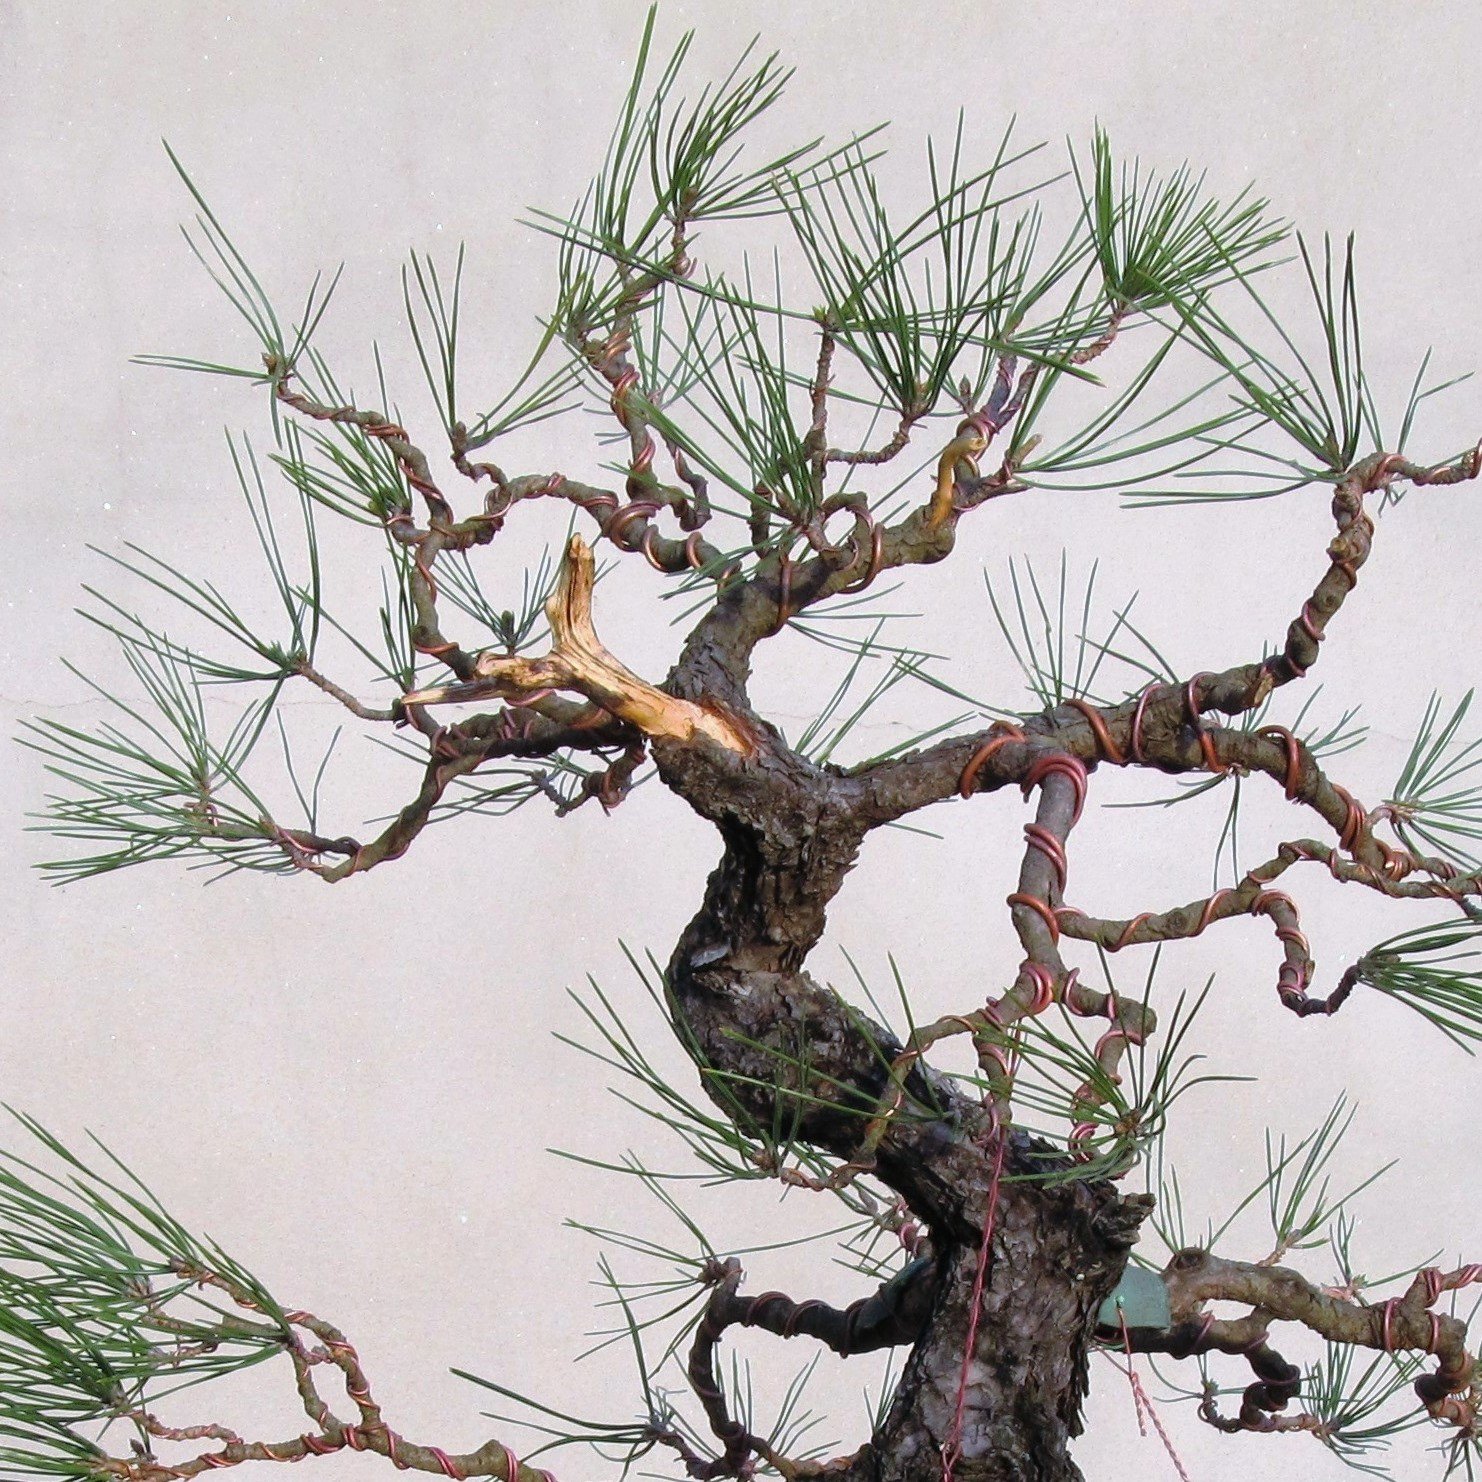
The lowest branch on the left side of the tree when viewed from what had been thought of as the front also changed dramatically. It, too, was shortened and a stub of deadwood left behind:


All of the 2016 work depicted above was done in January. I usually conduct this sort of intensive redesign activity in the off season, because there is no time to do it once the growing season commences. My excitement about the redevelopment of this black pine is evidenced by the fact that as soon as the dust had settled on the 2016 growing season the tree was back in the shop for another round of work.
The following sequence of images, this time showing the pine from eight different vantage points, depicts what it looked like in November of 2016:


The degree to which the tree responded to work done less than a year earlier is dramatically represented in these pictures. The new growth was vigorous and necessitated the removal of all the wire that had been applied in January. Much of the shaping effect the wire was used to hold in place has already been undone by the vigor of the tree, as witnessed by the ascending look of the branch tips. It is not unusual that branches need repeated wiring before they will stay in position without it. The foliage was dense and the needles long at this point, but the tree was in training and not for show so there was no concern about this. The guy wires on the big branch that was split in order to give it some movement remain in place, however, because larger branches take longer to set into a new position. They must be held that way for years, not months. A properly-installed guy wire is a better way to go than wrapping wire around the branch, because it's less likely to cause scarring.
I was pleased with the results and itching to bring the pine to the next stage of the process.
To be continued …